
- Derfflinger 2 -
SMS
Derfflinger 2 – Tyler (2017)
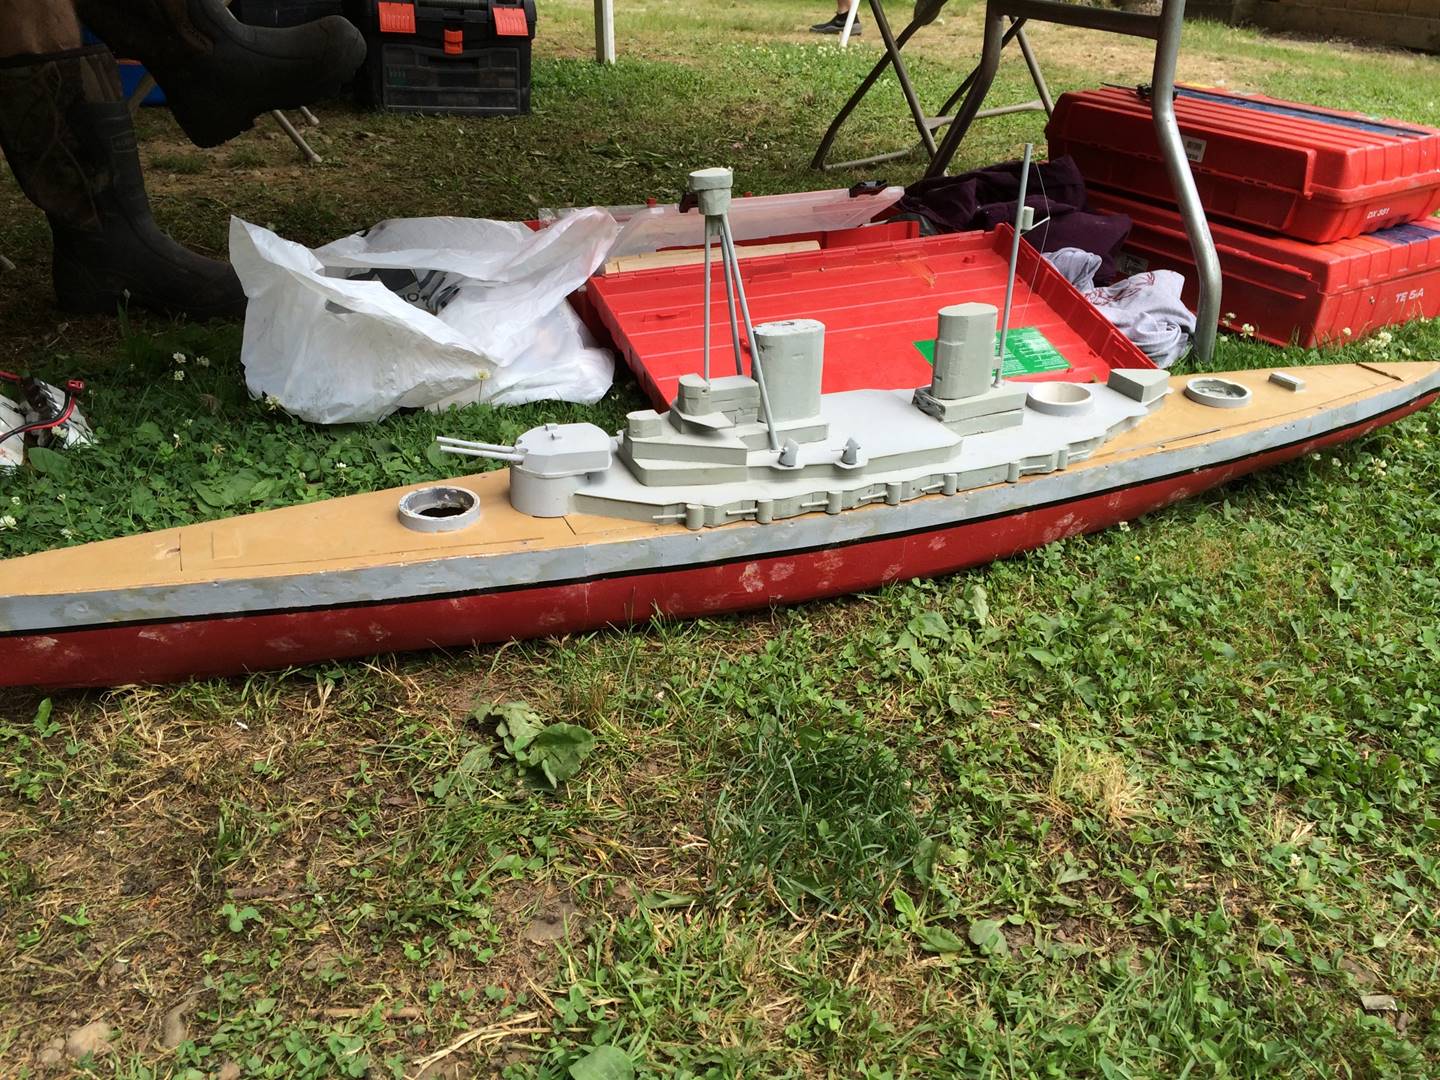
I picked up a Derfflinger in complete disrepair at Nats 2016. It is a fairly old hull that at some point ended up in Randy’s possession who then sold it to Brandon who later sold it to Chris who then sold it to me. The fiberglass was getting beat up and the plastic subdeck was cracked right through on the starboard side. Since I already had a Derfflinger, the plan was to copy the layout and get a second one done, perhaps to pass on to a new comer. The Derfflinger will always have a special place in my battling heart because it was the first capital ship I built. The original will be the Derfflinger 1, this will be the Derfflinger 2.
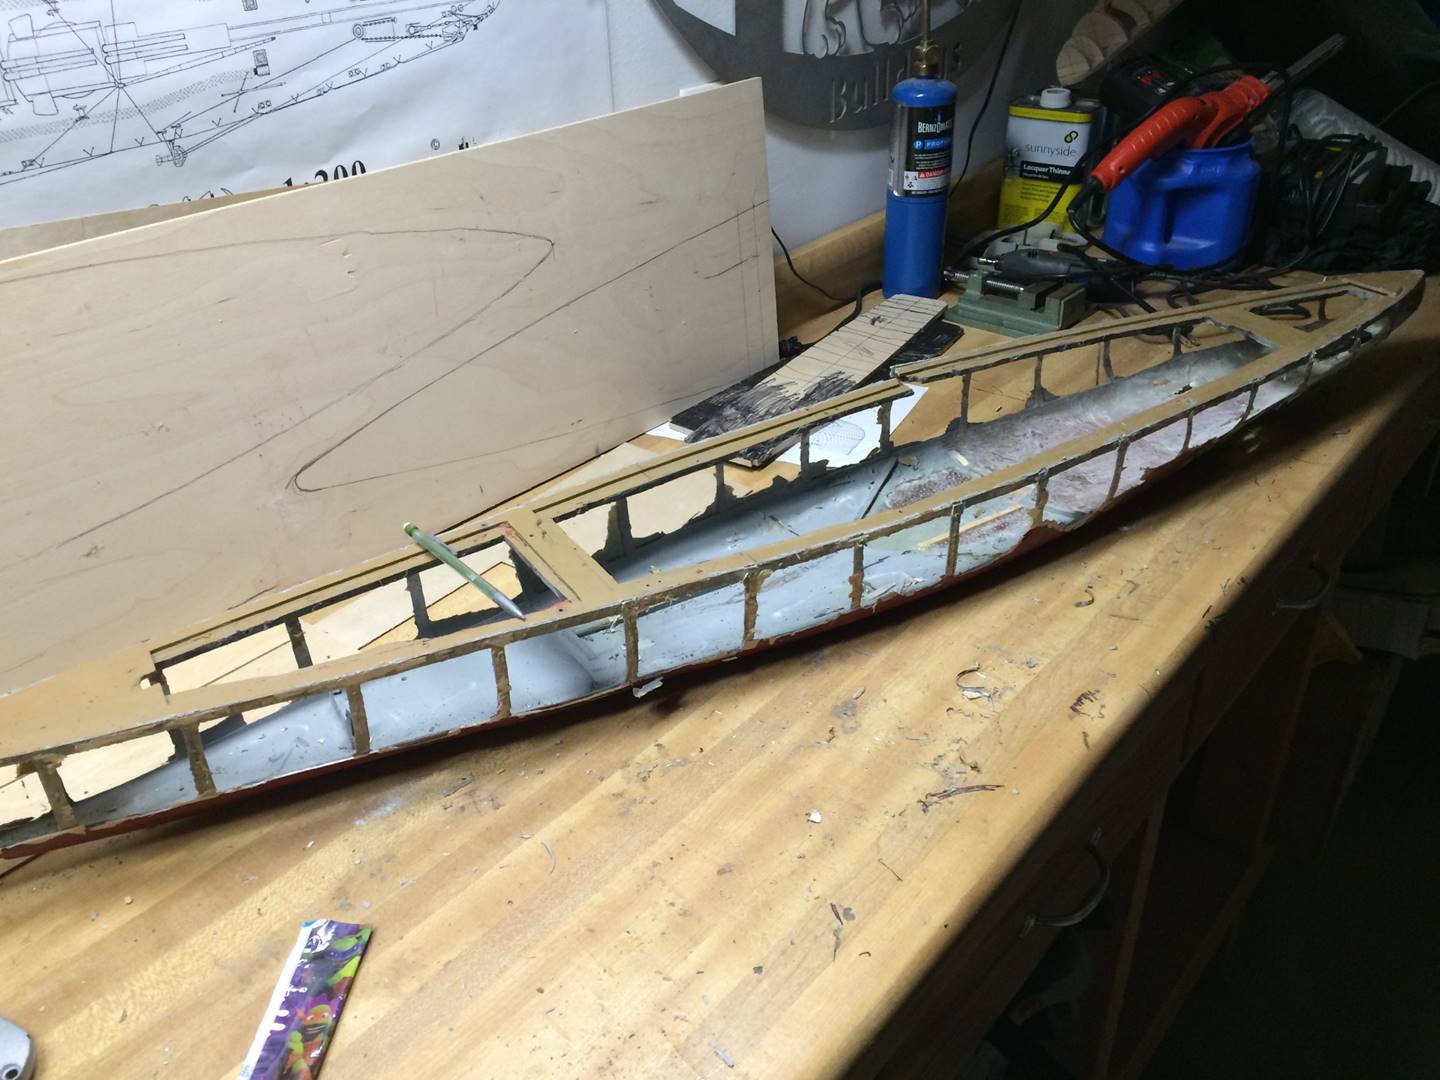
The subdeck was replaced in its entirety. I debated trying to replace just the damaged part of it vs the whole thing and also if I should put in wood as I typically do vs fiberglass. I decided to go to wood, mostly because of ease of working with it but also because I like a wood colored deck. And as I started working it became clear that the entire deck would have to be popped out.
The fiberglass was thin and very weak so it snapped out everywhere as I tried to remove the subdeck. At that point I figured it was better to scrap the fiberglass subdeck and just let the wood be the outside edge of the subdeck. As such I notched the wood subdeck to accept the very frail fiberglass ribs.
All of the ribs were backed with an additional 1/8 inch or so of layers of fiberglass and several of them were backed with a solid piece of ¼ inch wide 1 inch deep plastic, both for structural support and to attach the internal armor. For most ships I’d recommend 3 pieces of deck – hopefully not needing to frequently get into the bow or the stern sections during battle, the middle section is the primary access point for changing batteries and CO2.
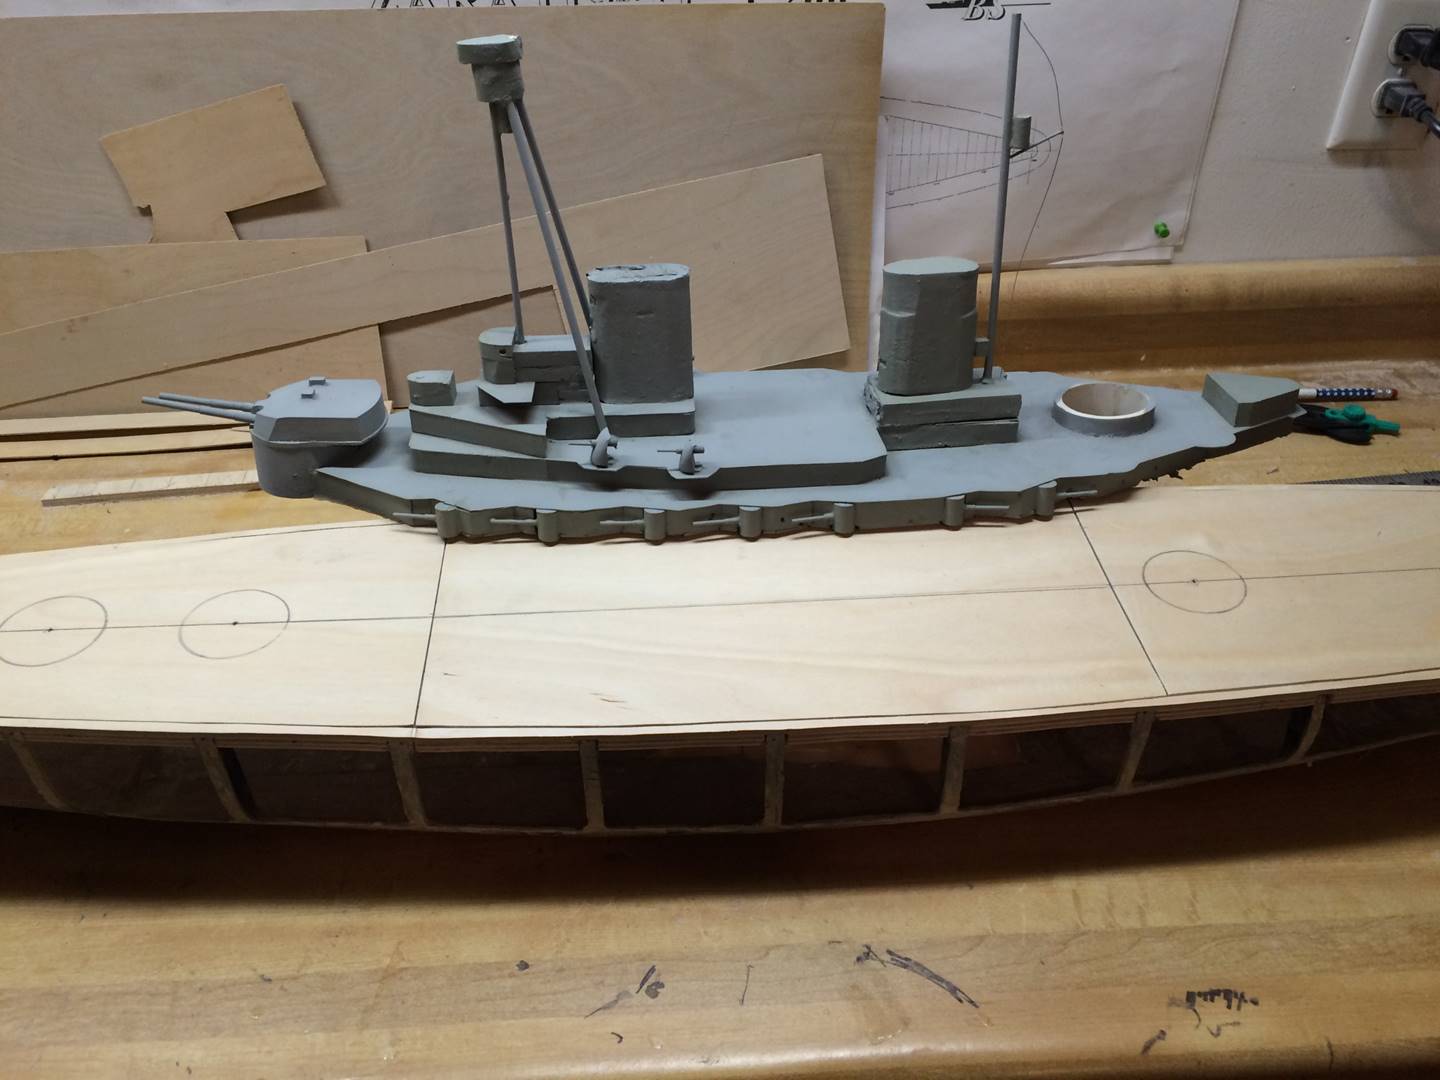
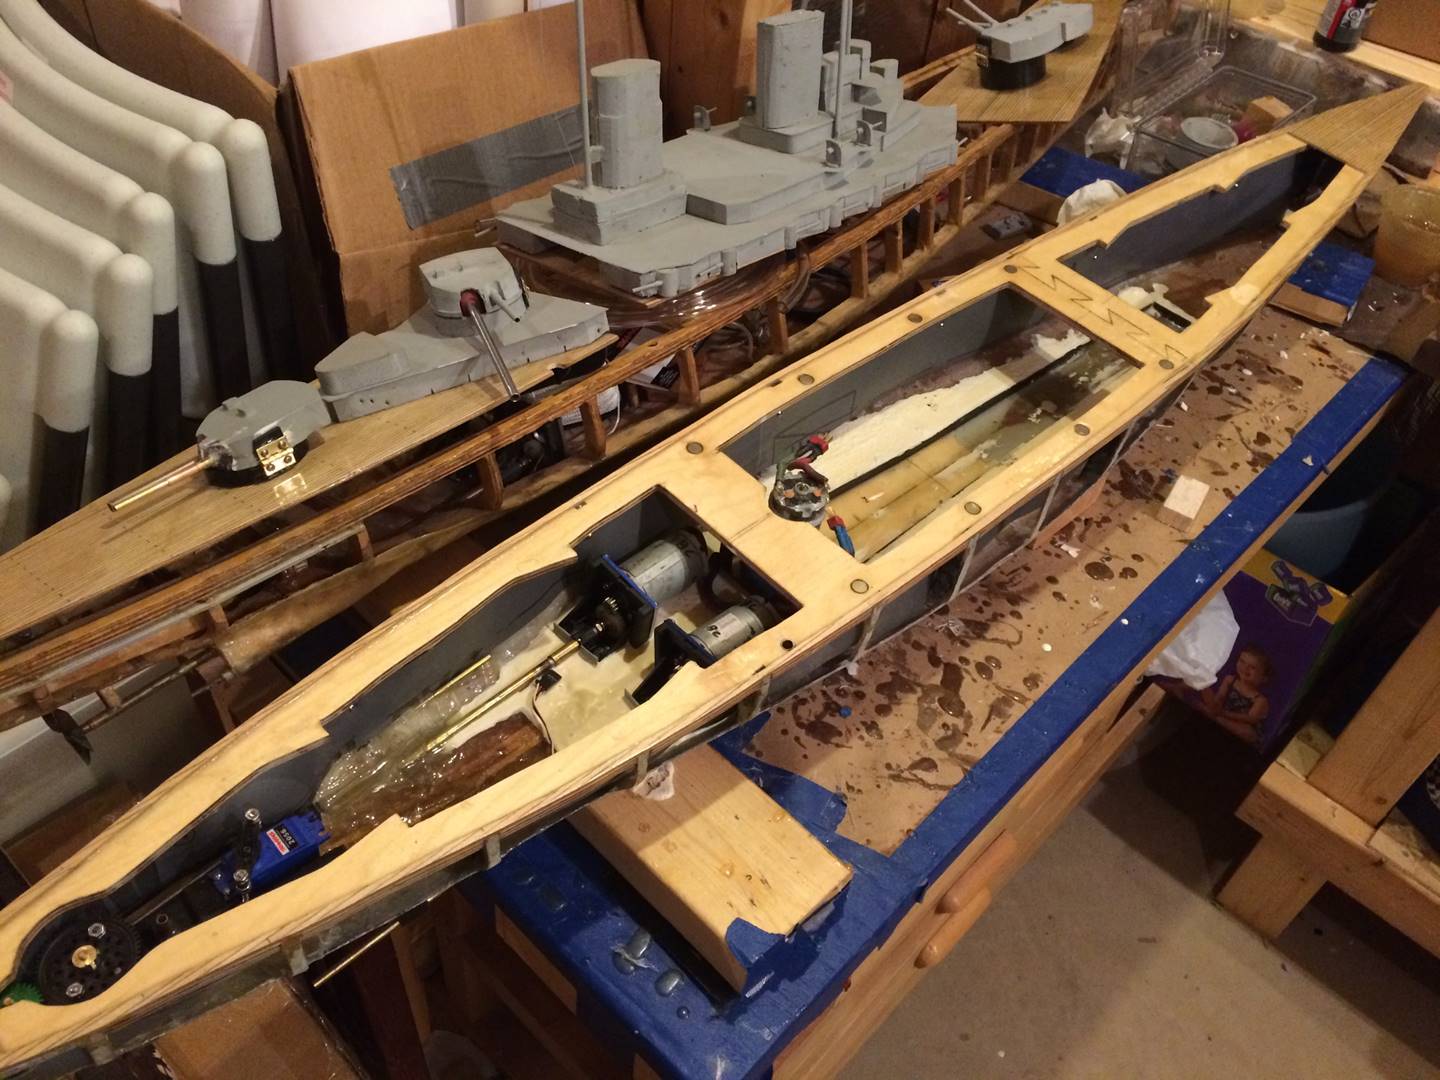
Super structure doesn’t need to change, still looks good. I did eventually have to cut though it as the deck cuts are in different locations than the original ship and turrets with functioning guns should in my opinion be fixed to the deck.
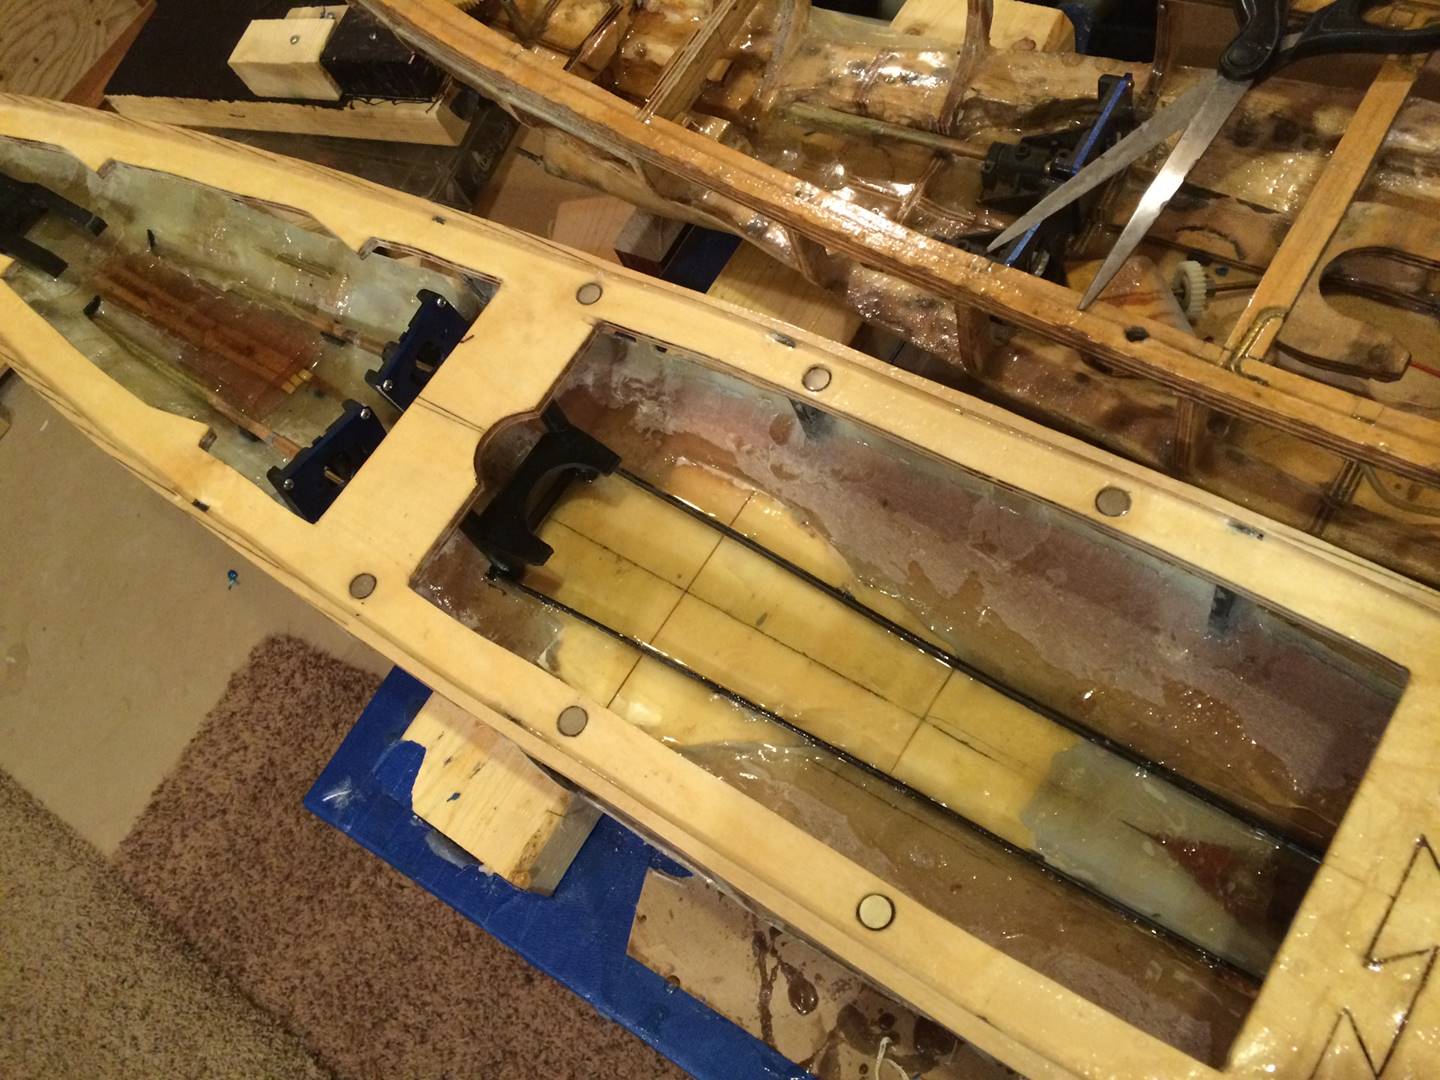
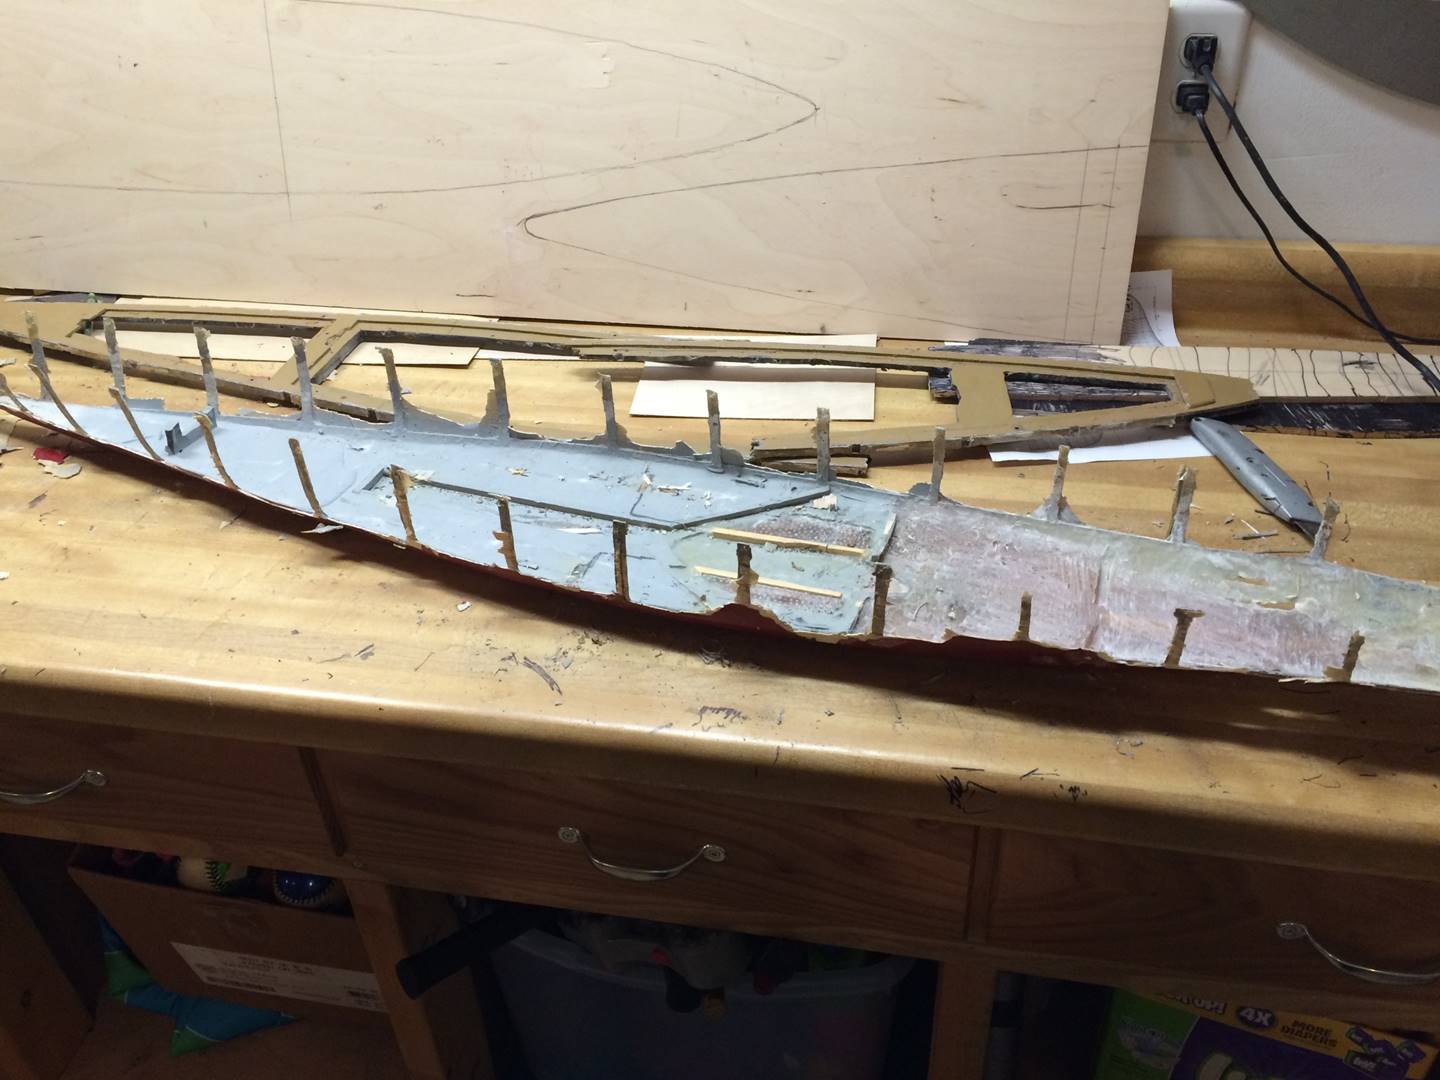
Water channeling is seen here. Much of the prior water channeling had to be cut out and re-done as it was built up way to high. Water channeling that is too deep makes the ship unstable as it takes on damage. The prior water channeling was a bit odd, the combination of previous owners had used a mixture of epoxy and wood on the bottom and concrete sealer over that. The Dremel and band sander solved all of that, some of the original epoxy did stay, you can see the clear epoxy along the outside edges of the new water channeling, which I formed via strips of ABS plastic. The gaps left behind will be filled in with plastic.
You can also see the way I built the deck/sub deck. There are magnets used for the middle deck piece. You can also see the dove tail for the joint of the main sub deck and bow sub deck. The bow most and stern most deck pieces have slides that when all pieces are in place can’t move because the center piece jams them all together.
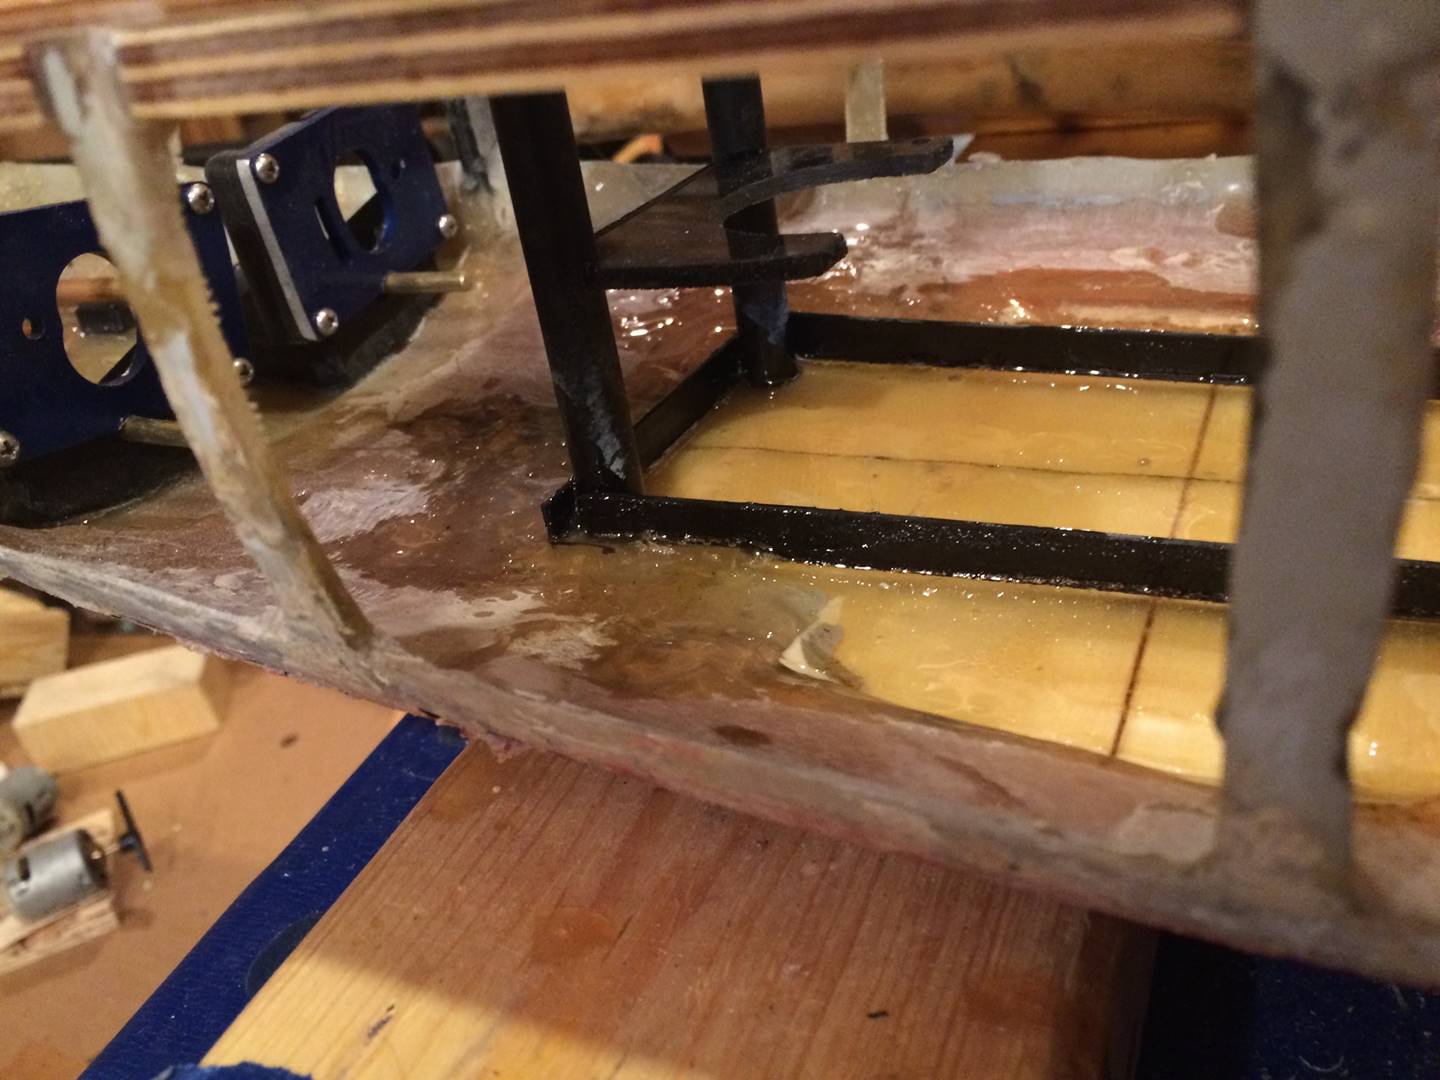
Water channeling and pump mount. Motor mounts are in the far left of the picture. I have built most of my pump mounts like this for a while now, usually I will use a zip tie to hold the pump motor in place. The motor mounts are heavily modified traxxas villain gear boxes, I drill a hole so that I can put the drive shaft all the way through the aluminum plate to hold it as steady as possible where the gears mesh, they are long in this picture and will not fit the motor on them until the excess brass 5/32 drive shaft is cut off. Also I cut the bottom part of the mounting bolt slot and the bottom part of the hole for the motor out of the aluminum to allow for smaller than 12 tooth gears to be used.
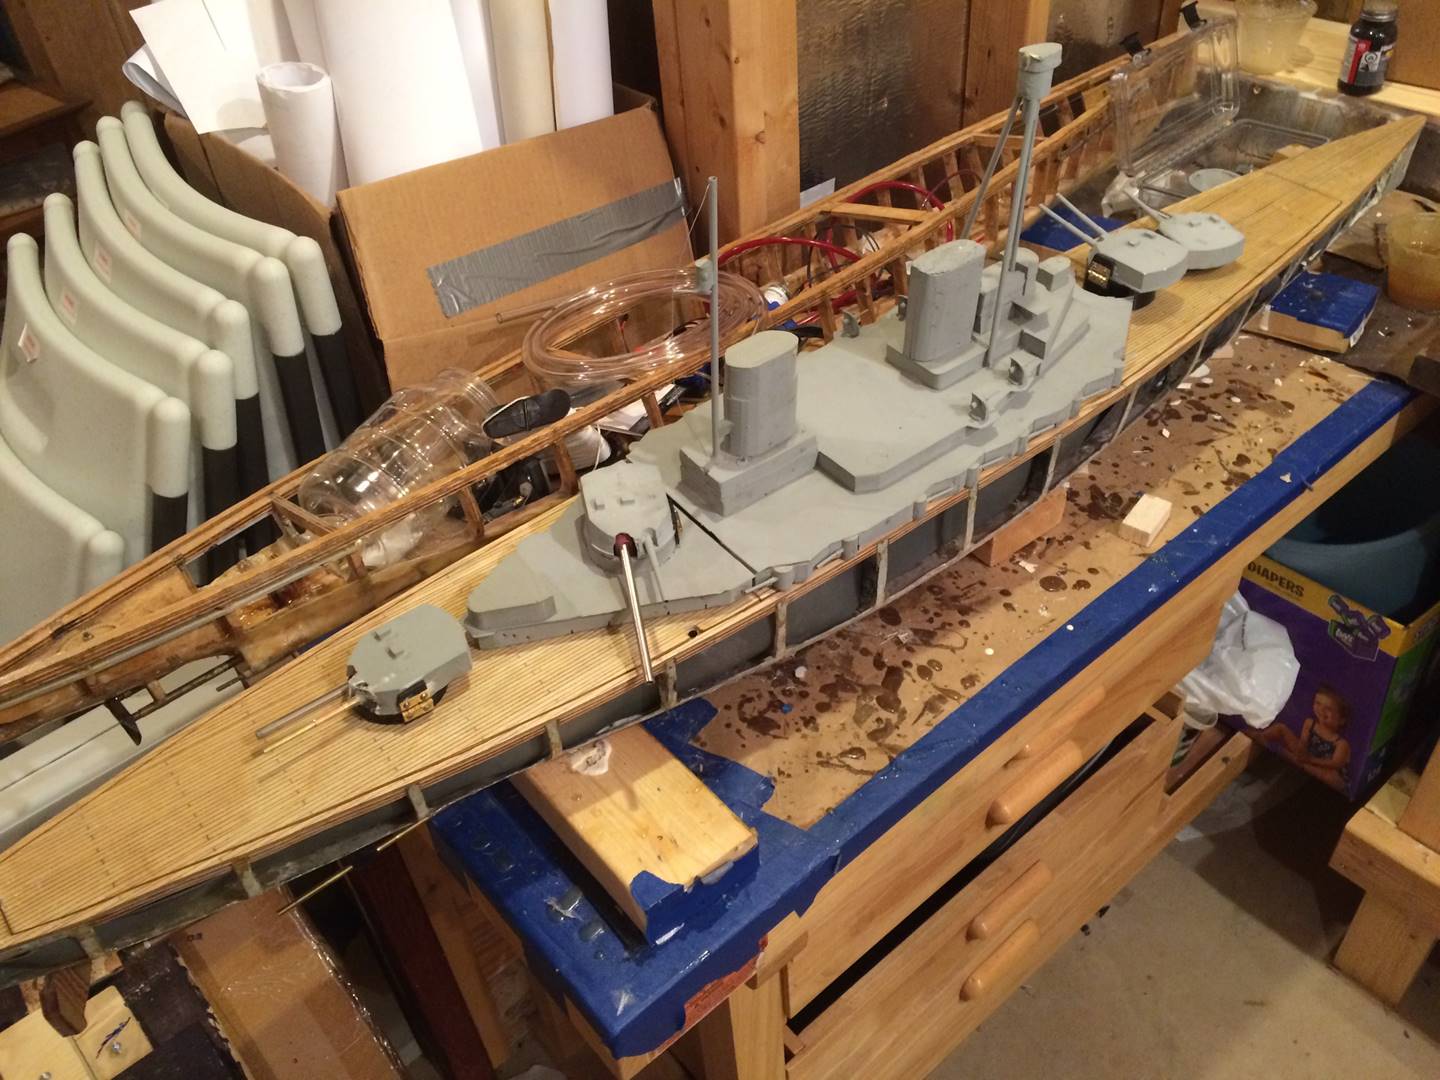
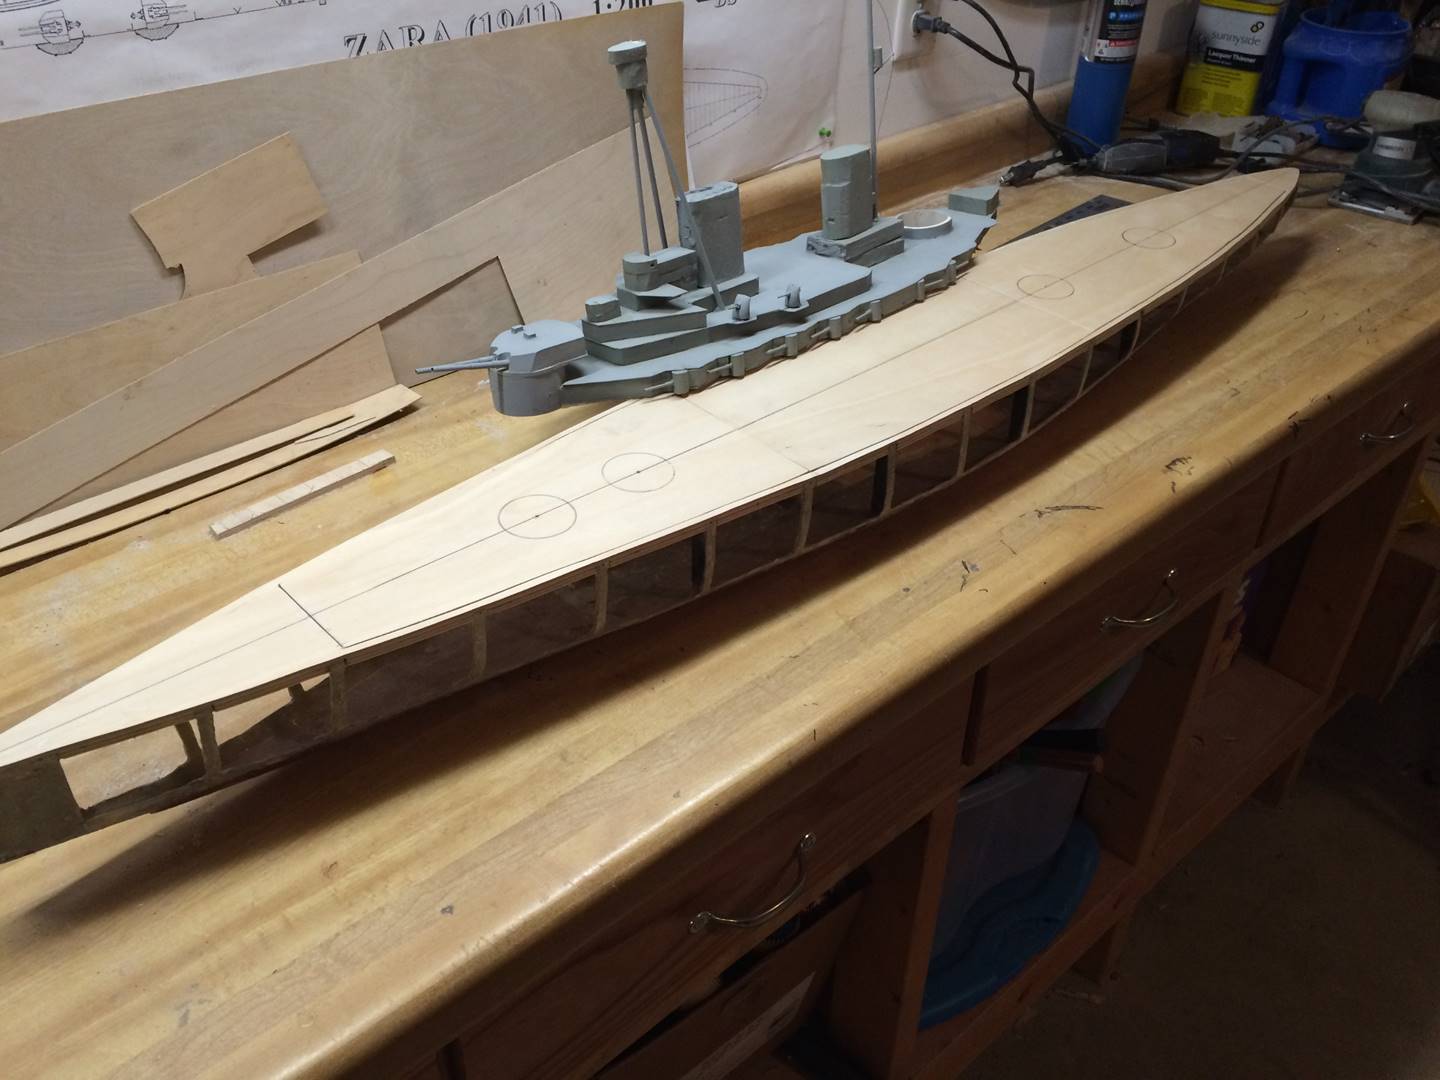
Glam shot with gun barrels in place. She is sitting next to the wood hull Derfflinger 1. I am setting this up with the traditional stern gun, stern sidemount, bow sidemount. You can see here that I cut the superstructure in front of the haymaker to make it mesh better with the way my decks are going in. I haven’t found a better way to do it when there is a turret inside the superstructure/deck level like this. I want the gun mounted solidly to the deck so the super structure had to be cut and thus not easily removable in that stern most section. Generally I will screw or bolt the super structure to the deck from the underside.
Running gear is in. I usually use a water proof servo to via push arm turn a larger gear (black gear in this picture) that is meshed with a smaller gear (green in this picture) that attaches to the rudder. This setup is transposable to dual rudder and singe rudder ships. You can also see the pourable white plastic in the bottom of the hull that was used to fill in the gaps of the water channeling. The notches in the subdeck for the deck sliding system are definitely the way to go, they hold very firm and make for quick removal while keeping the section of the ship open and free of a full transverse brace. The middle deck section will be held with rare earth magnets, I like this and have been doing it more lately, fairly easy to inset into the deck and subdeck but I don’t think it is worthwhile to do the whole boat with magnets when slides will do for the most of it. Also you can see the gray shower pan liner that was used for internal armor, it is very durable and attaches with screws to the plastic rib backers that for the most part run every other rib for the amidships portion of the hull.
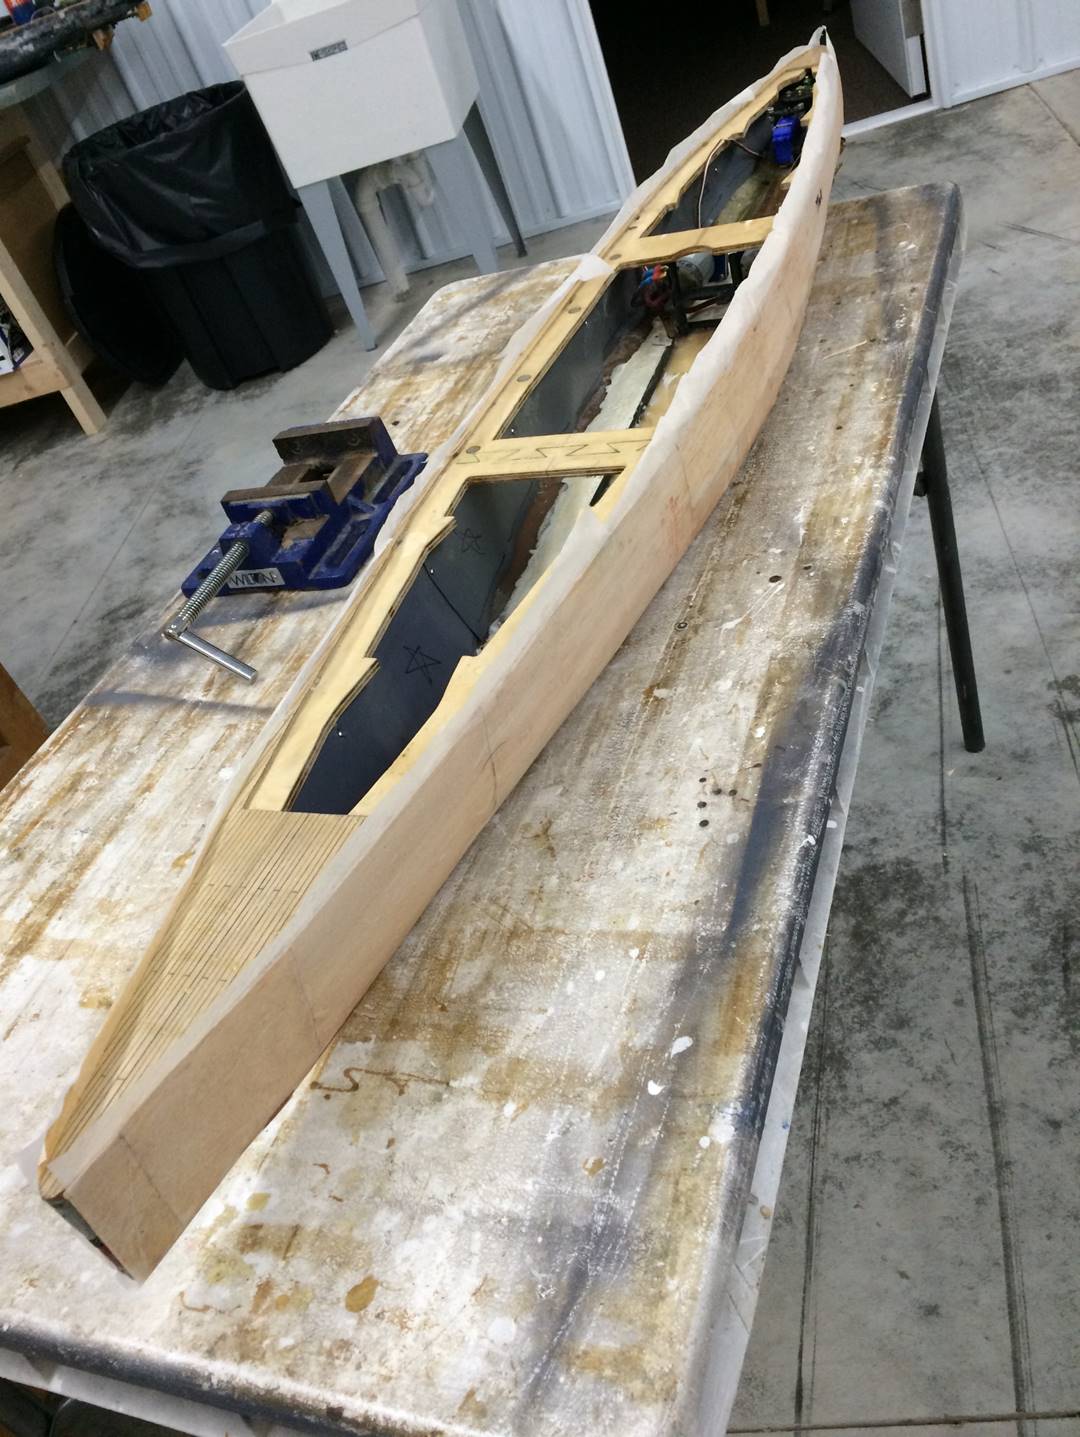
1/32 inch balsa sides are on for the first time. I put the sheeting on hoping it would see some action but unfortunately it didn’t get to battle as the guns were not quite ready at that point.

First time on the water since the refit began. This is at the Ice Breaker in September 2019. It was stern heavy but otherwise seemed to drive around OK. It didn’t battle at that event. It was nice to float it though since it allowed me to decide where the internals need to go to maintain balance.
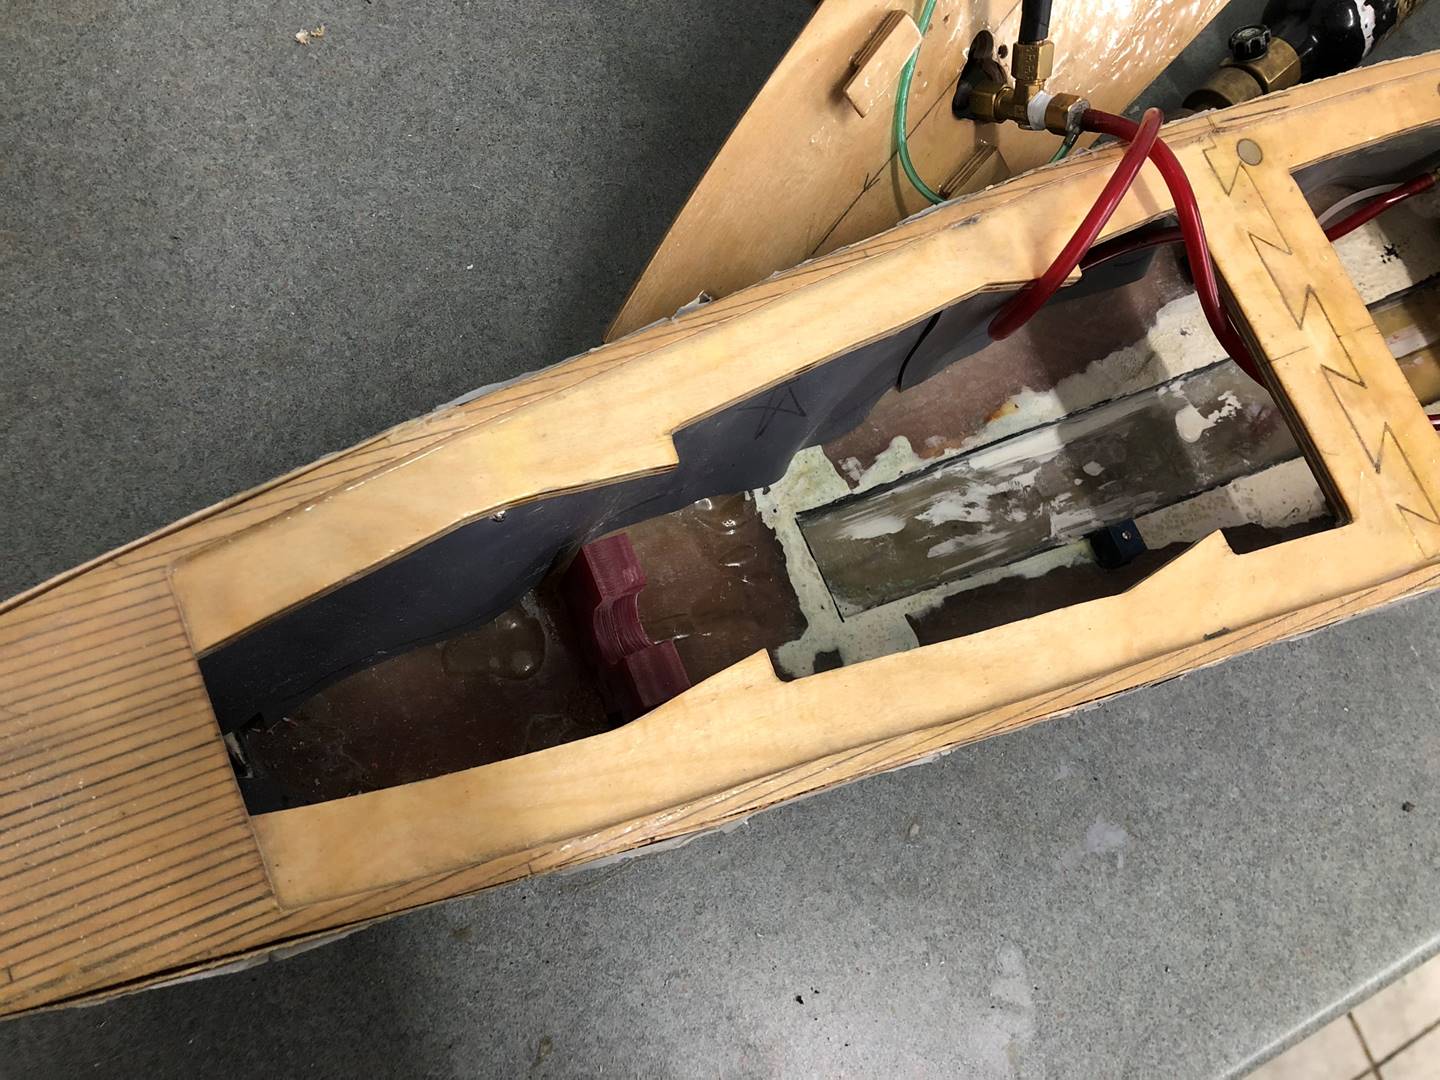
The open bow secion of the ship. You can see the water channeling dug that starts about at A turret. The red plastic is the bottle/regulator holder. This is a good look at the front deck slides as well.
The radio box is moved towards the stern to show the blocks of blue plastic that hold the radio box in place.
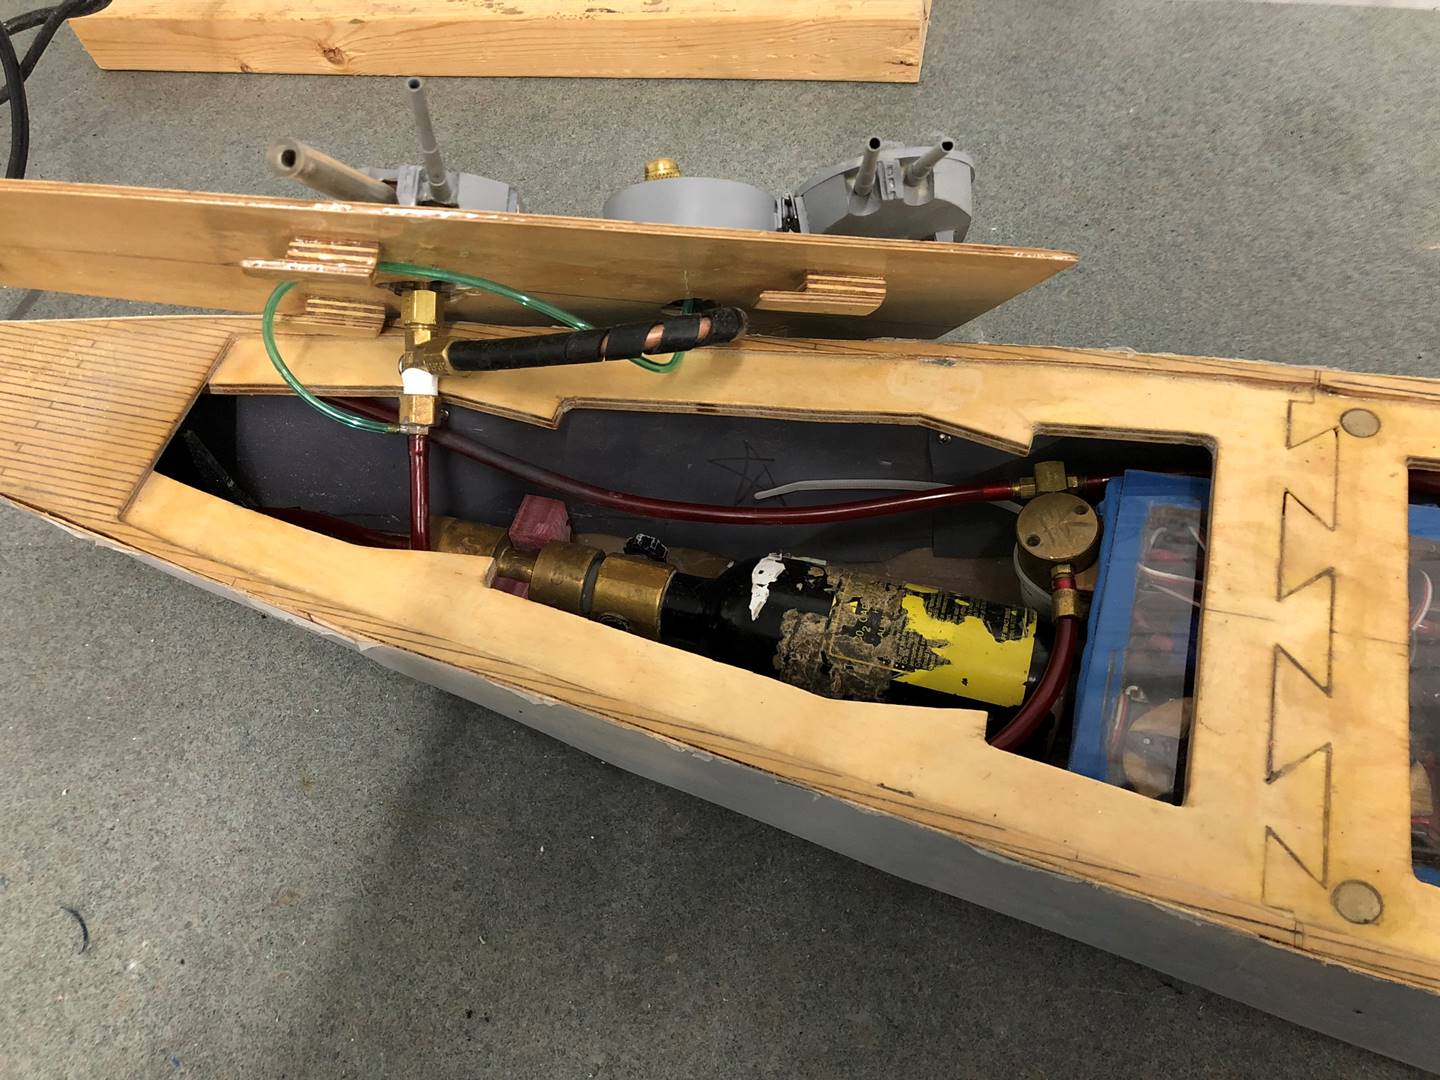
This picture shows the air systems in place and the radio box locked down into place. The guns are high flow with large air hoses feeding them. The solenoid for the bow sidemount is zip tied to the radio box to keep things from shifting around too much.
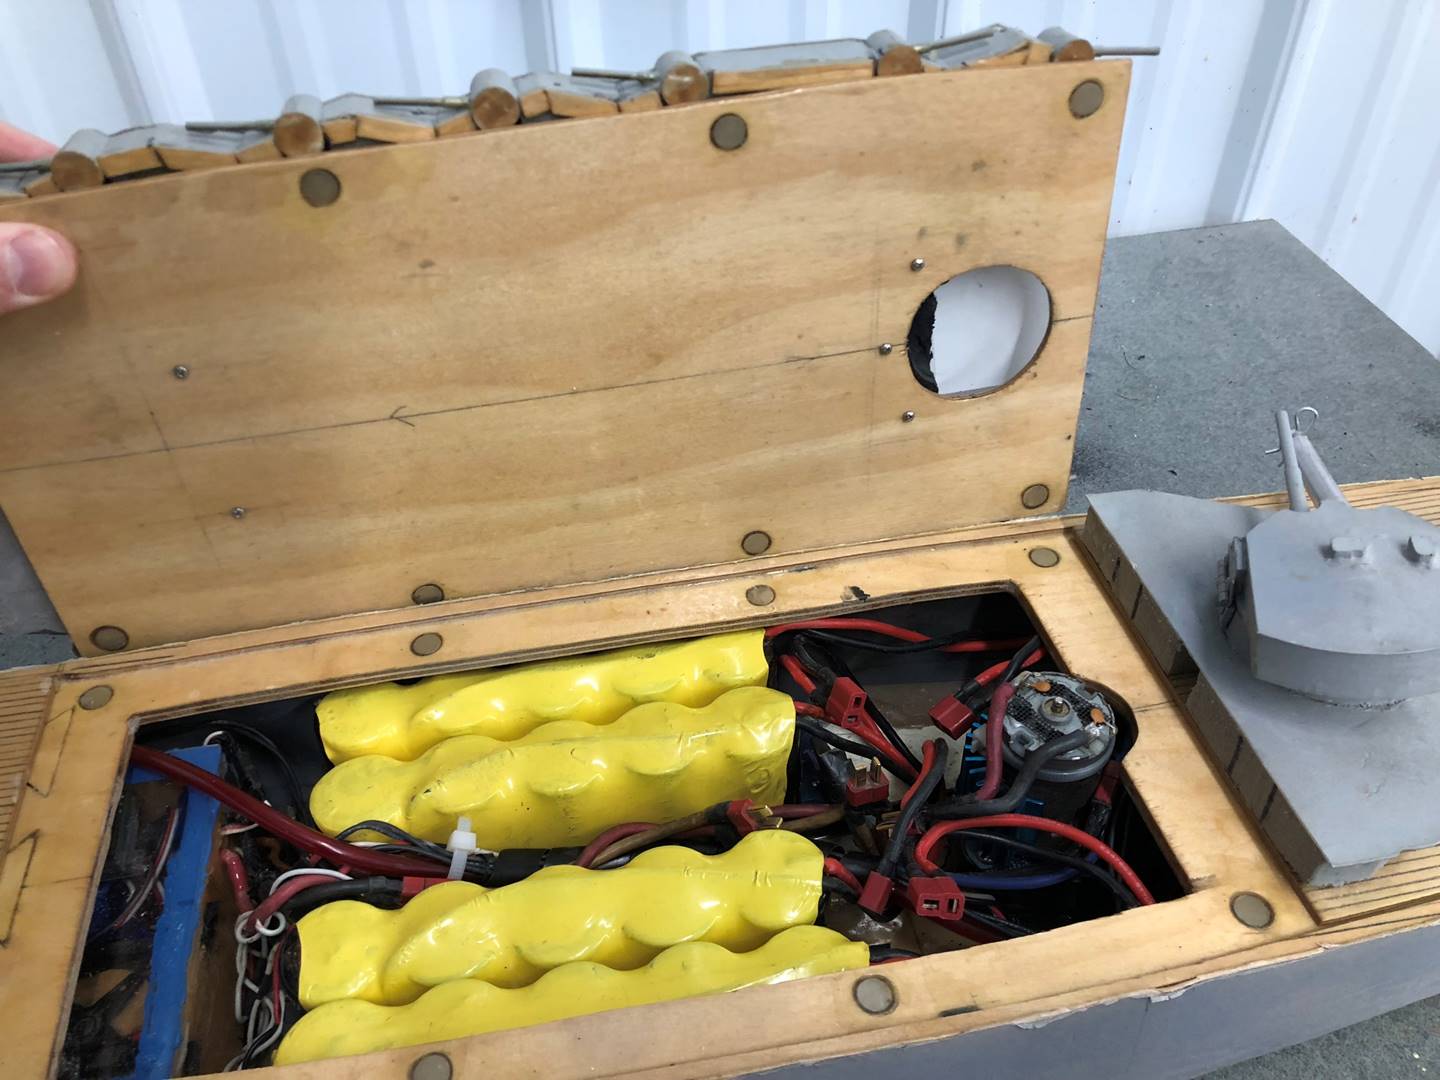
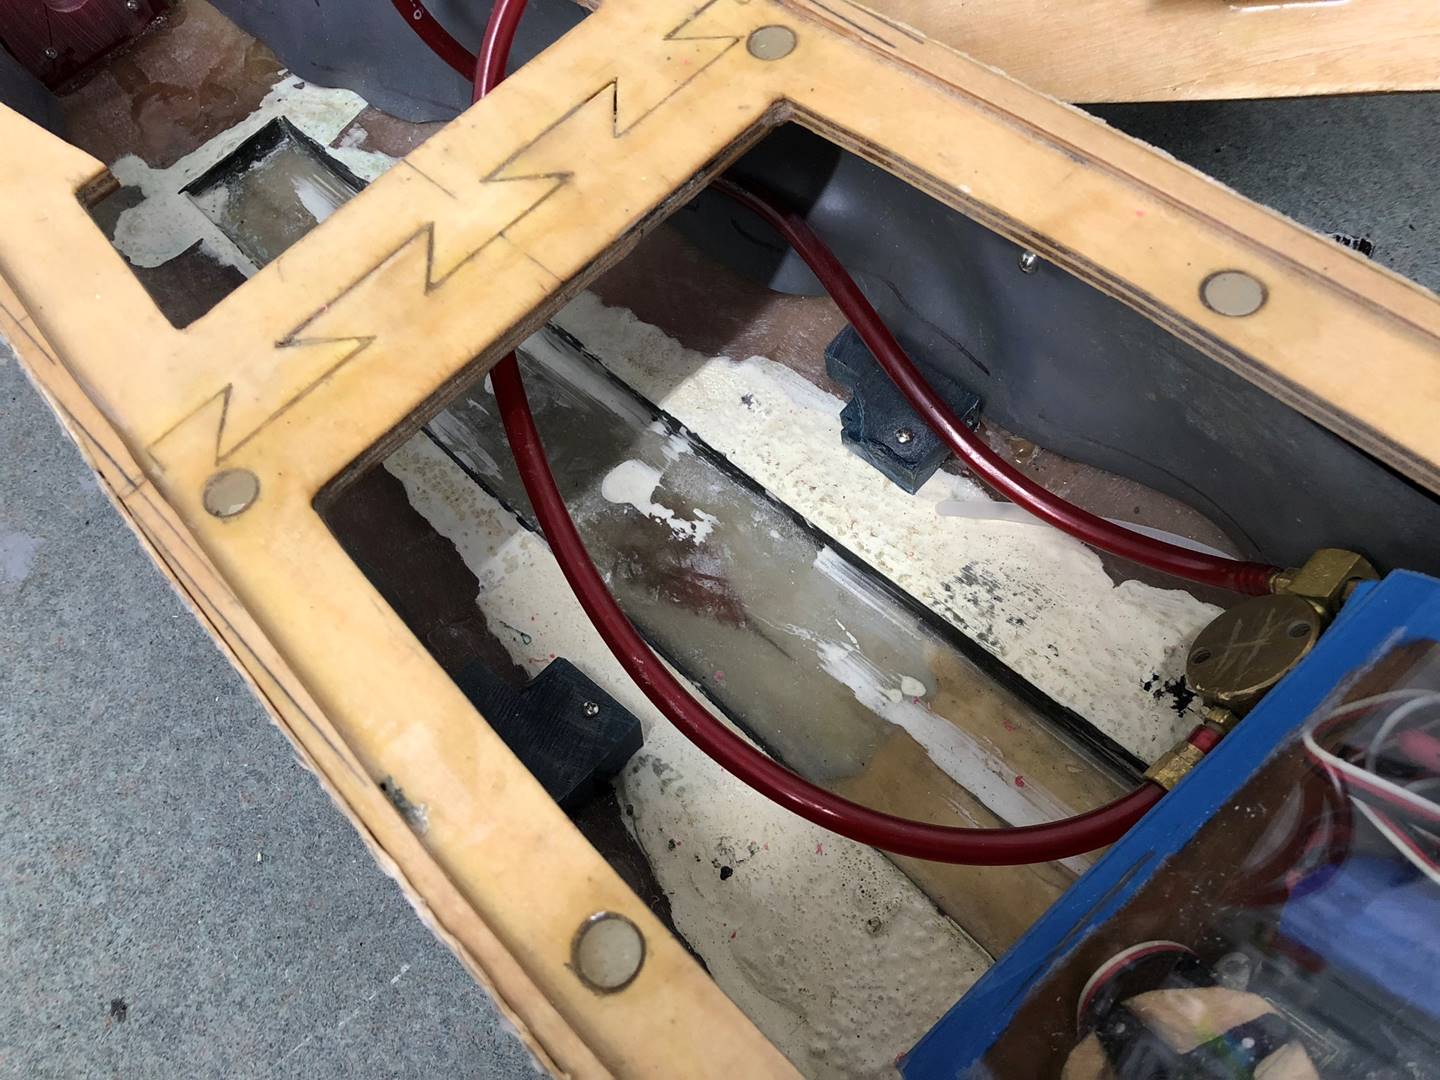
The four 6v 10amp hour NiMH batteries wedge across in the middle section. The wires from the radio box help hold things in place as well as blue plastic blocks that are glued and screwed to the bottom. The pump is a touch too tall, had to cut out a small hole in the top deck.
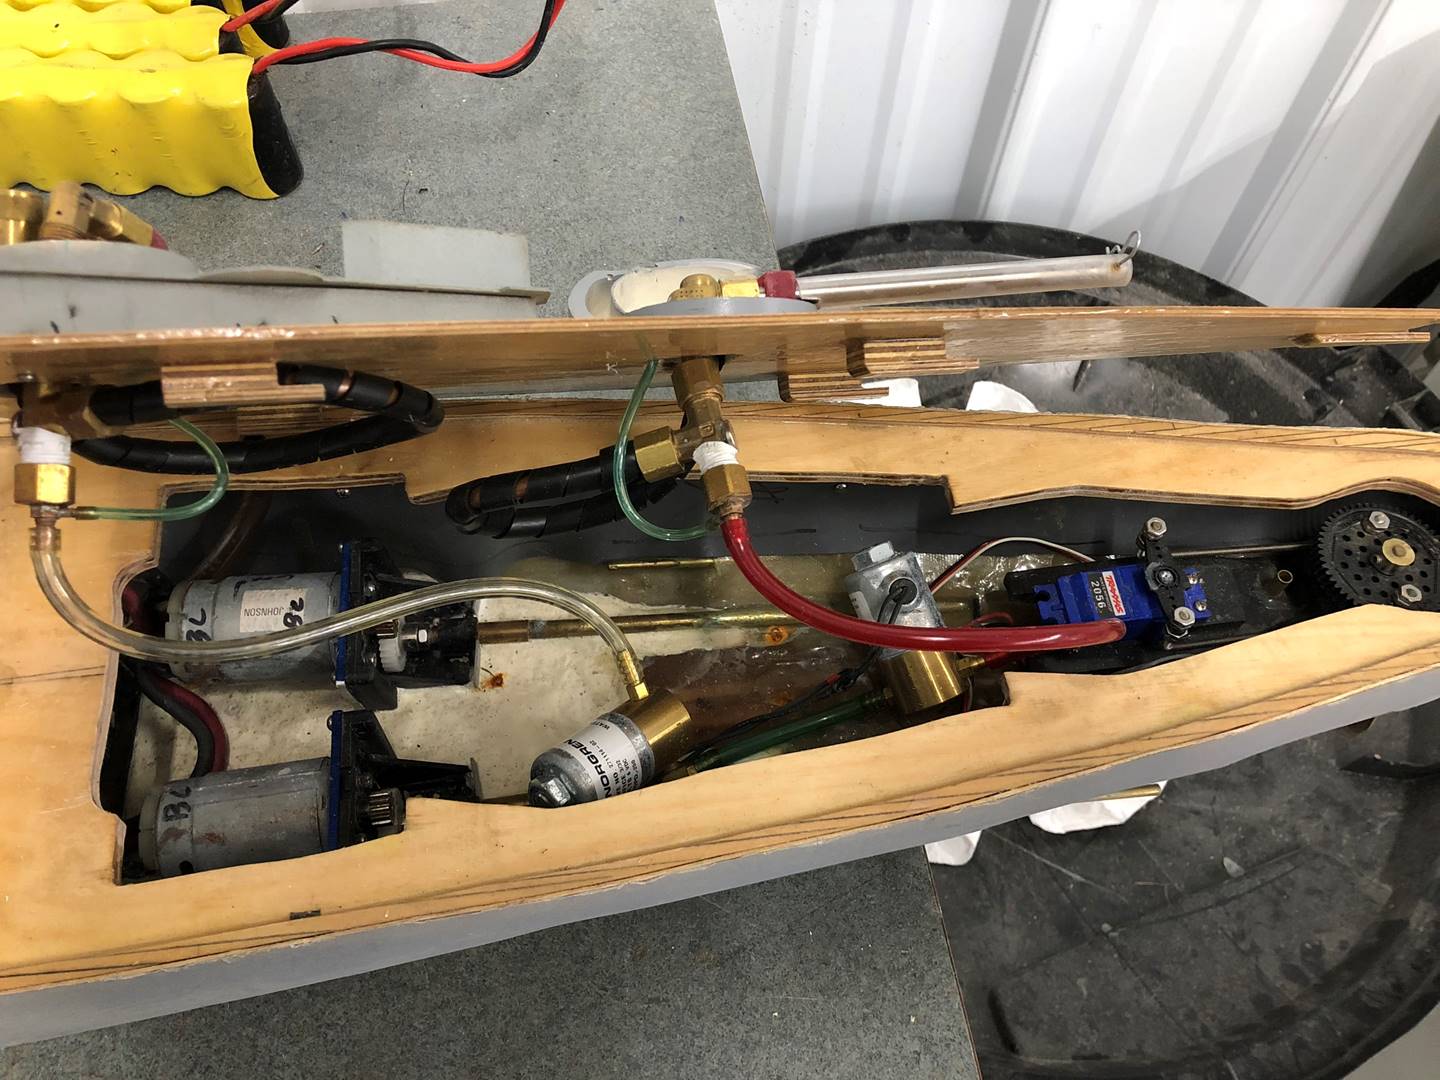
The stern section holds the drive motors and rudder assembly. The servo is water proof and turns via push arms a larger gear that meshes with a smaller gear for the rudder. The two solenoids are somewhat loose but are held mostly in place by the hoses. The guns area again high flow, each loads via the same turret. Bow gun is 50 rounds. Stern sidemount is 75 rounds.
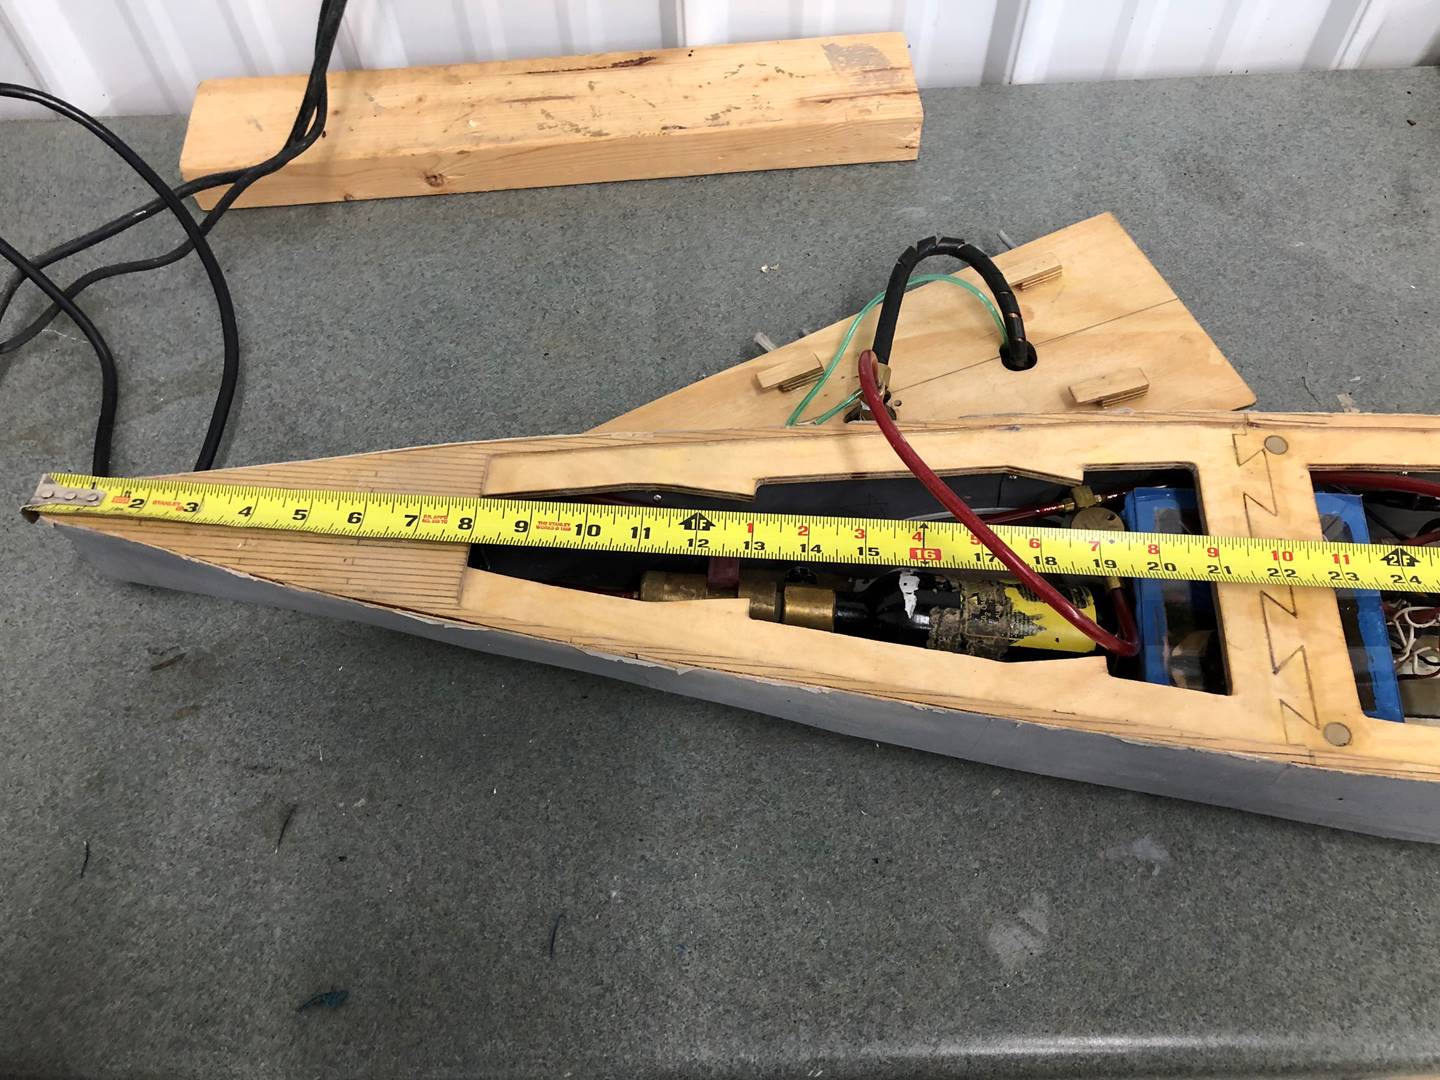
Bow with measurements.
Middle with measurements.
Stern with measurements.
Bow sidemount loads via B turret.

Stern section, the guns load via their respective turrets.

Rudder, props, drag shafts.
Props are 1.5 inch 4 blade 25 degree pitch.
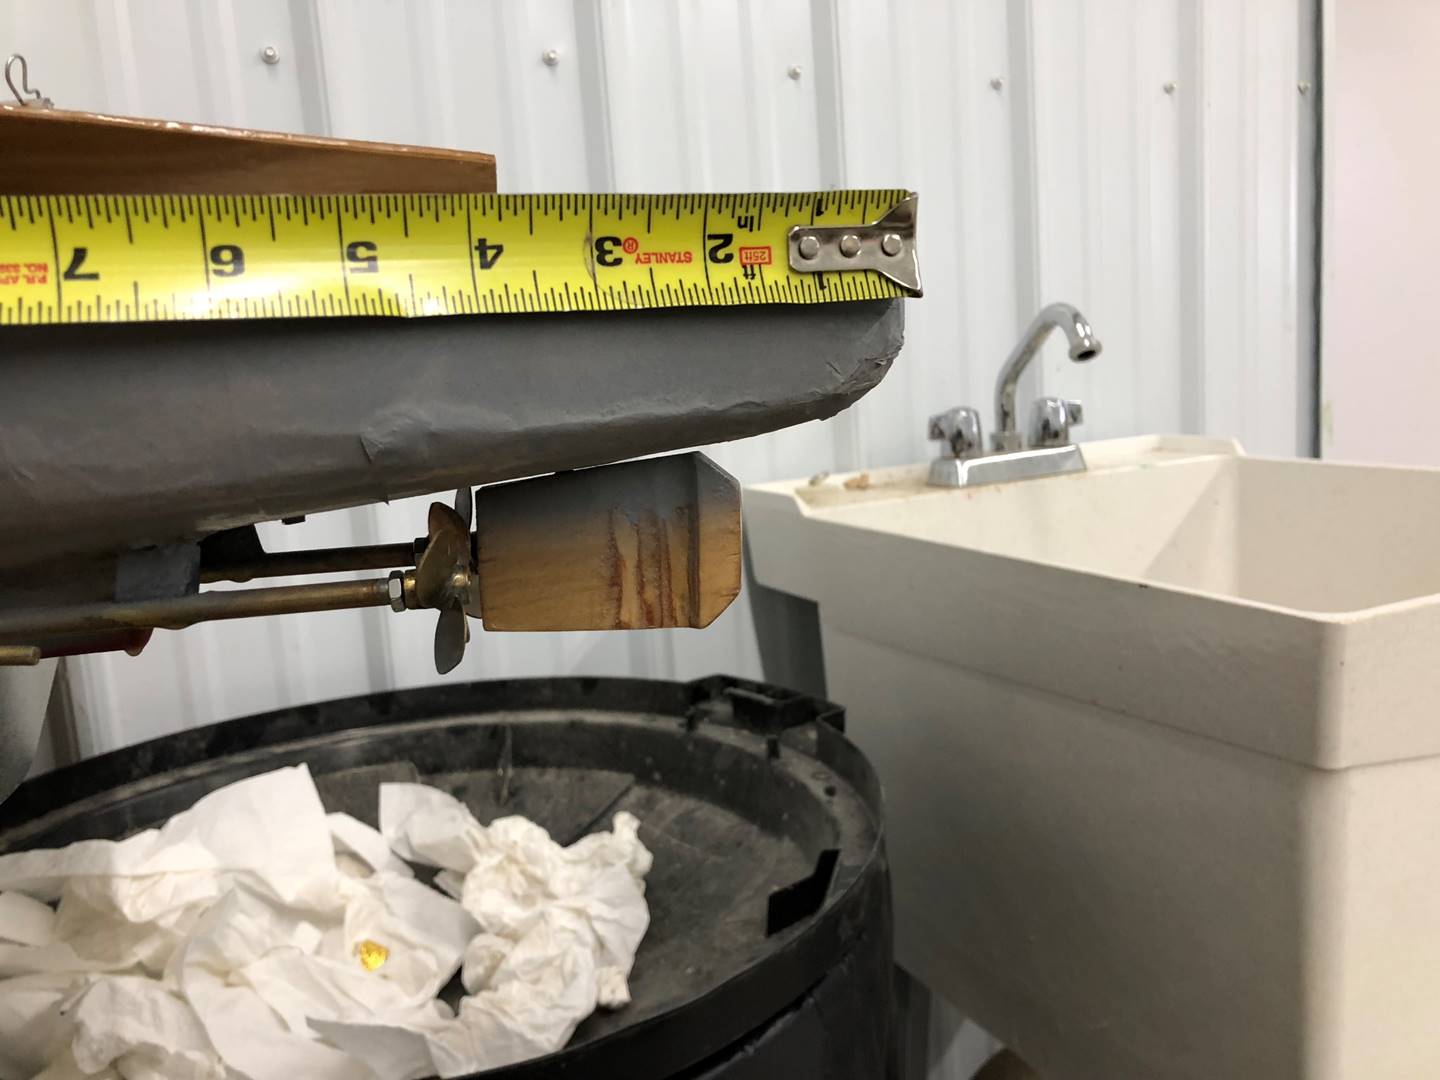
Stern section with measurements. Rudder post is at about 3.5 inches. Props at about 4.25 inches. Drag shafts end about 7 inches.
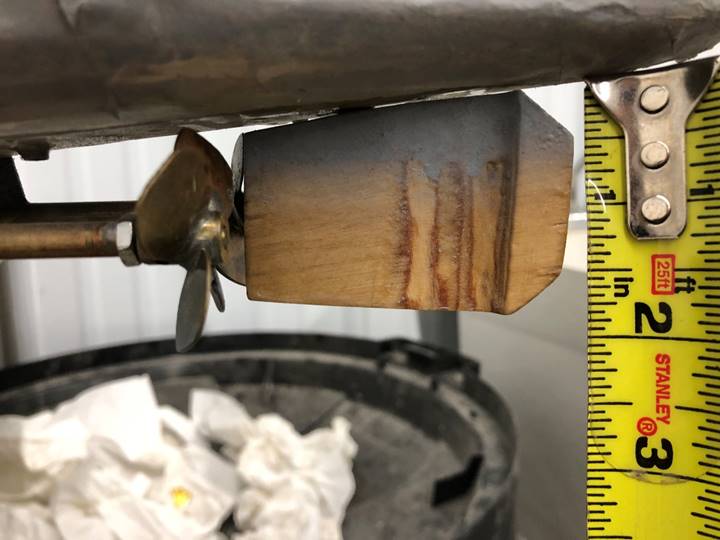
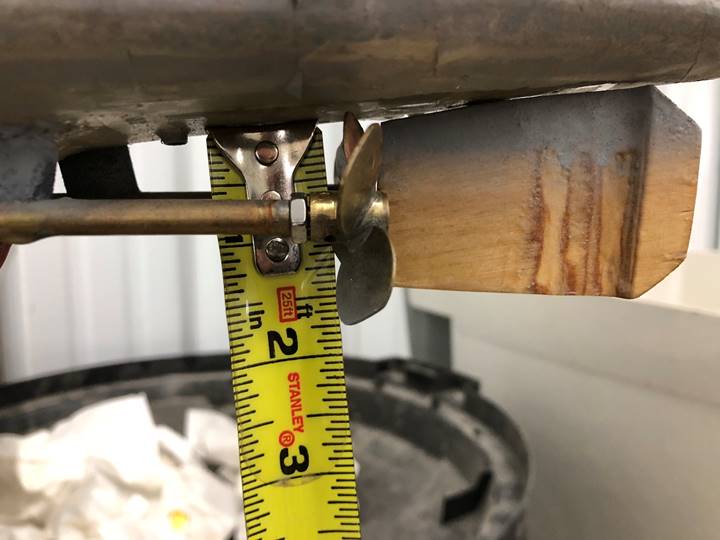
Rudder is tapered from prop height 1.5 inches in front to a little less than 2 inches in the back. .
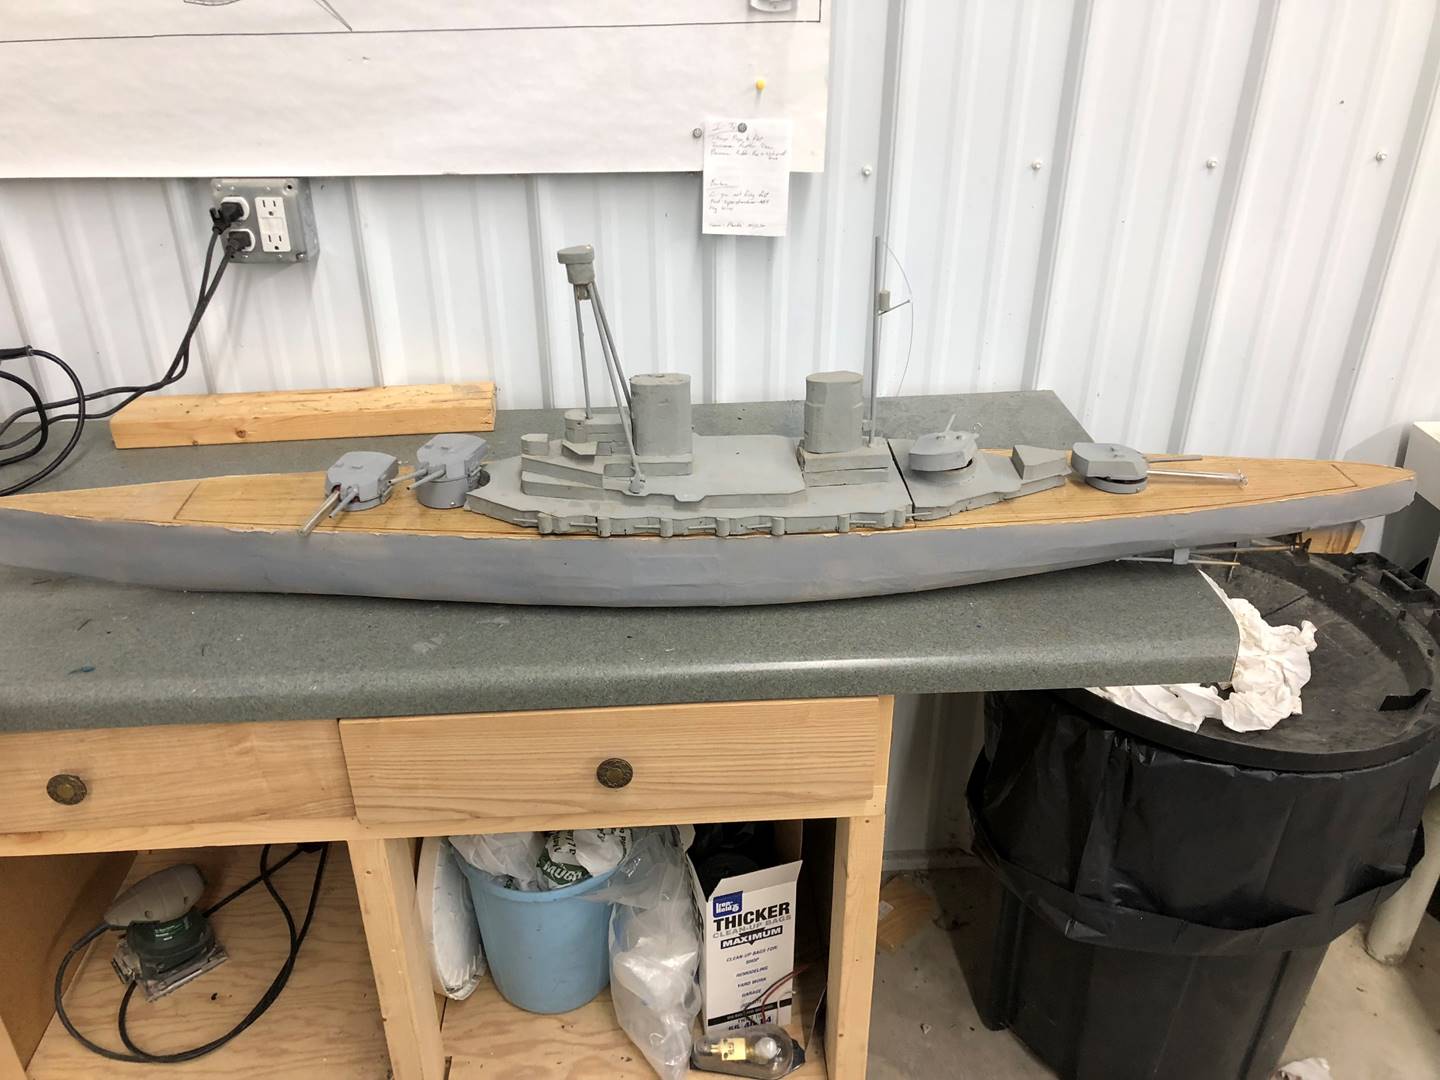
Another side profile shot.
In November 2019 I attempted to calculate how much this ship is “worth” by adding up the cost of new parts from various vendors, mostly from Battlersconnection.com. There are multiple small intangibles that are not included in the cost that are difficult to calculate, for instance small pieces of brass, plastic, hardware fittings, switches, not to mention the various tools that are required to work on the ship (drill, rotary tool, scroll saw, sander, etc). It should be mentioned that there are different ways to lay out the electronic components and this build was done with cheaper parts – servo/mag throttle drive vs ESC, servo/mag throttle pump vs board, firing boards vs switches, etc. The cost of building the ship is about what I would have expected, most new ships are generally quoted by veterans to cost 1000-1500 with transmitter and batteries, depending on the number of units and size. The transmitter and batteries and even the pump, guns and gas system, radio box, etc can all be transferred to different ships fairly easily so the cost of a second ship is generally much less. Another very difficult factor to calculate is the value of labor. For an advanced and experienced builder, the “value” of a highly competitive build and ship setup is in some ways worth as much of the cost of the parts themselves.
|
Part |
Cost in $ |
Link |
|
Ship Itself |
||
|
BC Hull (Seydlitz) |
140 |
http://battlersconnection.com/sms-seydlitz/ |
|
1/4 inch 5 ply wood 12x48in |
20.16 |
http://shop.balsausa.com/product_p/350.htm |
|
1/8 inch 5 ply wood 12x48in |
29.66 |
http://shop.balsausa.com/product_p/348.htm |
|
Superstructure |
50 |
various ABS/etc |
|
Turret x4 |
20 |
http://battlersconnection.com/sms-derfflinger/ |
|
Glue/Epoxy |
25 |
CA Glue, West Systems |
|
Gas system |
||
|
3oz CO2 bottle |
41 |
http://battlersconnection.com/3-oz-c02-bottle/ |
|
CO2 regulator |
40 |
http://battlersconnection.com/ultra-light-regulator-npt/ |
|
Solenoid x3 |
120 |
http://battlersconnection.com/combat-gear-solenoid-npt/ |
|
50rd Gun x2 |
63 |
http://battlersconnection.com/50-round-straight-magazine-cannon/ |
|
75rd Gun |
32.5 |
http://battlersconnection.com/75-round-straight-magazine-cannon/ |
|
Hose and Brass fittings |
20 |
|
|
Drive System |
||
|
Gear Box |
38 |
http://battlersconnection.com/gb500-gear-box/ |
|
550 Drive Motor x2 |
11 |
http://battlersconnection.com/550-motor/ |
|
Shaft/tube x2 |
23 |
http://battlersconnection.com/12-prop-shaft/ |
|
Prop 1.5in 4 blade 25deg x2 |
42 |
http://battlersconnection.com/1-1-2-4-blade-25-pitch/ |
|
Pinion Gear x2 |
10 |
http://battlersconnection.com/12-tooth/ |
|
Drive Gears |
10 |
|
|
Rudder |
4 |
http://battlersconnection.com/class-4-single-rudder/ |
|
Traxxas rudder
servo 2056 |
30 |
|
|
Damage Control System |
||
|
Pump |
30 |
http://battlersconnection.com/large-pump-full-kit/ |
|
Radio Control System |
||
|
Fire Board x3 |
75 |
http://battlersconnection.com/combat-gear-dual-gun-pcb/ |
|
Drive Servo |
12 |
|
|
Pump Servo |
12 |
|
|
Various Wire |
50 |
|
|
Deans connectors x6 |
12 |
https://www.towerhobbies.com/cgi-bin/wti0001p?I=LXKX39&P=ML |
|
TOTAL |
960.32 |
|
|
Other Stuff |
||
|
Solder, flux |
||
|
Fiberglass cloth |
||
|
Internal Armor |
||
|
Radio Box and lid |
||
|
Silicone |
||
|
Hardware - screws, hinges, bolts |
||
|
Various Brass pieces |
||
|
Plastic Incorporated into Hull |
||
|
***Batteries x8 |
480 |
https://www.batteryspace.com/nimhbatterypack60v10ah5xd60wh40arate.aspx |
|
***Transmitter |
150 |
|