
- Tiger -
HMS Tiger – Tyler (2018+)
4.5 units, 24 seconds, British Battlecruiser
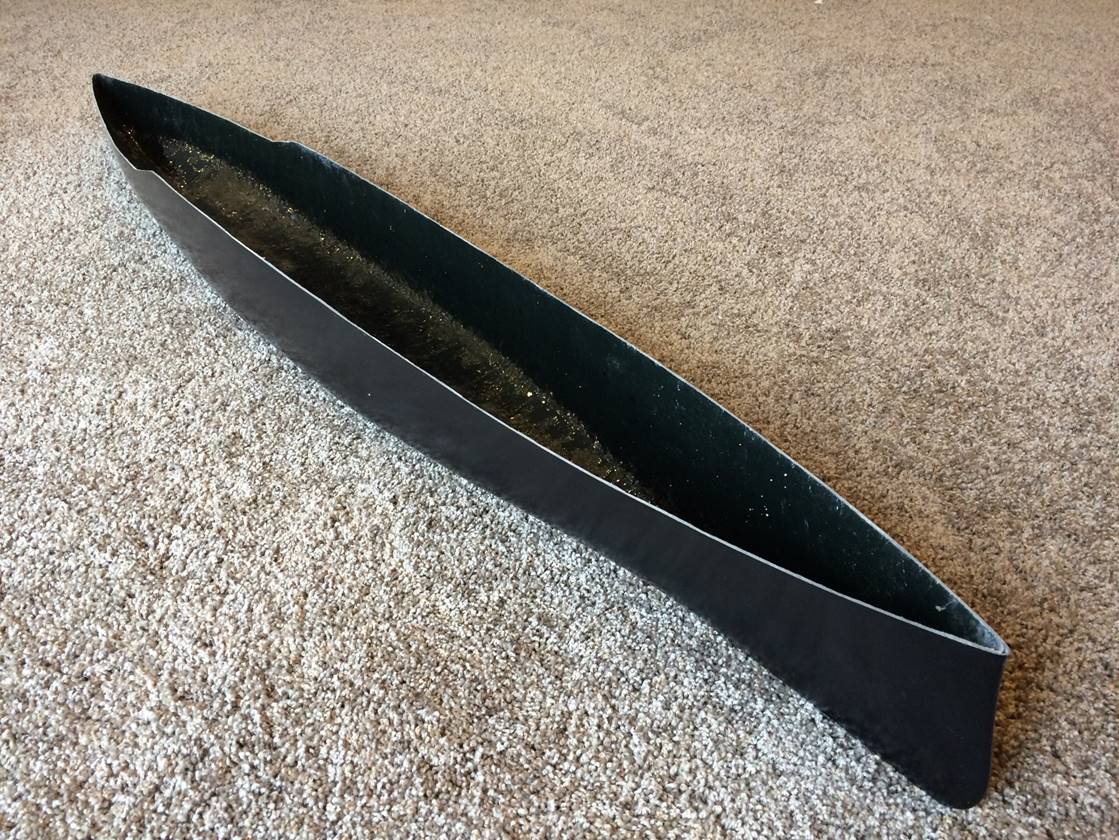
HMS Tiger will be a “kit bash” where I take a HMS Lion
hull and modify it into the HMS Tiger. The ships were very similar in both
length (Tiger was 4 feet longer, which is 1/3 inch in scale) and beam (Tiger
was 2 feet wider, which is 1/6 inch in scale) and the overall hull shape was
extremely similar and though I’ve not been able to really confirm that they are
identical, it will be close enough to fake it. I got the hull for Christmas in
2017.
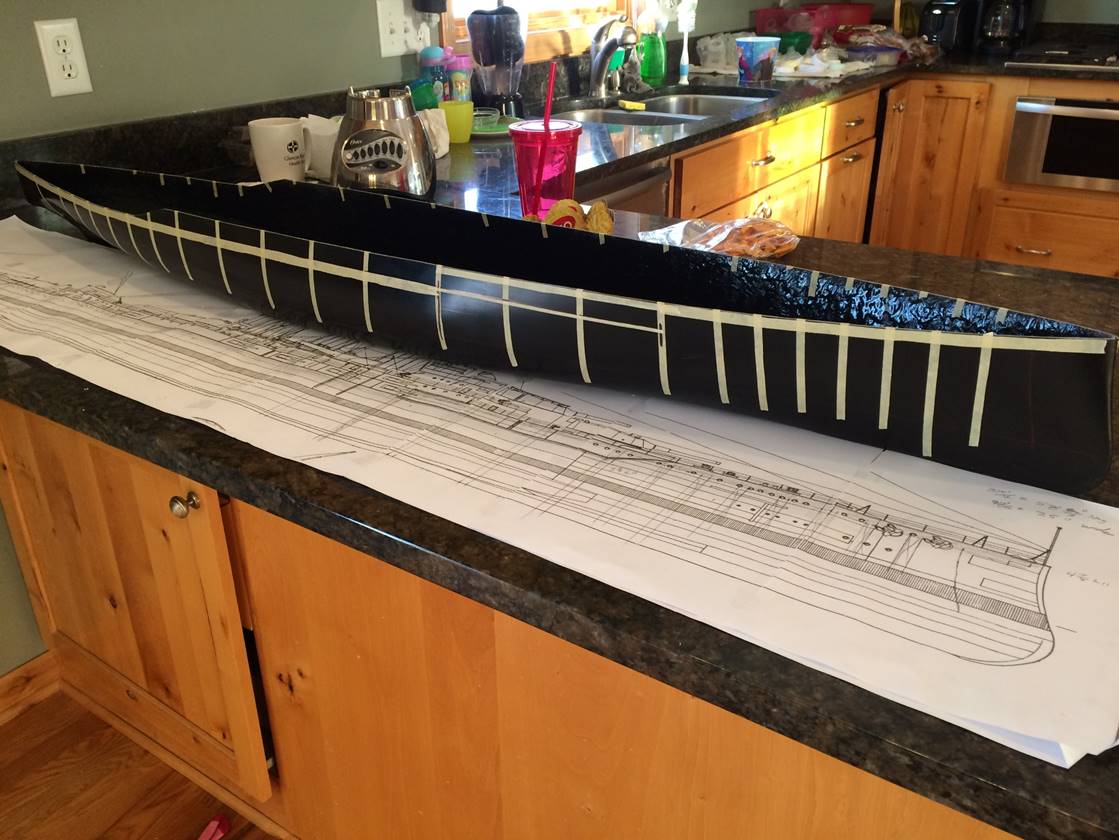
Hull is marked where the ribs will go, I use masking
tape cut to the appropriate width (1/8 inch, 1/4 inch, or 3/8 inch). The
planning stage of ship building is very important and can take longer than one
would think. Generally the bow should have more ribs because it sits higher out
of the water. A lot of people put more ribs where the side mounted guns will go
as well since that area seems to collect damage more heavily as well.
Additional hull features such as casemated guns and armor bulges complicate
things as well.
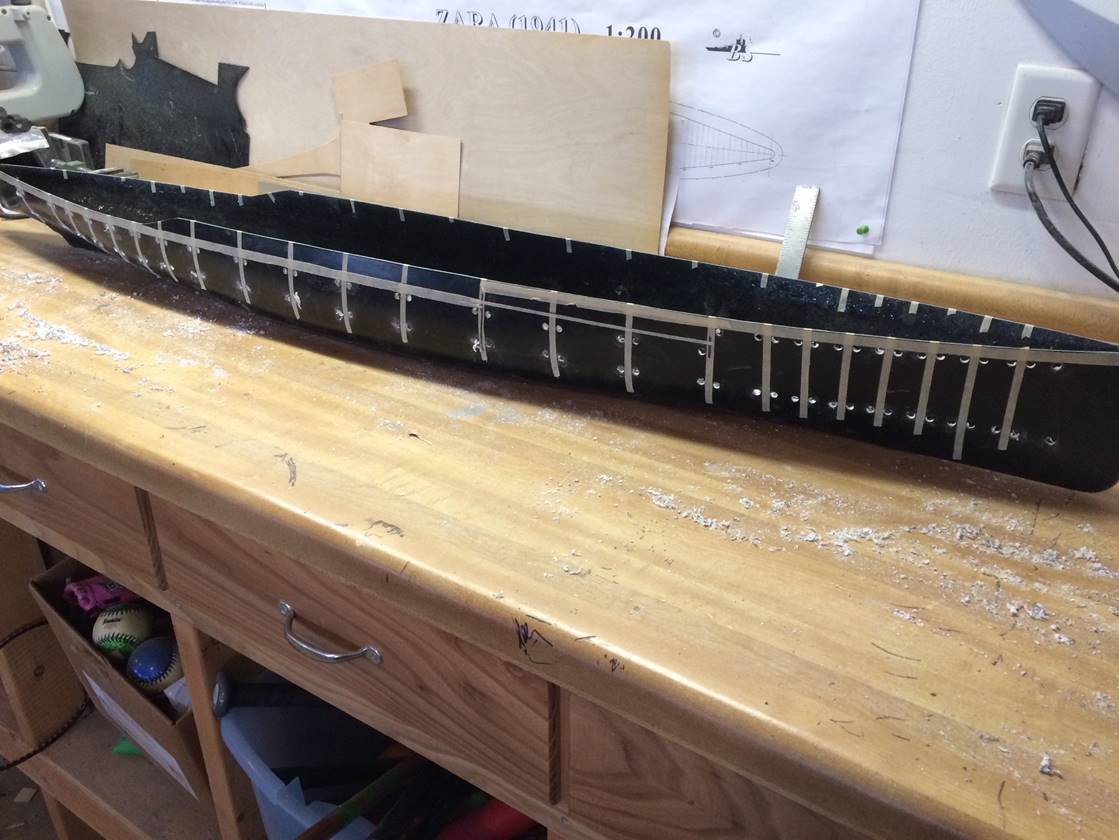
Getting ready to cut the windows out and leave the
ribs behind. 15% of the side of the hull can remain impenetrable front to back,
85% must be removed. The cut out section needs to be at a depth 1 inch below
the waterline. I had floated the ship at about the weight I thought it would
battle and figured out the bottom cut, the upper horizontal cuts are determined
by the 3/8 inch deck/subdeck assembly and/or the stringer. I would recommend
drilling holes at the corners and leaving them ever so slightly rounded for
strength, this also makes the cutting go a little quicker since you don’t have
to be so precise to not over cut at the corners.
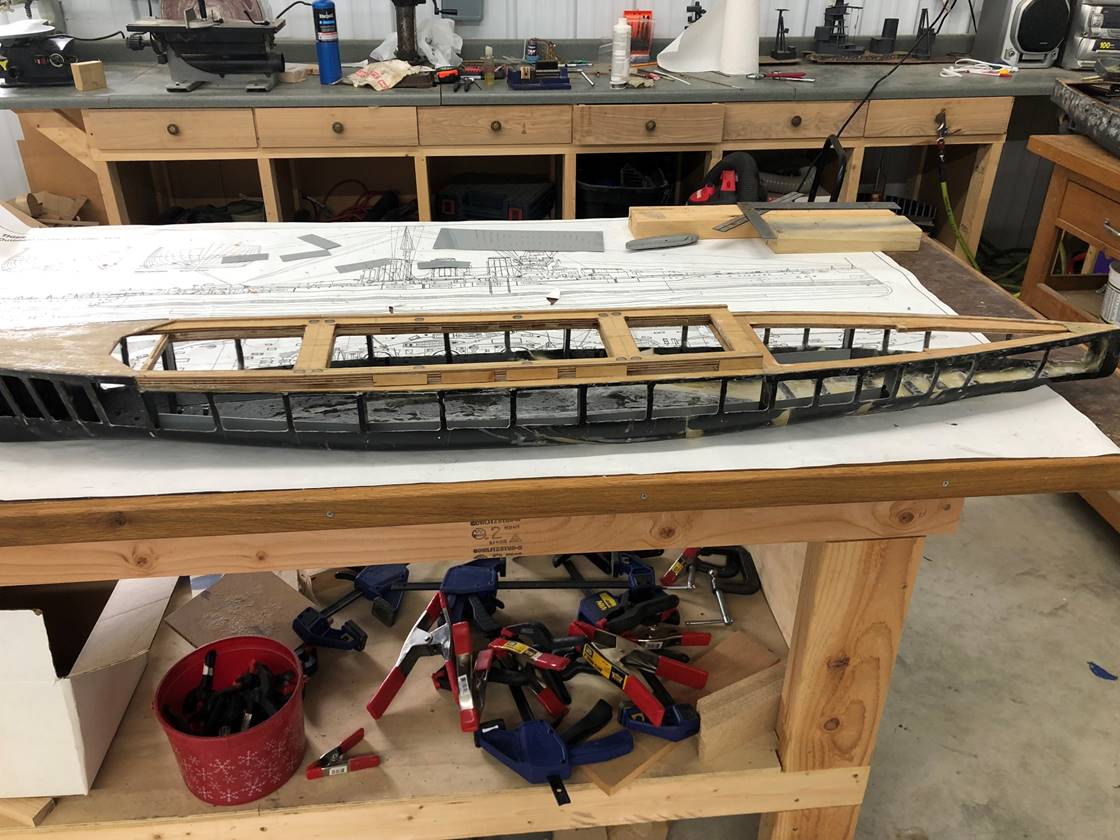
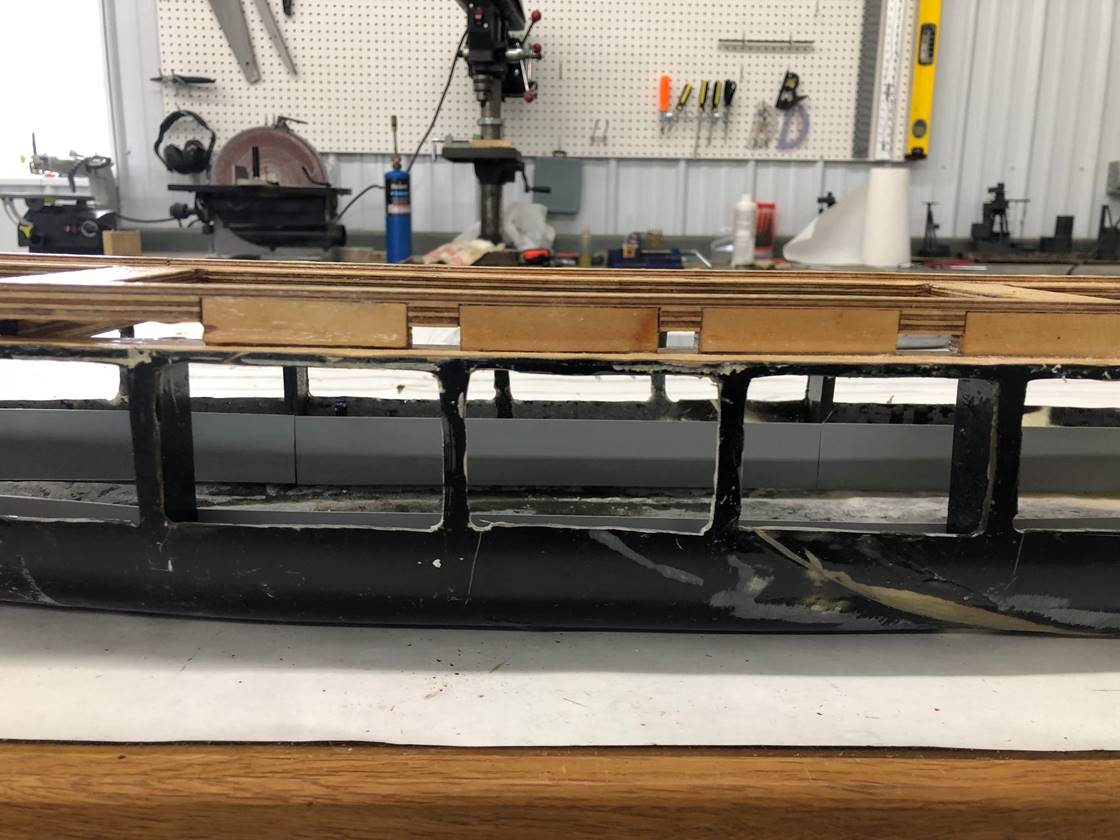
The hull is (mostly) cut in this picture. It is
generally a good idea to line the ribs up so that there are more in the bow (to
block bb’s entering the more vulnerable part of the ship) and also I usually
line them up to straddle casemates to give even more impenetrable area through
that portion of the ship. Of note the marked middle sections are incorrect and
will be trimmed down as the process continues after the decks are inserted,
it’s easier to leave it long early on and trim it back later.
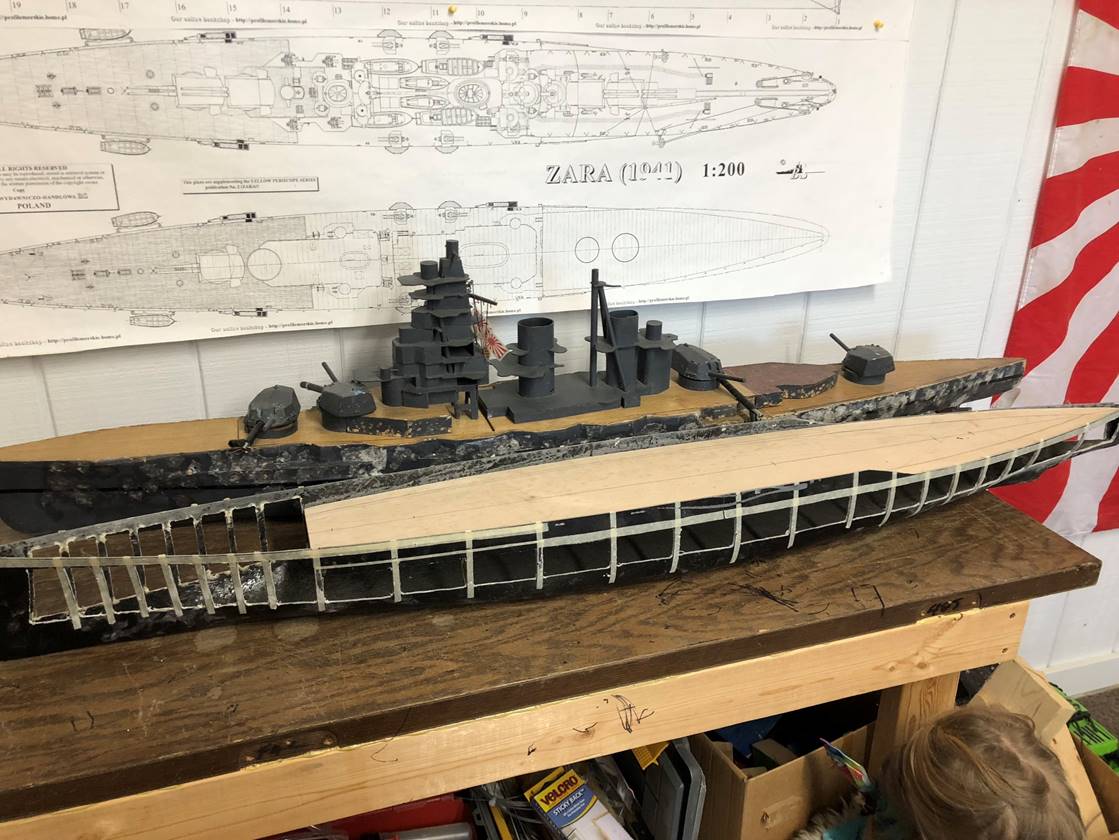
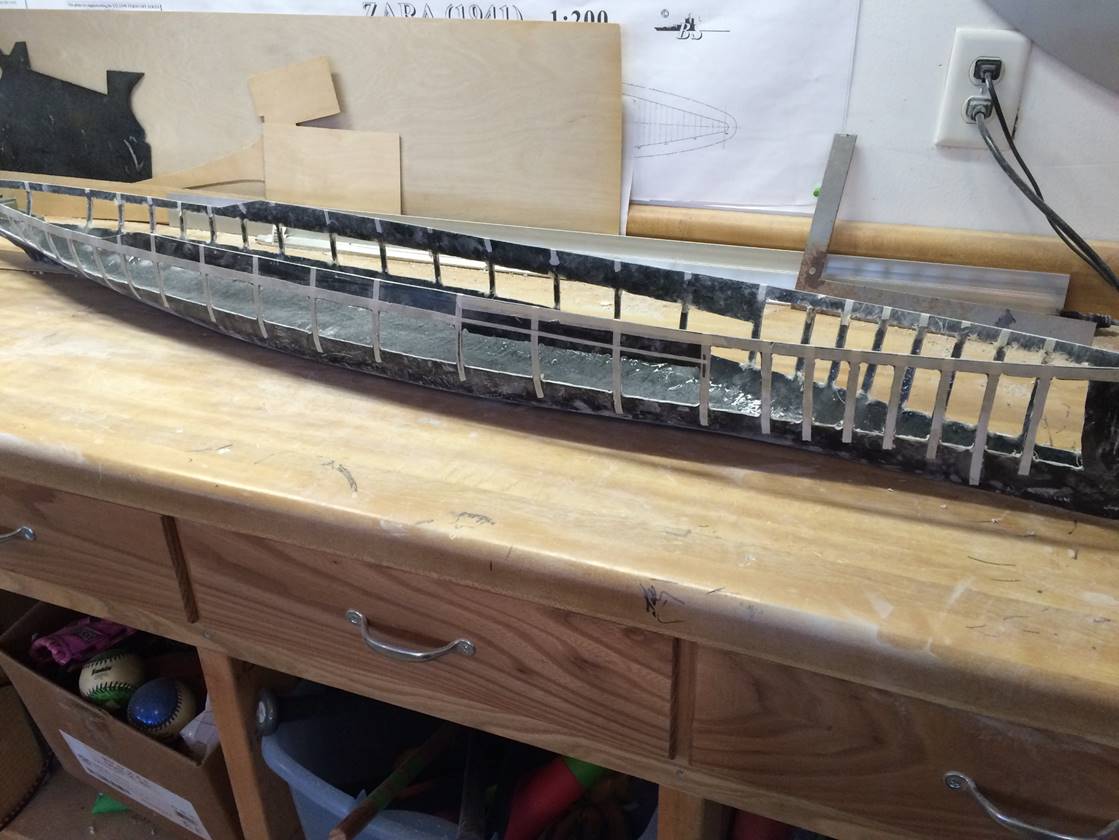
The ship lays out very similar to the IJN Kongo as
seen in the background. The Kongo is 24 feet (2 inches in scale) longer. The
turrets are in very similar places, with the raised middle/stern turret just 1
inch towards the bow compared to the Kongo’s.
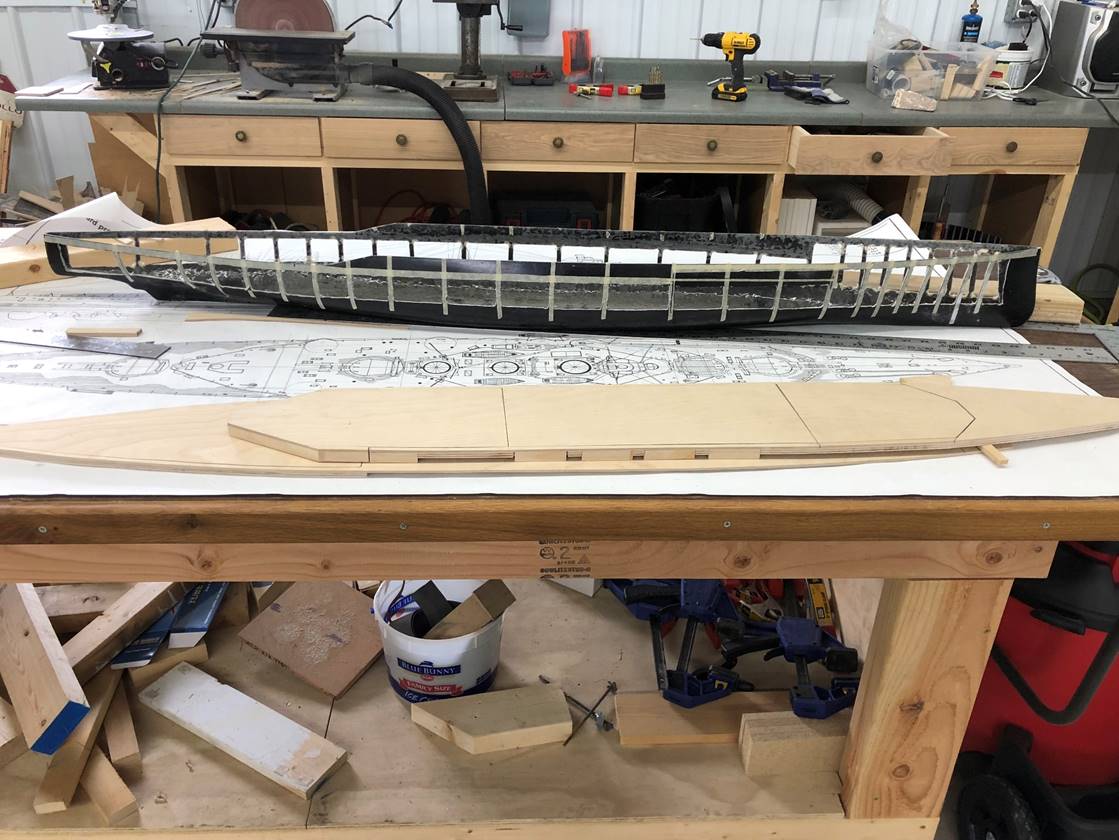
Decks are coming together. I’ve opted to lay them all
out and glue them together first, then glue them into the fiberglass hull. This
will keep the two deck levels flush with each other by default rather than
risking some poor fitting seams/warping if they were to be installed
separately.
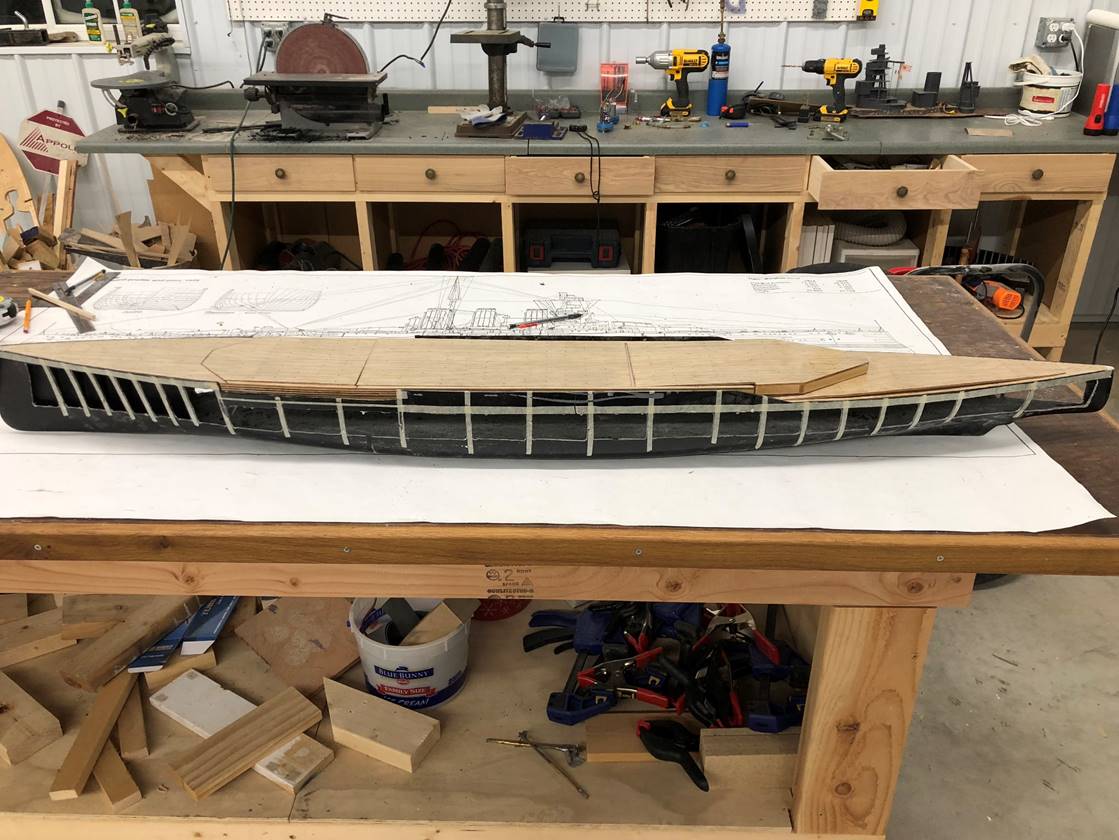
Deck/subdeck assembly is glued in. I debated a lot
about how to make the deck sections come apart. Usually I like when the
sections of deck with guns attached can stay put during routine operation and
only need to open for more advanced repairs, while the middle superstructure
containing deck can be opened to change CO2 and batteries which is also
convenient for transport. The far bow section will have the 2 bow turrets. The
far stern lower section will have the stern most turret. And the raised stern
section will have the other turret. I’ve debated attaching the stern most two
parts vs keeping 4 separate sections, I think I will start with 4 which I
generally don’t like doing and changing it later if I feel like it isn’t
working out. There is further trimming of the fiberglass that needs to be done
in the casemate section.
Deck is glued in and the excess fiberglass along the
casemate area amidships has been cut away. The entire wooden part has been
covered with epoxy to protect it against water and add some bb protection as
well.
A closer look at the midships section. The rounded
casemated cupula based guns will be attached where the flat impenetrable areas
are. The upper part of the deck rim is 3/8 inch thick (1/4 inch sub deck and
1/8 inch deck) and the deck area below the casemated guns is 1/8 inch.

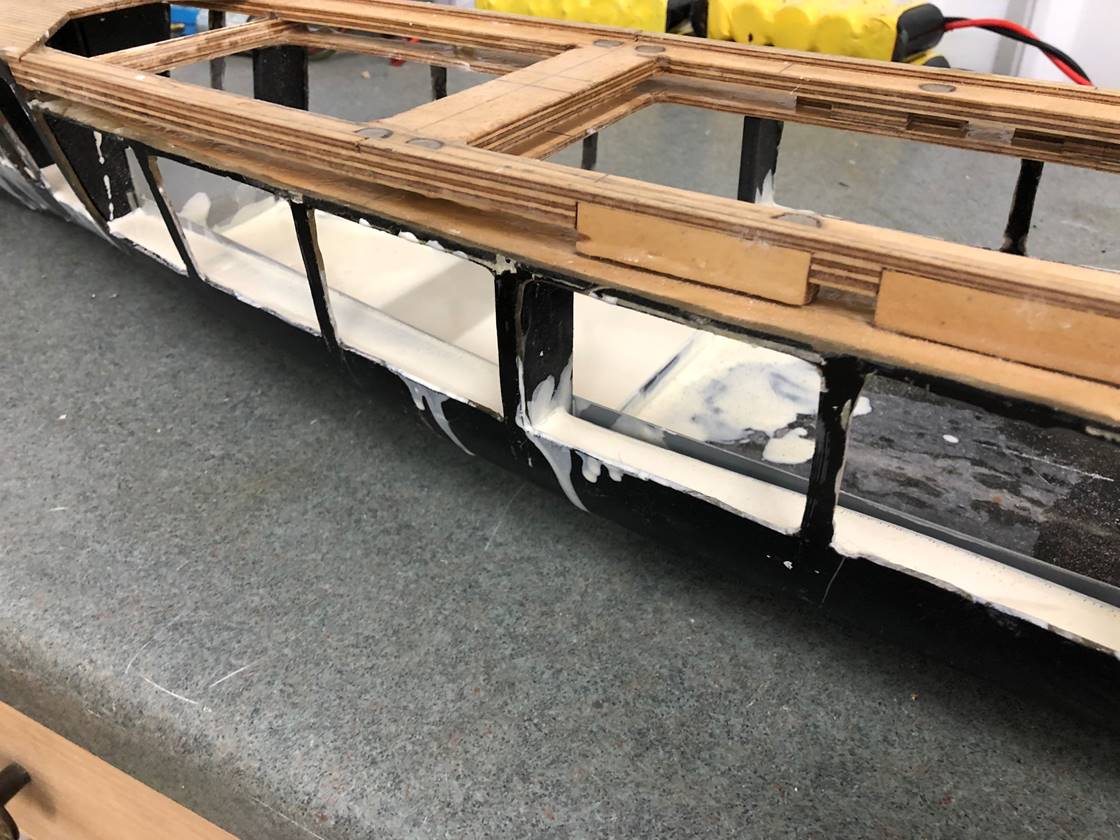
This is a shot of the inside of the ship in the middle
portion. This picture shows the prepping for the water channeling. I glued in
light weight 1/32 inch gray plastic and epoxied it in to place so it will hold
the pourable 2 part plastic in place as it cures. Generally, the bulges of
larger ships should have some water channeling to prevent incoming water from
causing a list as it takes damage. There is minimal usable space in the bulges
any way, since the hull curves upwards rapidly. I would recommend any light
weight material since it is meant to displace water, you can gain slight
amounts of buoyancy as you take damage. Also this prevents your build from becoming
too heavy and not performing correctly without an easy way to adjust it, and if
you do have to later add weight you can be more deliberate about it adding it
to the center of the ship and balancing things along the way rather it being
affixed to the hull. You can also see the black plastic vertical rib backers
used to add strength and allow for a place to attach the internal armor. This
is also a good look at the inset magnets used to keep the deck in place when it
is set in place.
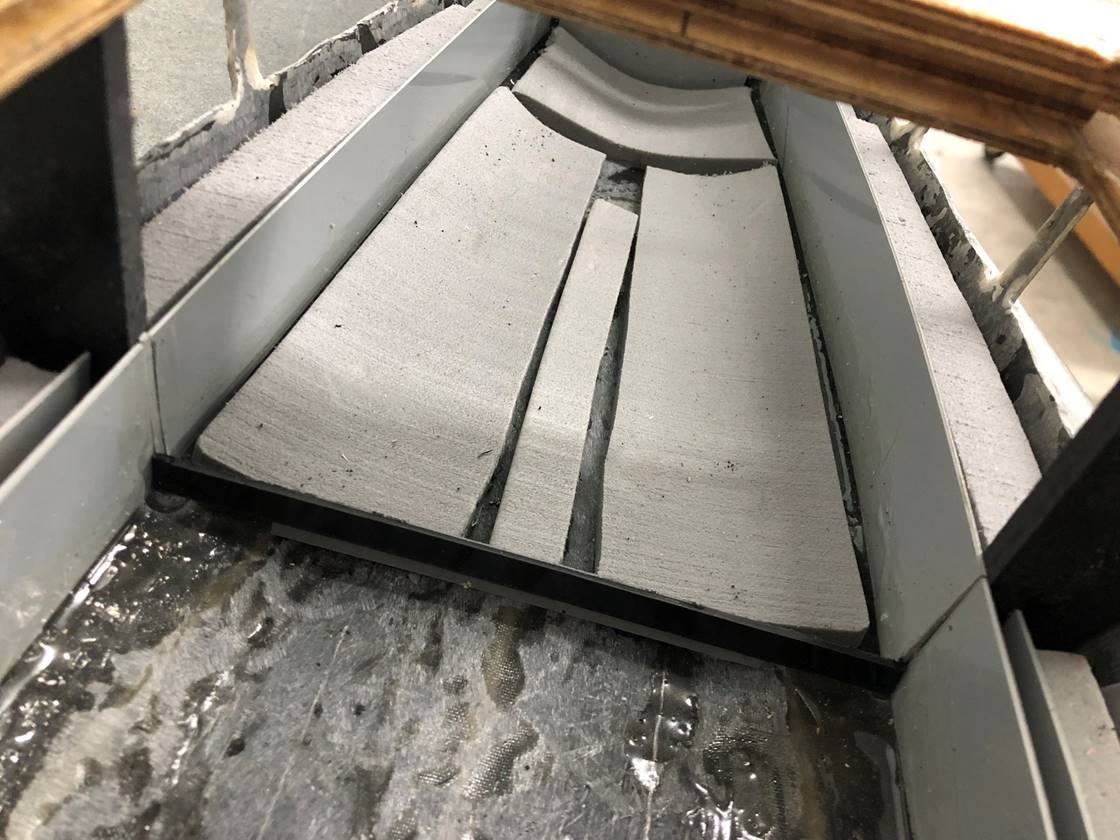
For the water channeling the light weight material I
tend to use is foam glued to the hull with some spaces/cracks left
intentionally in it. I then pour a liquid 2 part plastic mixed with microballoons in among the gaps so it fills the spaces and
gets under and around the foam.
This is part way through the process of pouring the
white plastic water channeling. The bulges and extreme bow of the ship are
filled to the 1 inch below the waterline level. The more amidships parts are
not filled as high. This is the area right under the bow turrets.
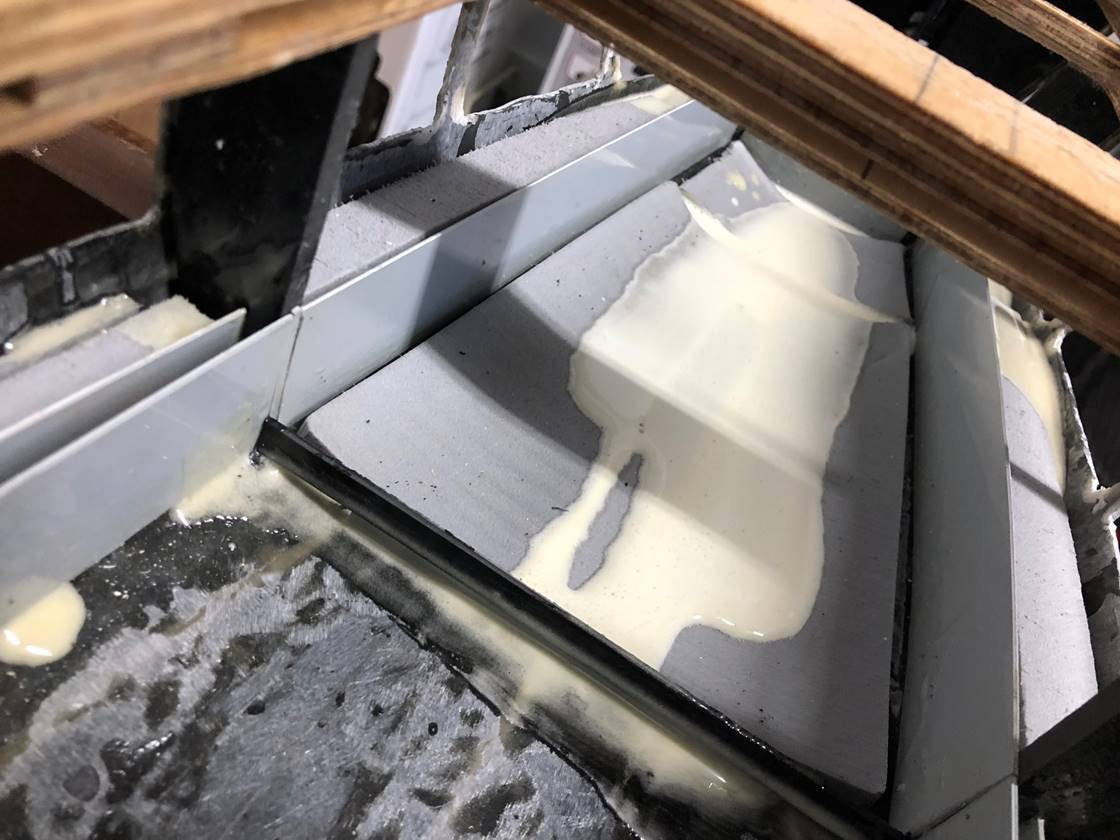
This is nearing the final stages of pouring water
channel. I usually leave the plastic dividers a little high then trim it back
later. The white poured plastic will pop right off of smooth finished surfaces.
Make sure to sand the hull so it will grab it a little better where you want it
to grab.
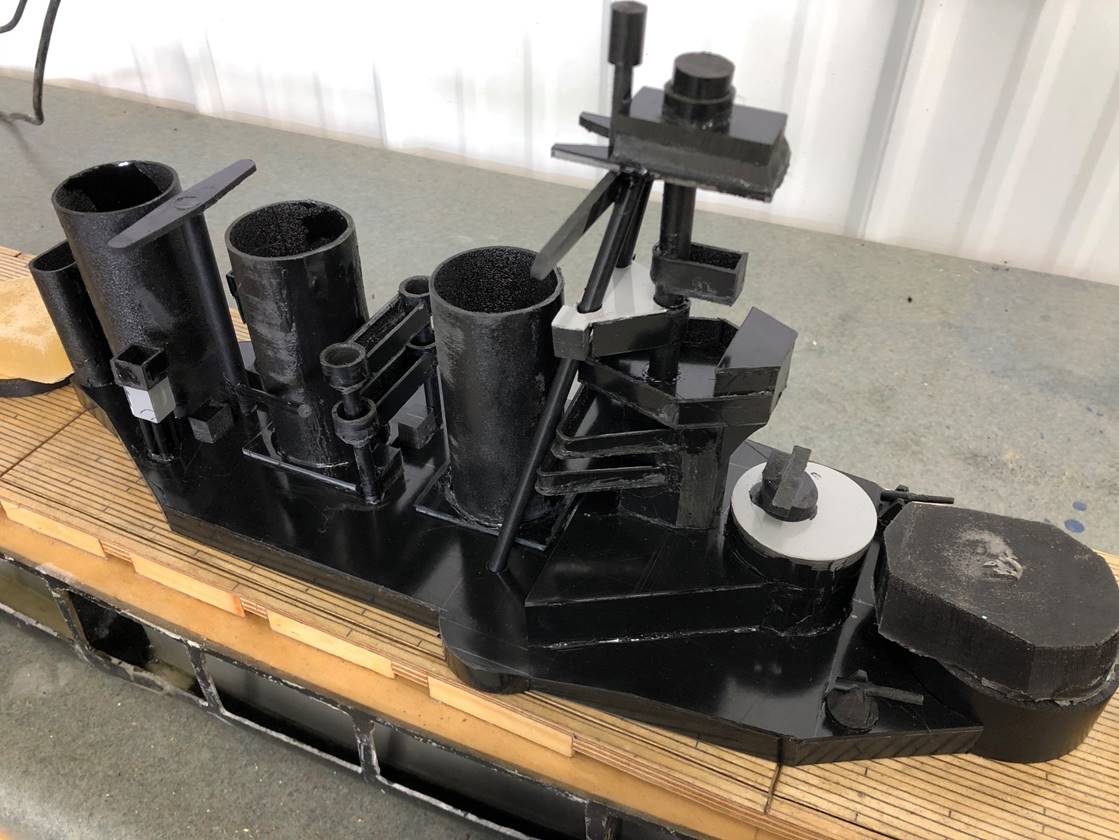
Super structure always makes it feel like the project
is coming along. As per my usual method, this is mostly made from 1/16 inch
thick black ABS plastic cut to spec and glued together with ABS solvent. It is
very durable. The gray parts are 1/32 inch ABS. the barbettes are ABS pipe. The
turrets are poured plastic from molds that I made off of a wood master.
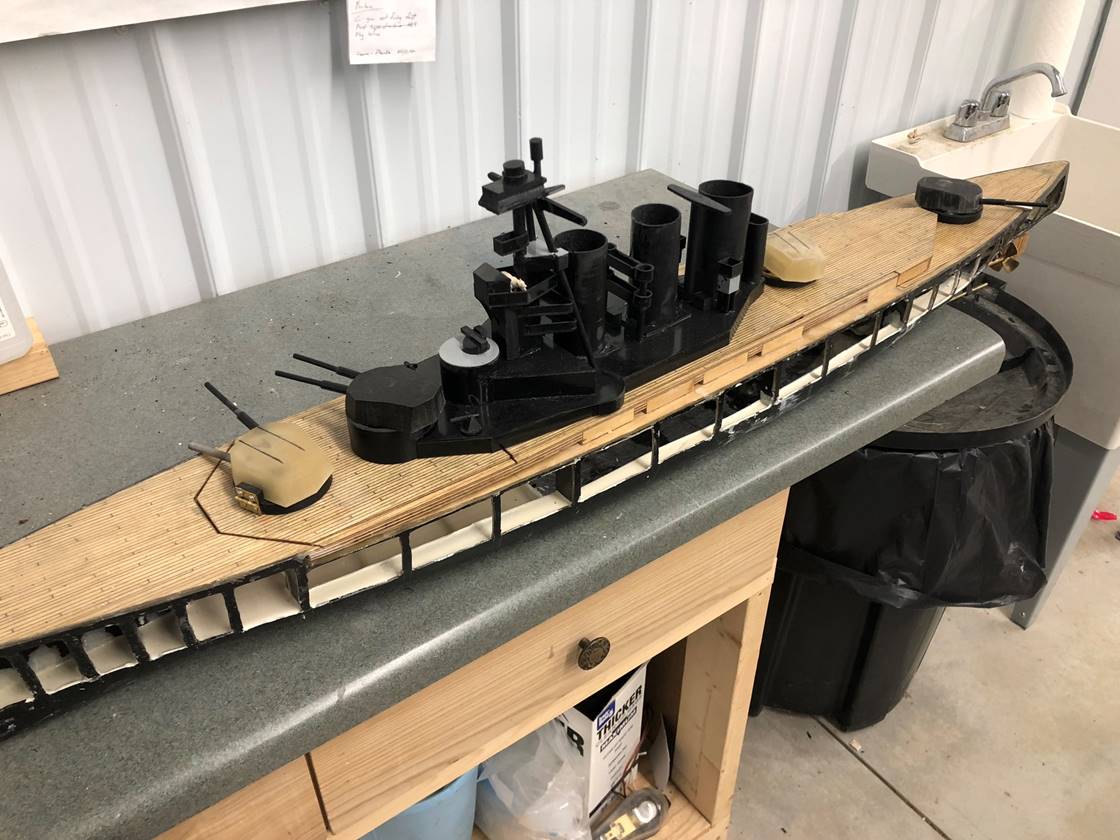
Starting to look like a real ship.

Added gun mounts makes it look like it could actually
fight some day. The setup for this ship will be one full
unit pump and three guns: 50 round bow sidemount, 50
round elevated stern sidemount, 75 round stern sidemount. A rule passed in the IRCWCC allowing as of
January 2020 for the longer battlecruisers to have 3 rather than just 2 side
firing guns. That rule should really
help the competitiveness of this ship and help it make up for the poor turning
radius the longer class 4 ships generally suffer from. If I were to build this
ship under the prior rules I would probably have the two stern most guns as they
are now and have a bow off angle “funny gun” to protect the bow of the ship.
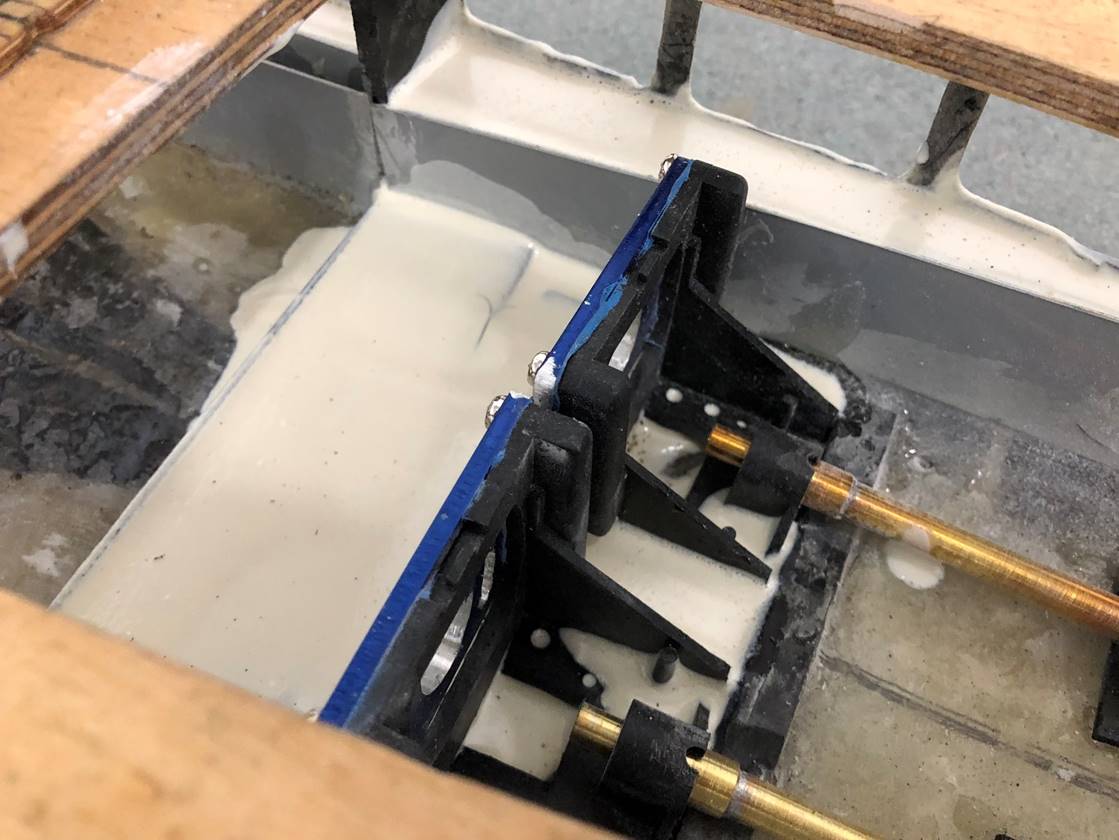
Motor mounts with some surrounding water channeling
plastic, this is just stern to the cross brace. These are Traxxas
Villain replacement parts, designed for a commercially available speed boat but
seem to work well for our purposes. The prop shafts are 1/4 inch brass tube
that taper by soldering sequentially smaller tubes inside of eachother down to the size of the 5/16 drive shaft.
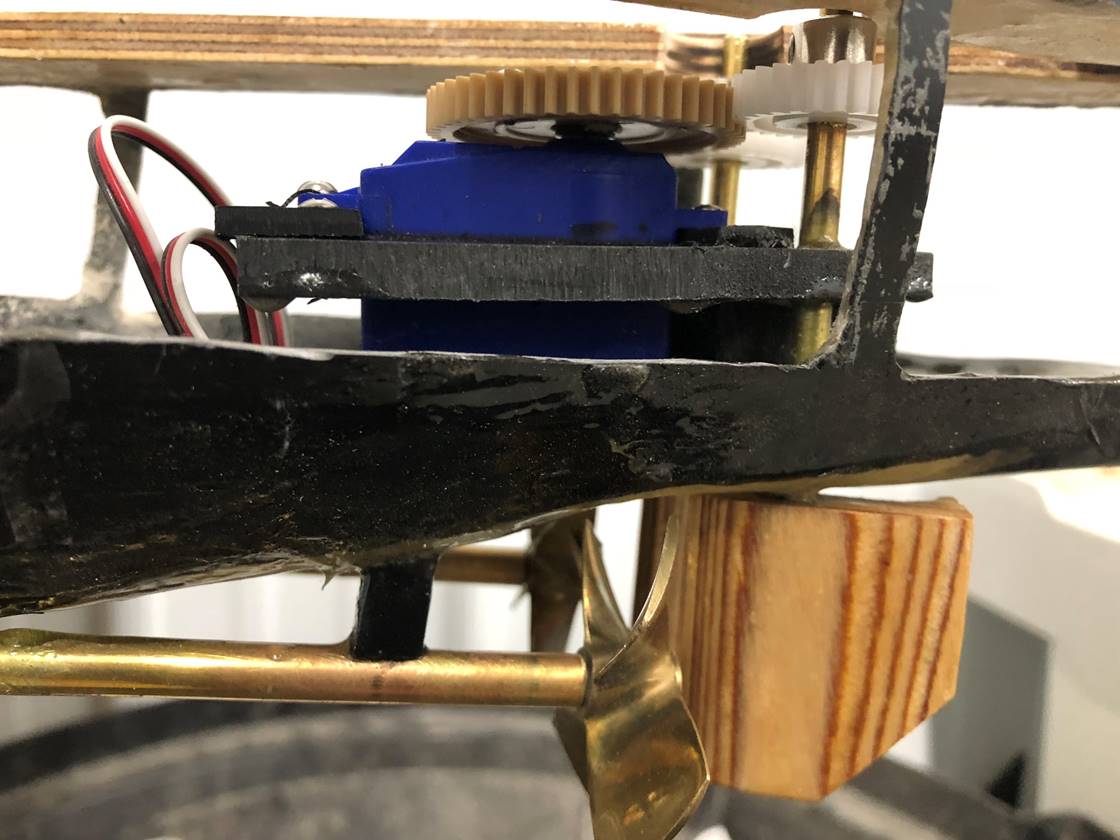
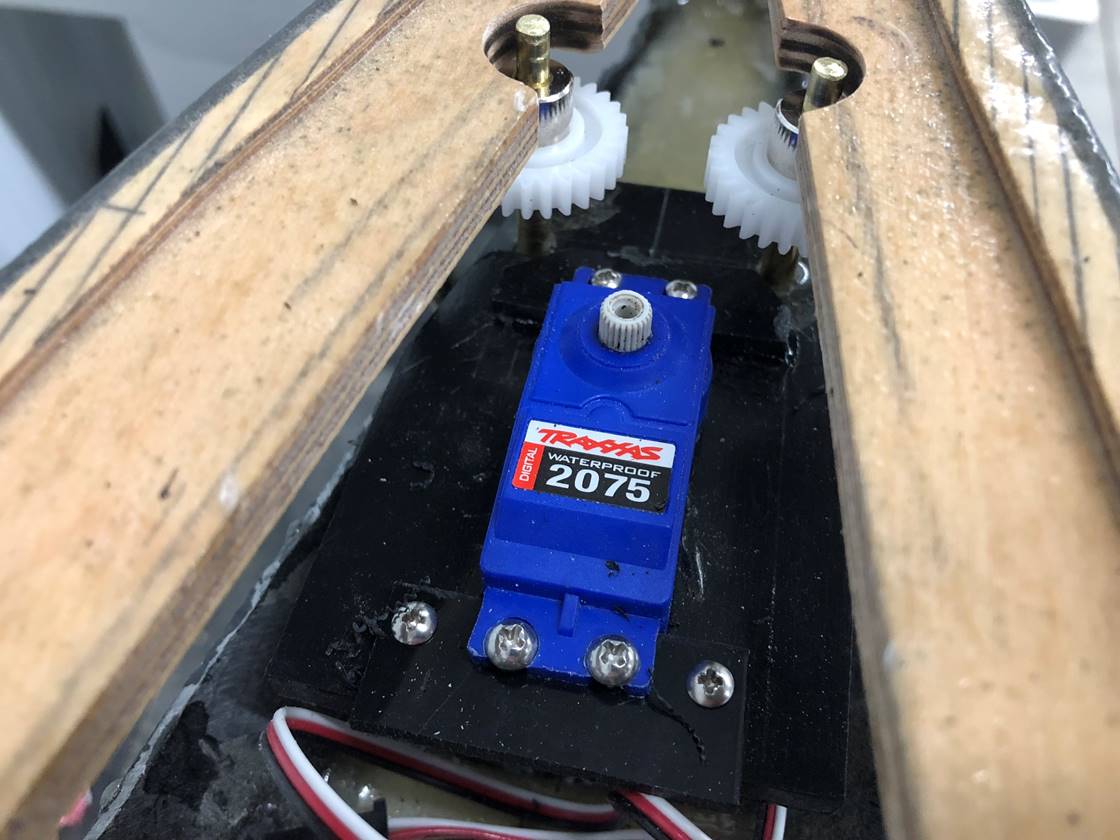
Props/rudder setup. Mostly I wanted to show the rudder
servo mount. There are various ways that can be accomplished, some people just
super glue the servo in the ship, I’d prefer to have something a bit more
solid. I usually make a squared off U shaped mount to accept the servo to hold
it steady and screw the stern most end directly to the mount. The back end gets
a set of screws to hold it to a removable piece and a set of screws to hold the
removable piece to the mount. The rudder shafts go through the mount and all of
it gets epoxied into place. The two rudder posts/shafts have a smaller gear (35
tooth 24 pitch) while there servo itself has a larger gear (in this case 51
tooth, use any thing in the low 50’s and it will be fine).
Rudder servo affixed to the mount with the horn/large
gear off of it.
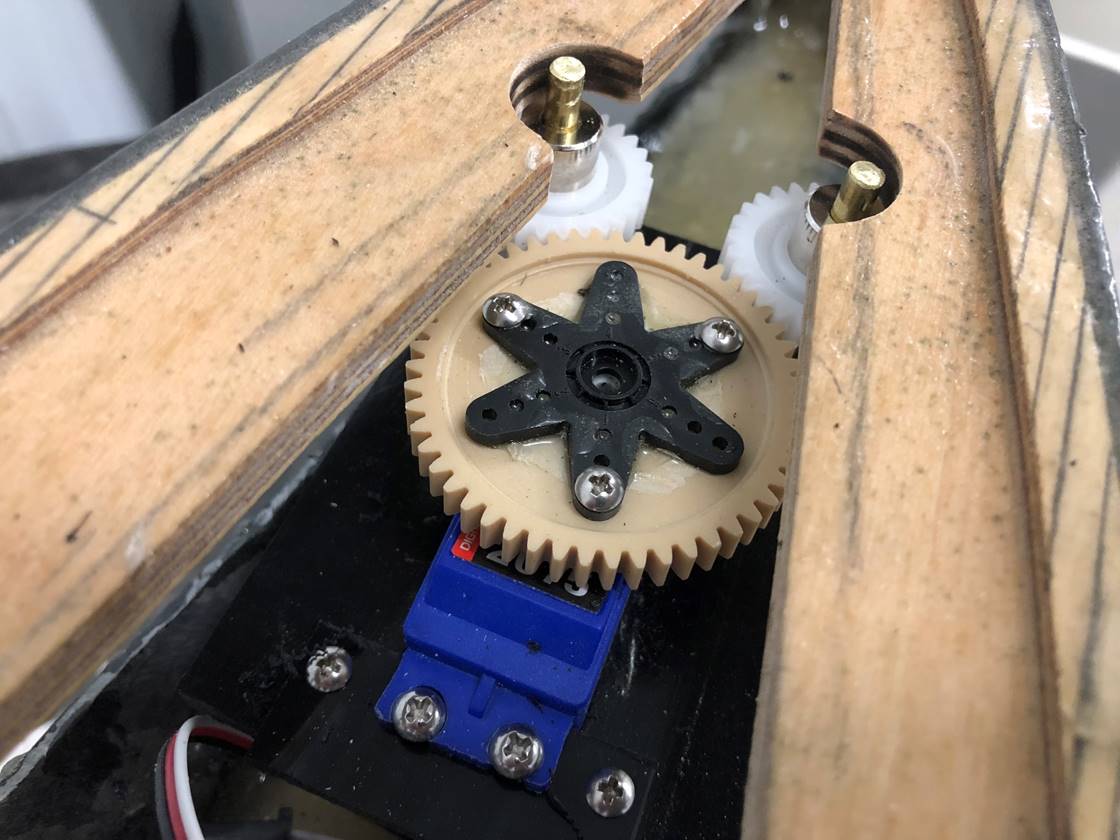
Here it is with the servo horn/gear on top (minus the
screw). I usually super glue the gear to the servo horn, with this gear I had to
drill out the center of it so the servo horn would sit flush. I also put screws
through it, and lastly put a little left over epoxy on the top when I happen to
be using epoxy another project. All of this is a lot of energy for a small part
of the ship but rudder control is considerably important, and can still be
changed out relatively easily should the servo die.
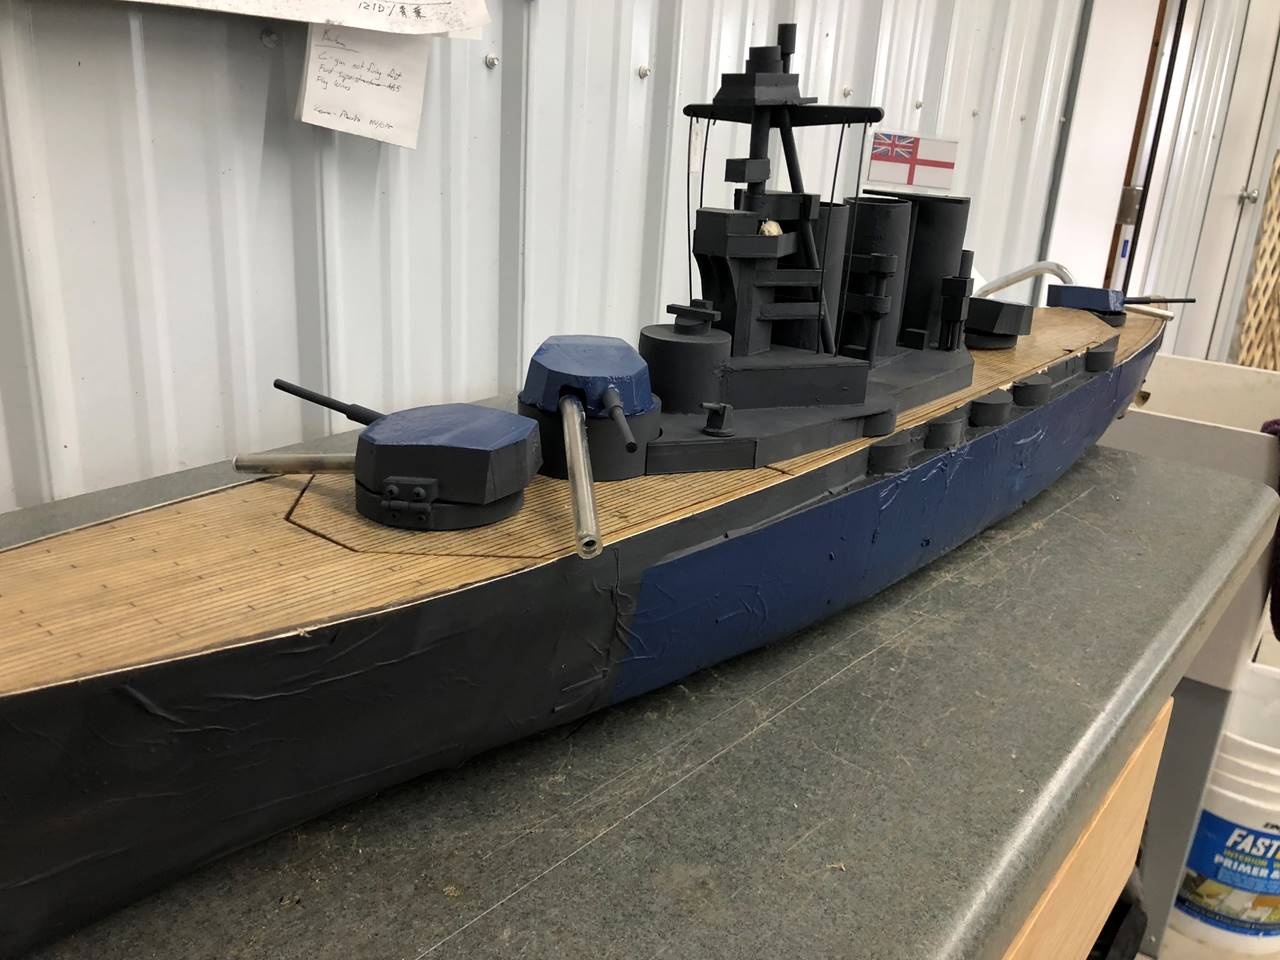
Another glam shot with the turrets carved out and
false barrels attached. I use hinges to attach the turrets to the barbette and
another small screw to attach the barbette to the circular piece of wood as
seen in other parts of this article. It looks a little ugly but is barely
noticeable when it is on the water battling and is very functional.
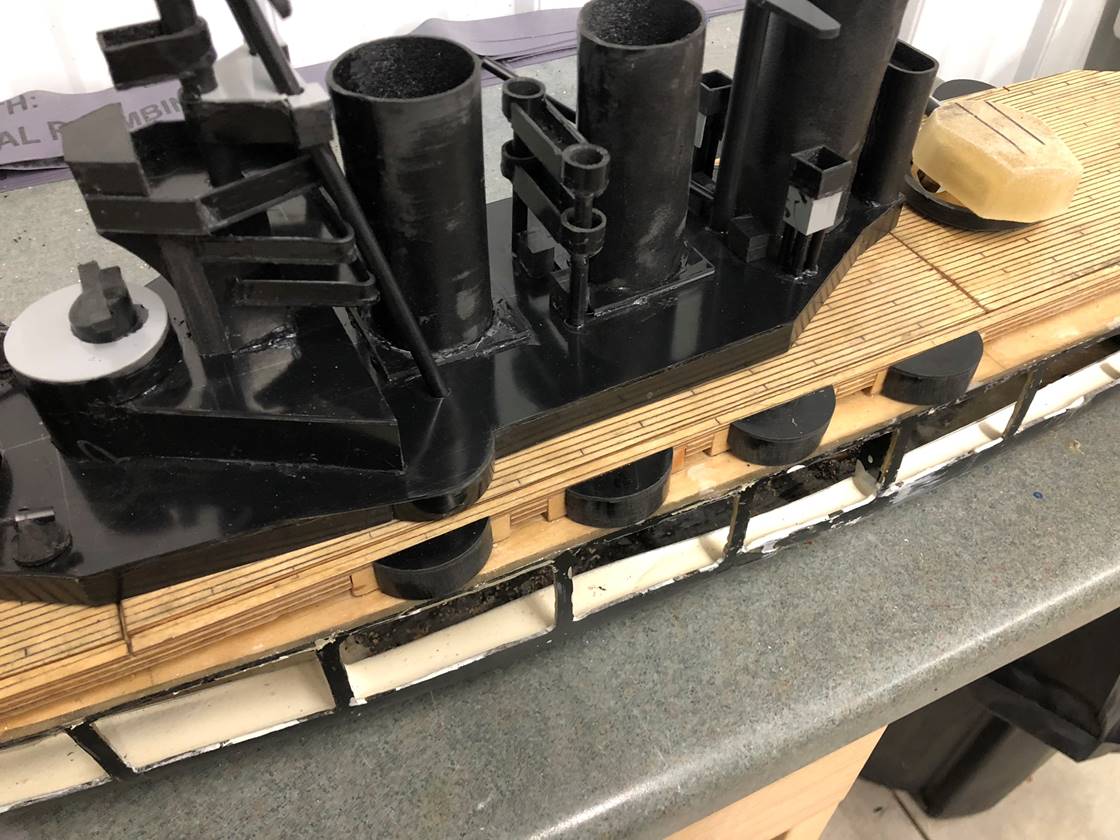
Added the casemate gun tubs. These are ABS pipe with a
1/16 thick roof added to it. They are screwed in through the supporting wood
from the inside out.
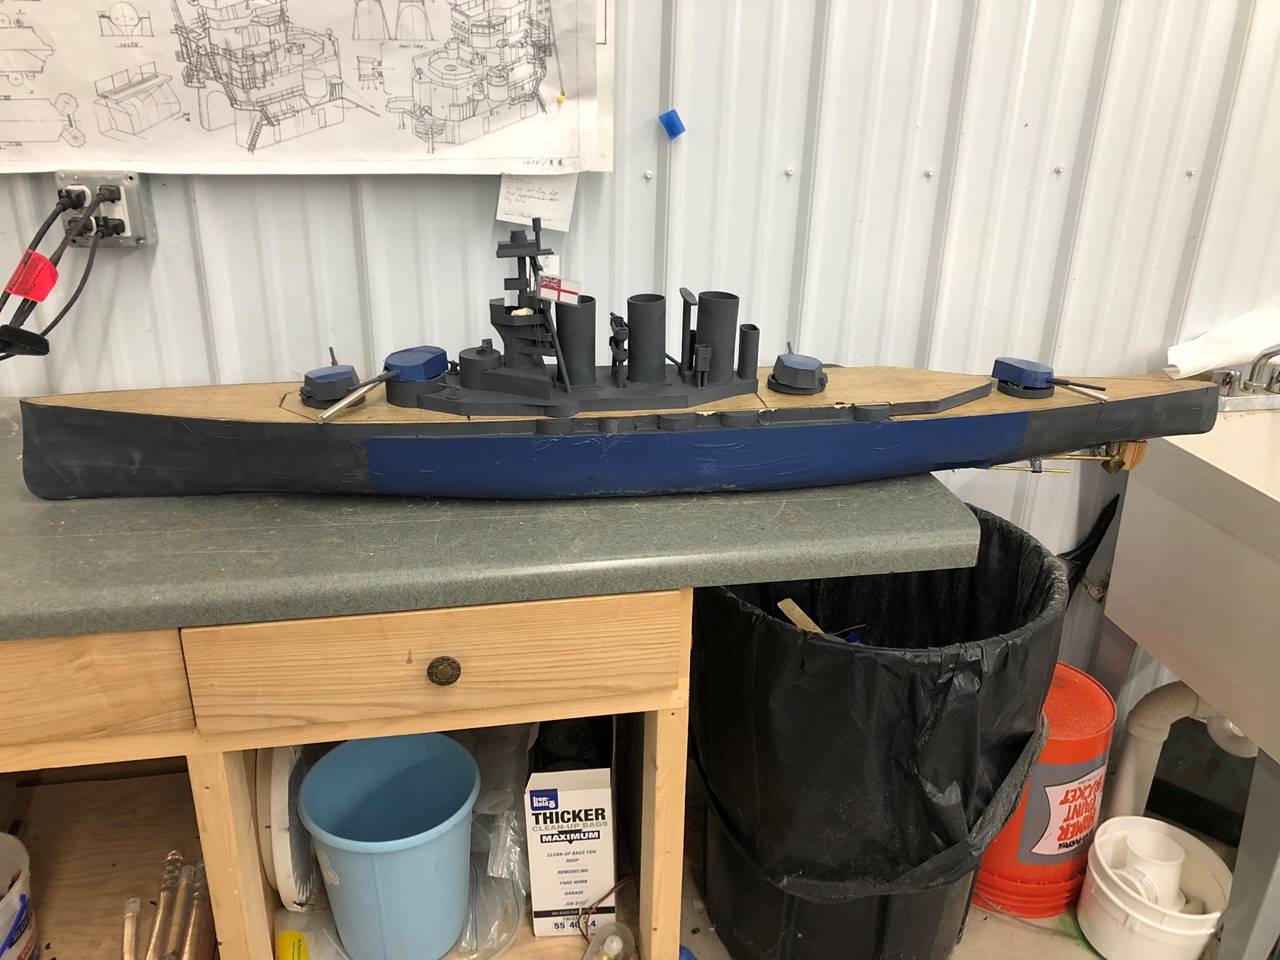
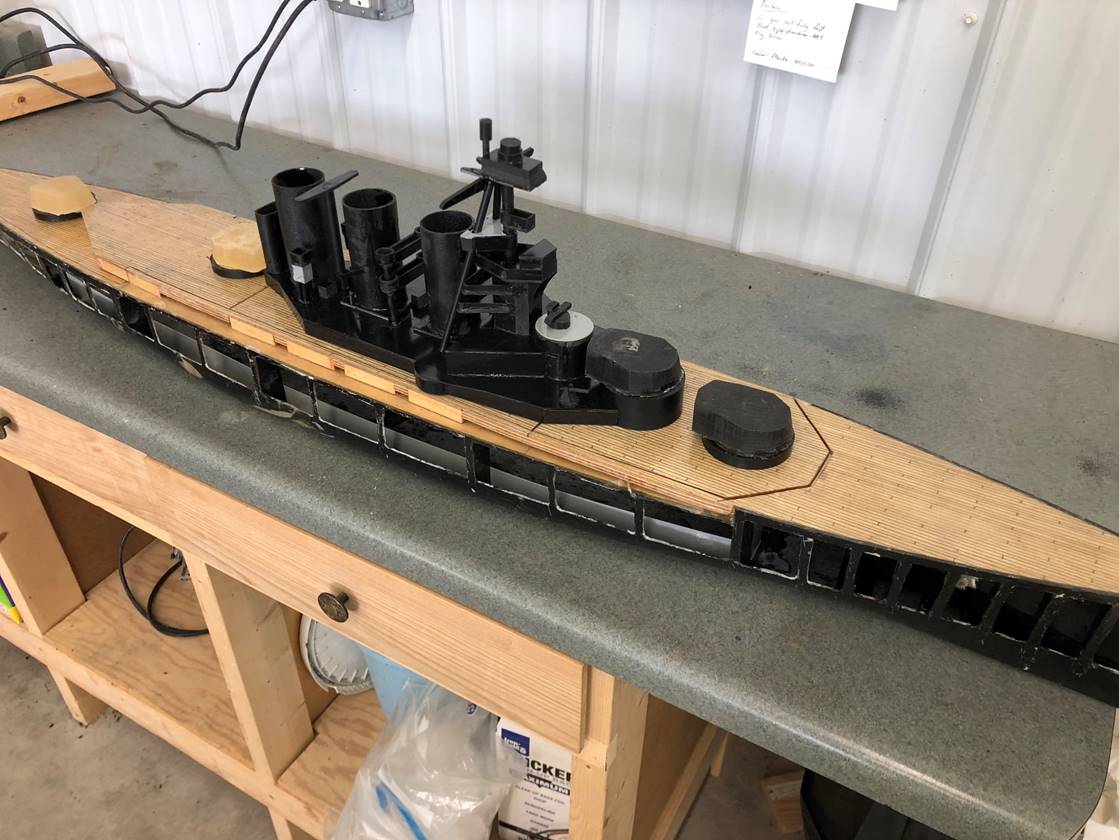
Sheeted. I found a cool paint scheme. I’m not entirely
sure if it is historically correct or even someone else’s imagination, but I think
it looks cool.
Note the polar bear captain. The “B” turret is not an
active gun, but a barrel meant to confuse Andy. I suspect it will work.
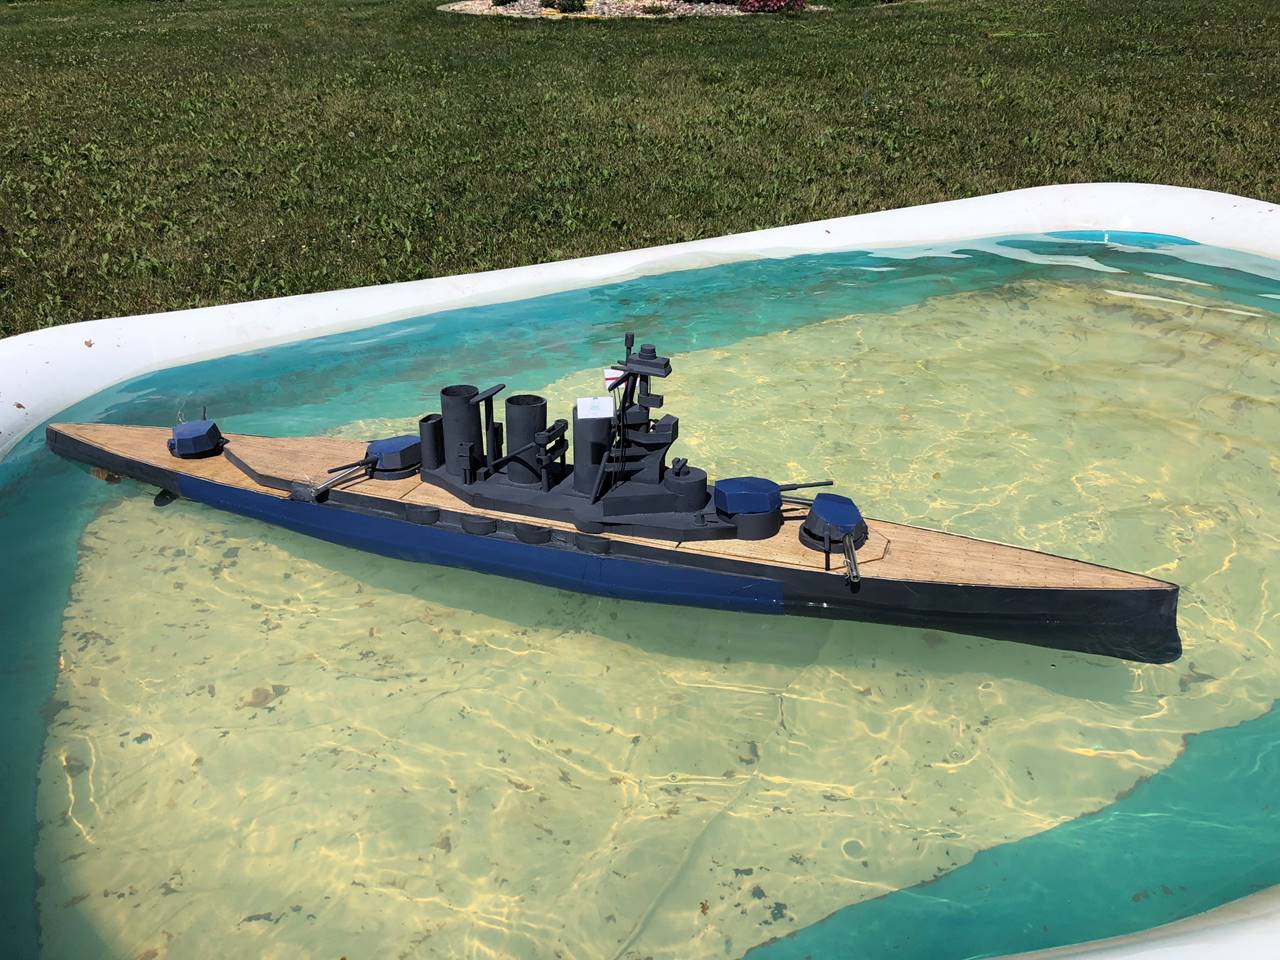
Trying to sort out how I need to balance it. I left
room on the inside to shift the bottle/batteries, and add weigh if needed. It seems
sort of close but will really need to battle a few times to see her sink and
drive with damage. My kiddie pool isn’t large enough to tell if she turns well
or not, but it accelerates like a beast.