
- Yamato -
IJN Yamato – Tyler (2021)
84.0 units, 24 seconds, Japanese Super Battleship
launched 1940
The Yamato class battleships were the heaviest,
widest, and most heavily armed battleship ever made. It was the only ship class
to ever mount 18 inch guns. It was considered the
pinnacle of achievement designed for ship to ship
large gun combat. In reality however, due to fire control and other
technological advantages, as well as numerical advantages of the American
battleship fleet, the two Yamato Class ships and the several older modified
battleships of the Japanese navy would have likely struggled significantly in
this type of surface engagement. Additionally, due to the dominance of air based combat in controlling naval engagements during WW2
which became the strategic centerpiece of the pacific war, supply and fuel
limitations, and hesitation to commit the main Japanese battleship fleet, the
“decisive battle” for which the ships were designed never happened and instead
both the Yamato and Musashi were sunk by overwhelming air attacks.
Like most battlers, when I was first becoming
interested in the hobby I wanted the biggest and baddest ship possible, so the Yamato was on my radar. Like
most new battlers I had no idea what I would have actually been getting into at
the time (tons of patching and limited fun due to inexperience and a huge ship)
and luckily the veterans were able to talk me out of building a BFT (big
floating target). However, after roughly 12 years in the hobby I believe that I
have acquired sufficient battling and building experience to attempt this very
advanced build. This ship should not be built by almost all battlers.
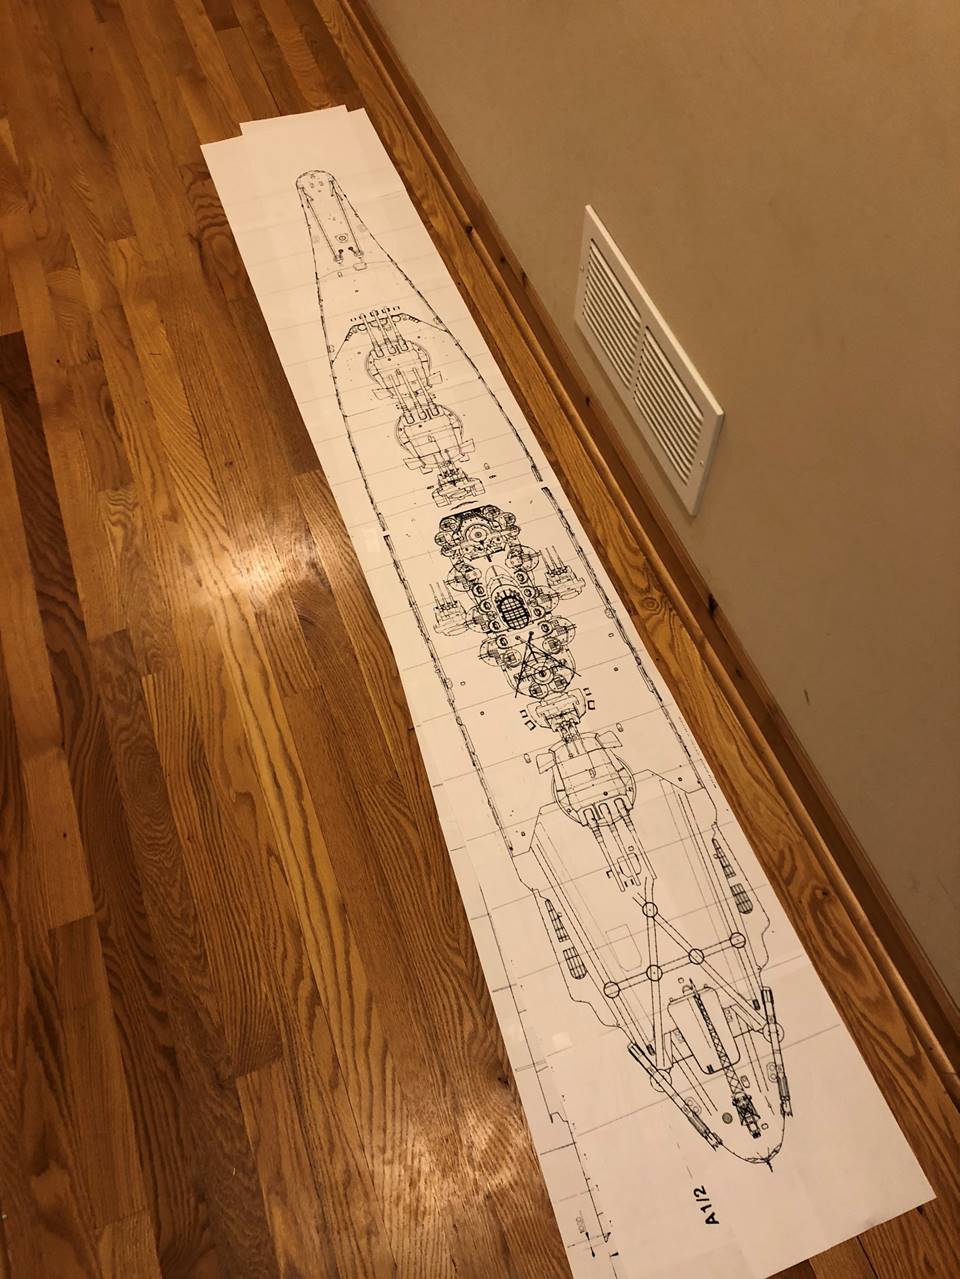
Even lying out the plans is intimidating. The ship is
roughly 71.5 inches long and 10.6 inches wide.
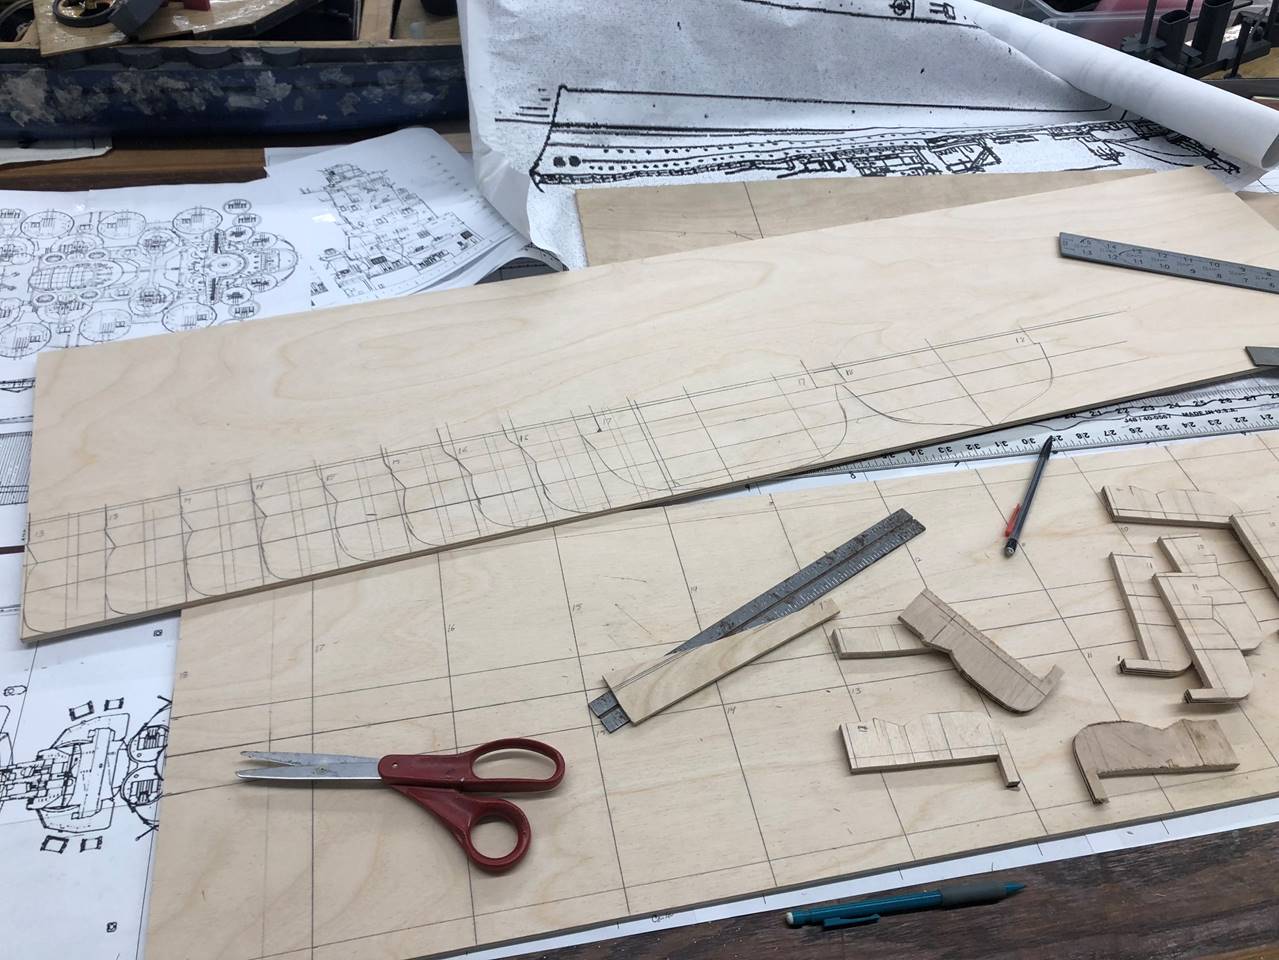
I will try to document the baseboard technique that I
used for the ship which I used in combination with the upside-down stylebuild. Except for the far bow and stern
I opted to only use the outer edge of the ribs as the center would be cut out
any way, and it would save a ton of wood. Each of these sets of ½ of the rib
were inset into the baseboard. 1/4 inch 5 ply birch
plywood is used.
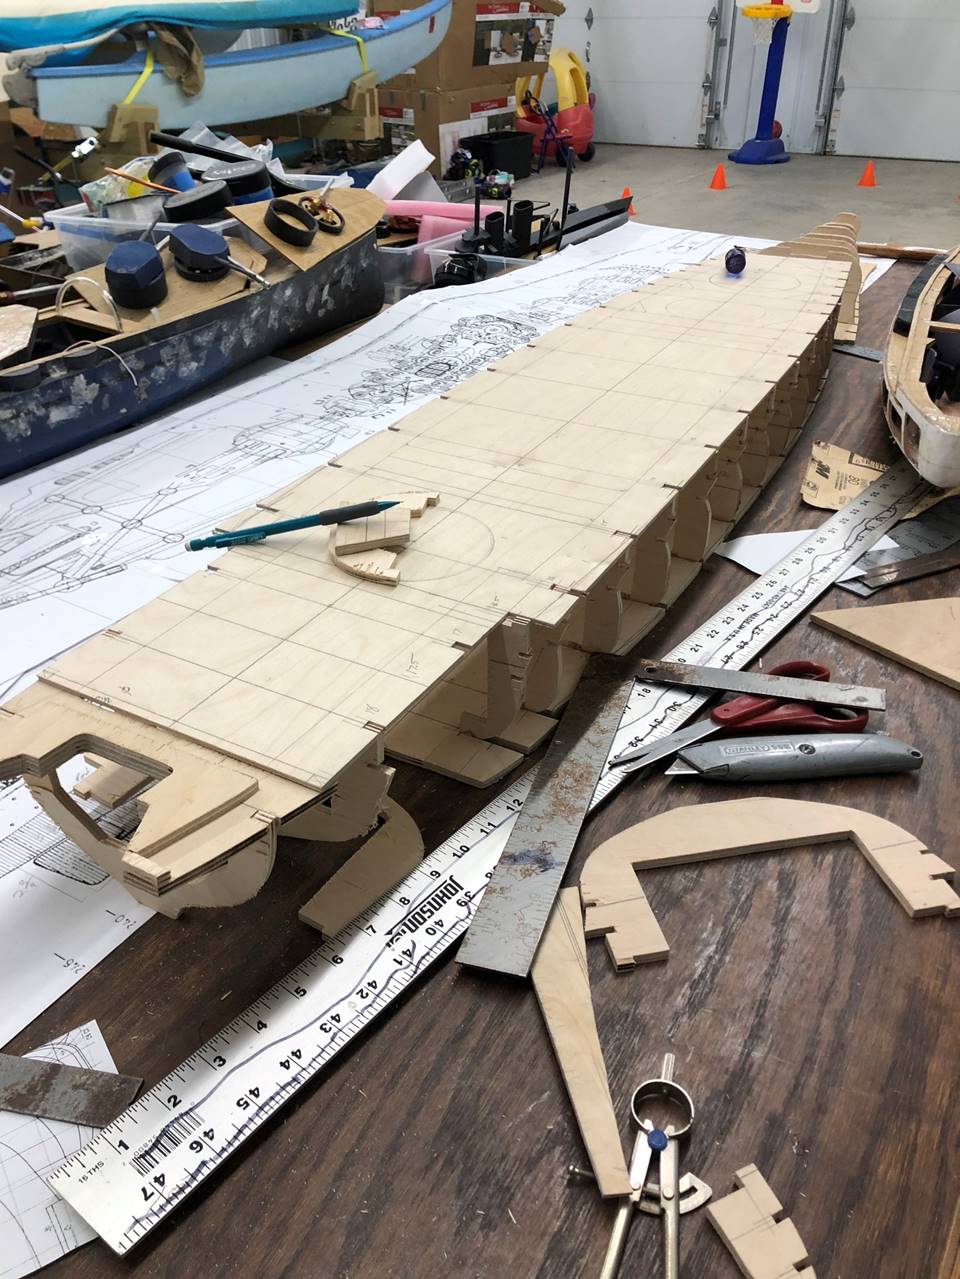
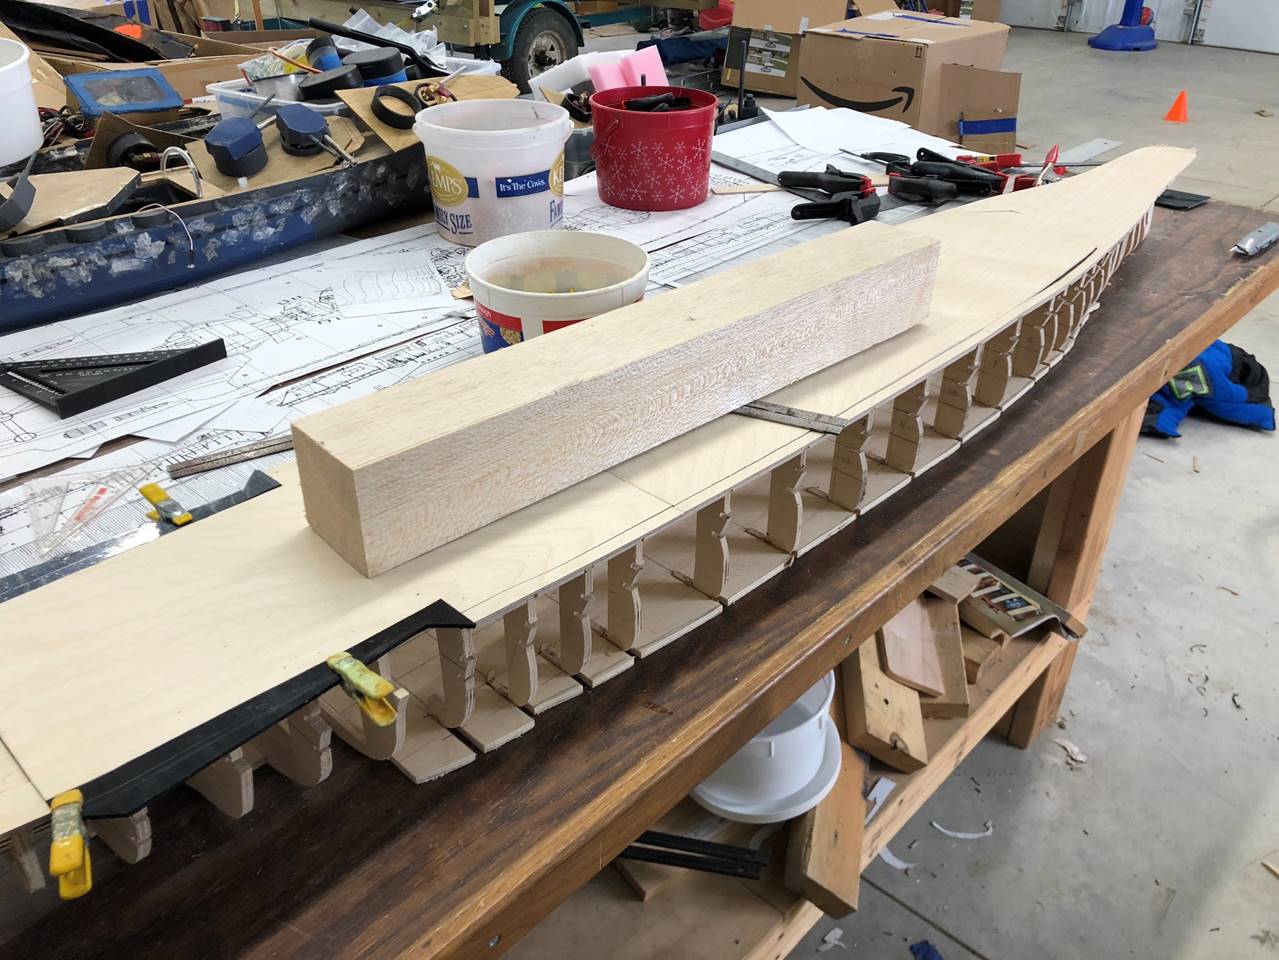
This picture shows the upside-down build technique
used in the far bow and stern. The sub-deck is notched to accept the ribs which
are not yet cut through the middle in this picture.
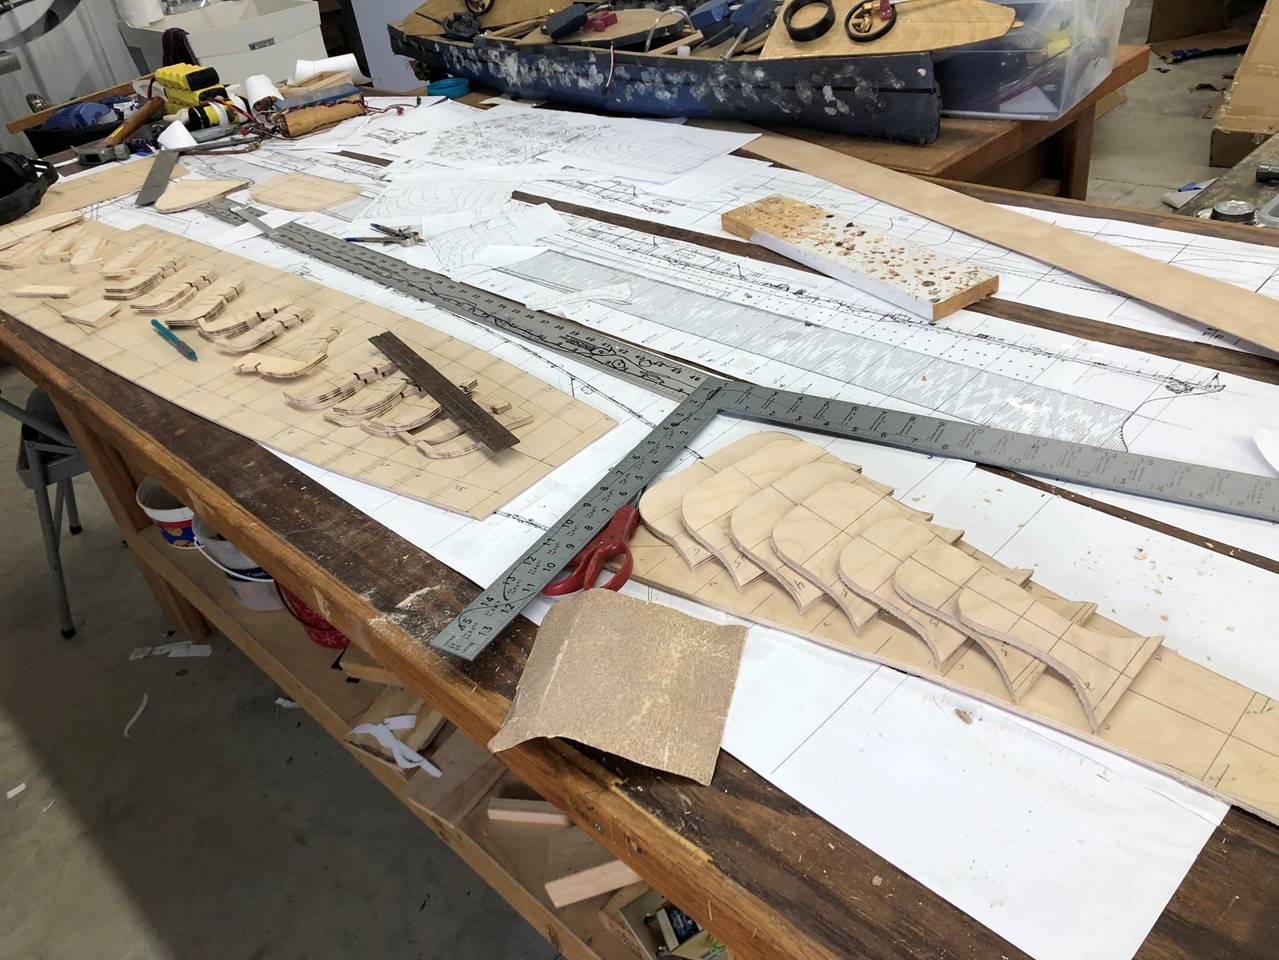
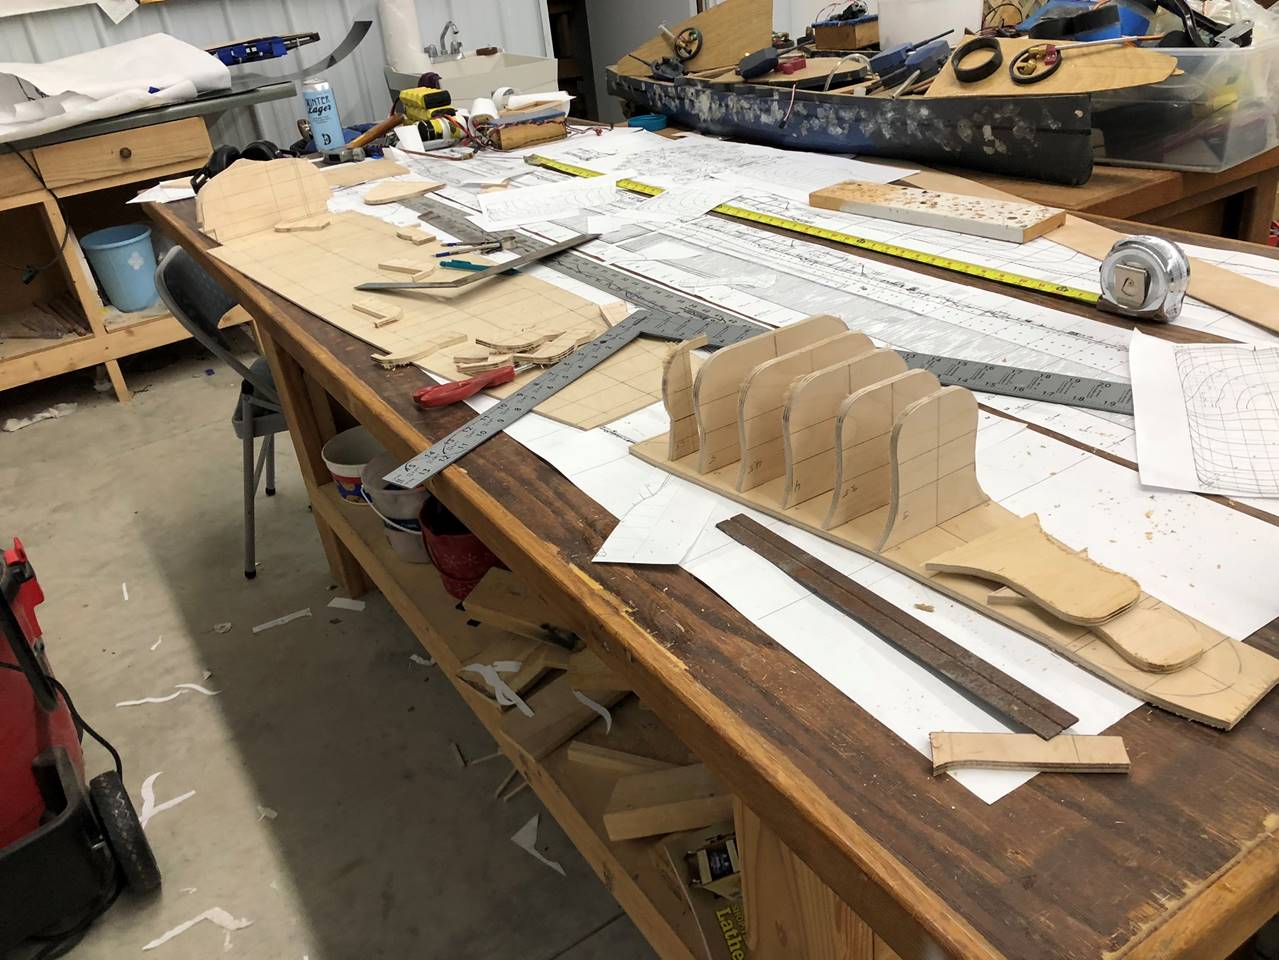
The ribs and sub deck sections are laid out. Due to
stringers which hold the shape of the armor belt, the middle section of the
ship gets 1/8 inch subdeck plus the 1/8 inch deck for
a total of 1/4 inch. Whereas the far bow/stern get 1/4 inch
sub deck plus 1/8 inch deck for a total of 3/8 inch.
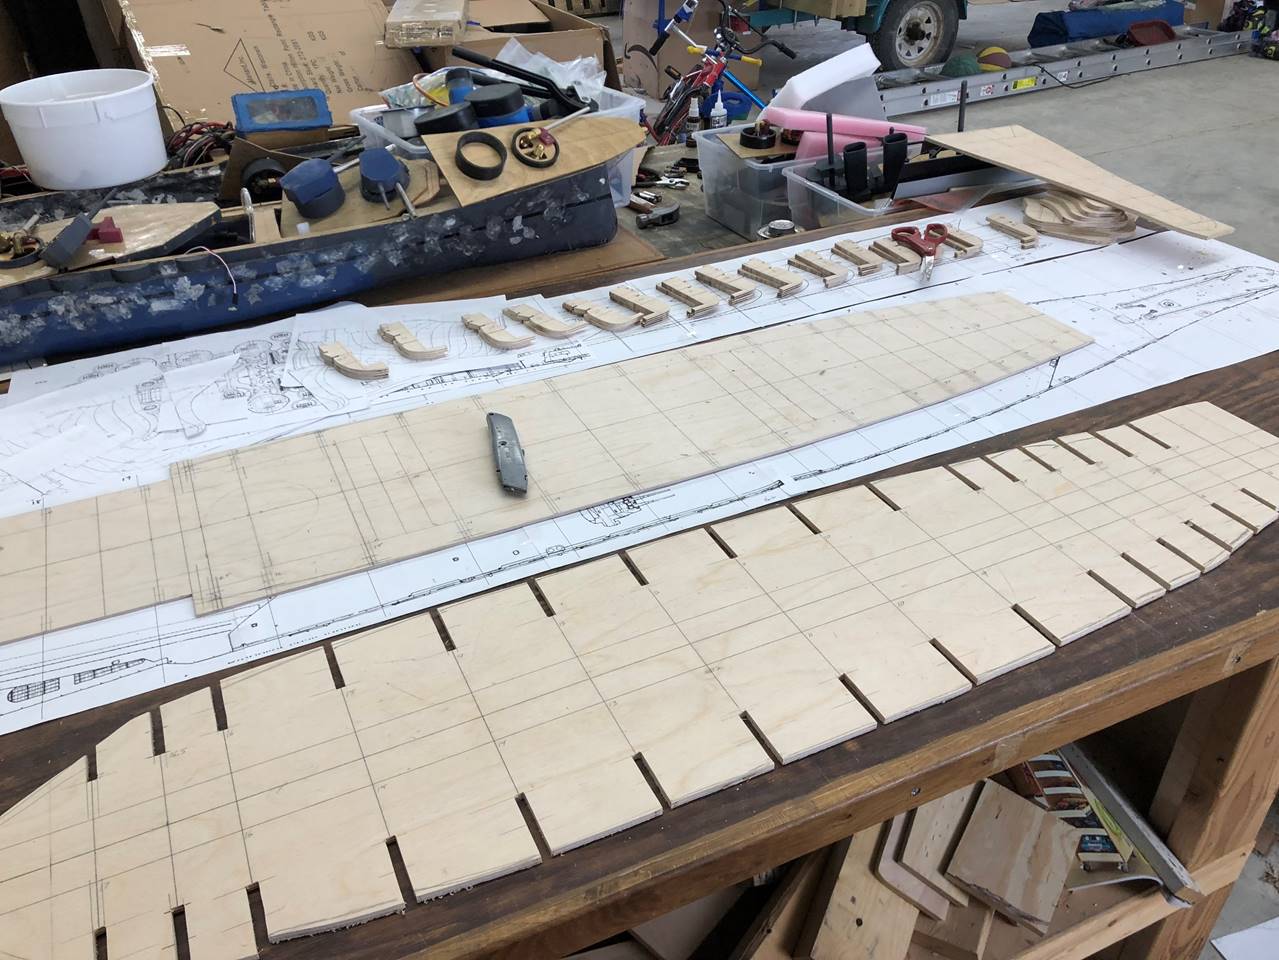
Here is the baseboard for the middle section with
accepting notches cut. The subdeck is next to it.
This is with the ribs glued in. It is in the process of
getting things to line up correctly with the subdeck.
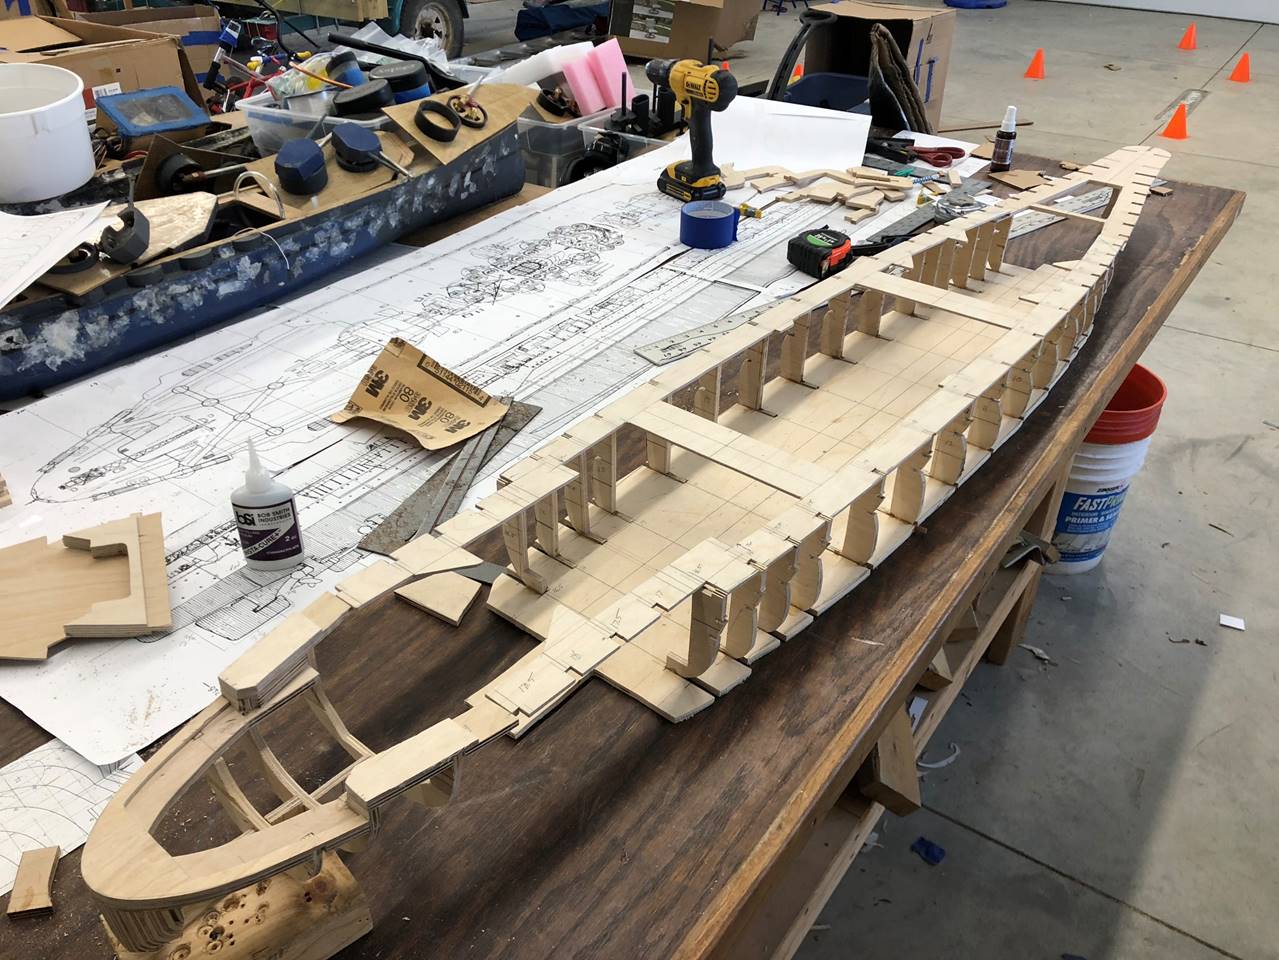
Here the 3 sections of the sub deck (bow and stern
most 1/4 inch, middle section 1/8 inch) are glued
together. The ribs are glued to the baseboard. I’m opting for 3 main deck
sections and as such the cross braces will be between the turrets. Generally I like to have the middle section with
superstructure be the main access point for routine changing of CO2 and
batteries for most battle operations. If done correctly this makes stacking the
ship on a boat rack without the middle superstructure much easier as well. The
bow and stern deck pieces keep the turrets/guns in place for routine battle
prep but are removed when necessary for maintenance.
The deck pieces are laid on top with the outer most edges
cut off and glued to the sub deck. The far bow of the ship is not removable and
with a ship this large it will not really need to house any internal
components. The far stern will need to be accessible to get to the rudder and
as such I made a small 4th deck section where the step occurs. The
stern most large deck section houses the stern most turret. There are slight
overhanging sections of the ship which served as an aircraft deck. I built the
overhanging section from ABS plastic rather than wood so it can take more of a
beating and not chip away like wood might.
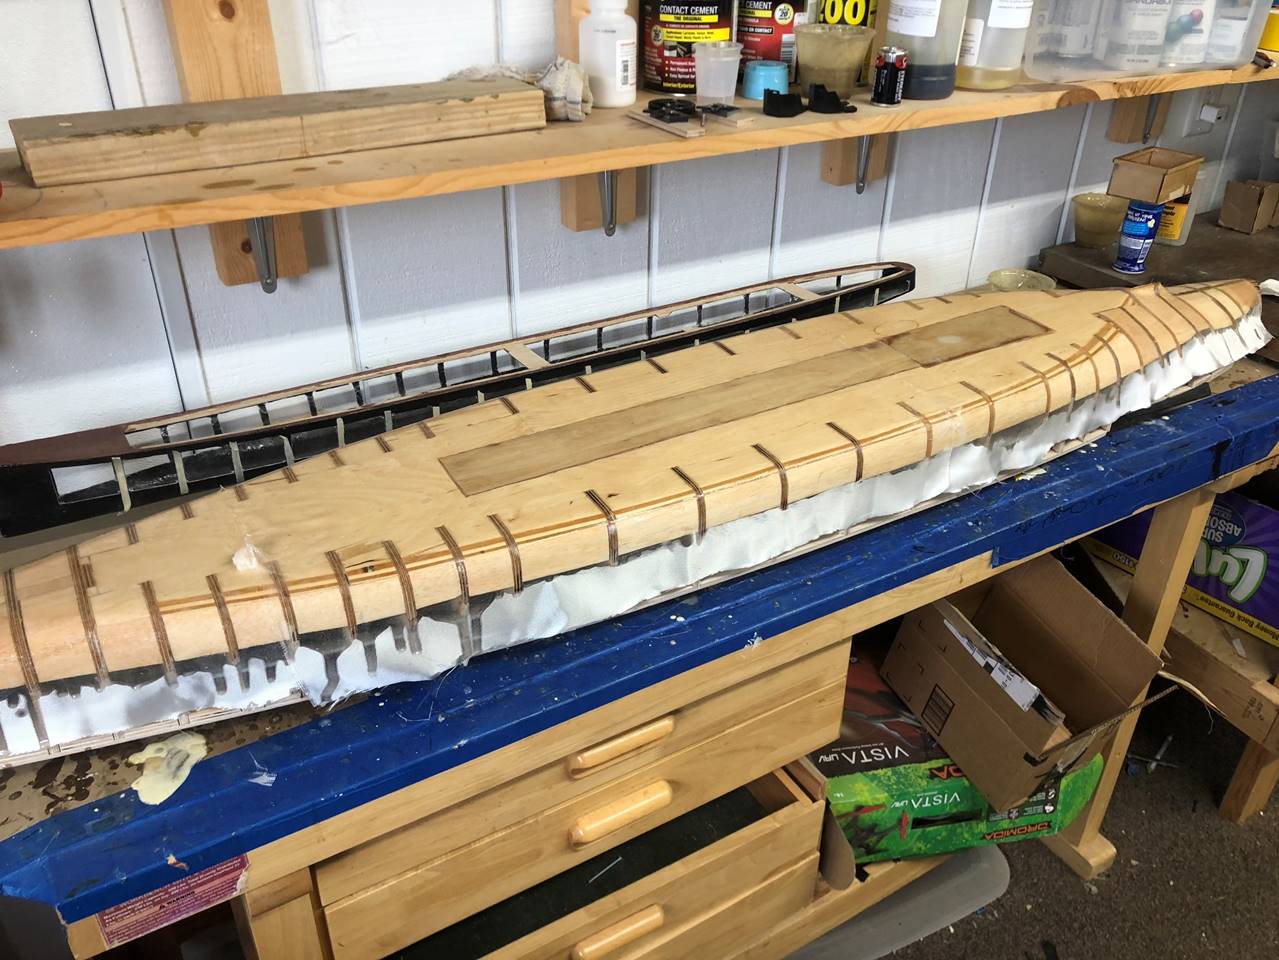
The bulge and stern/bow most water channeling is made
from a big slug of balsa.

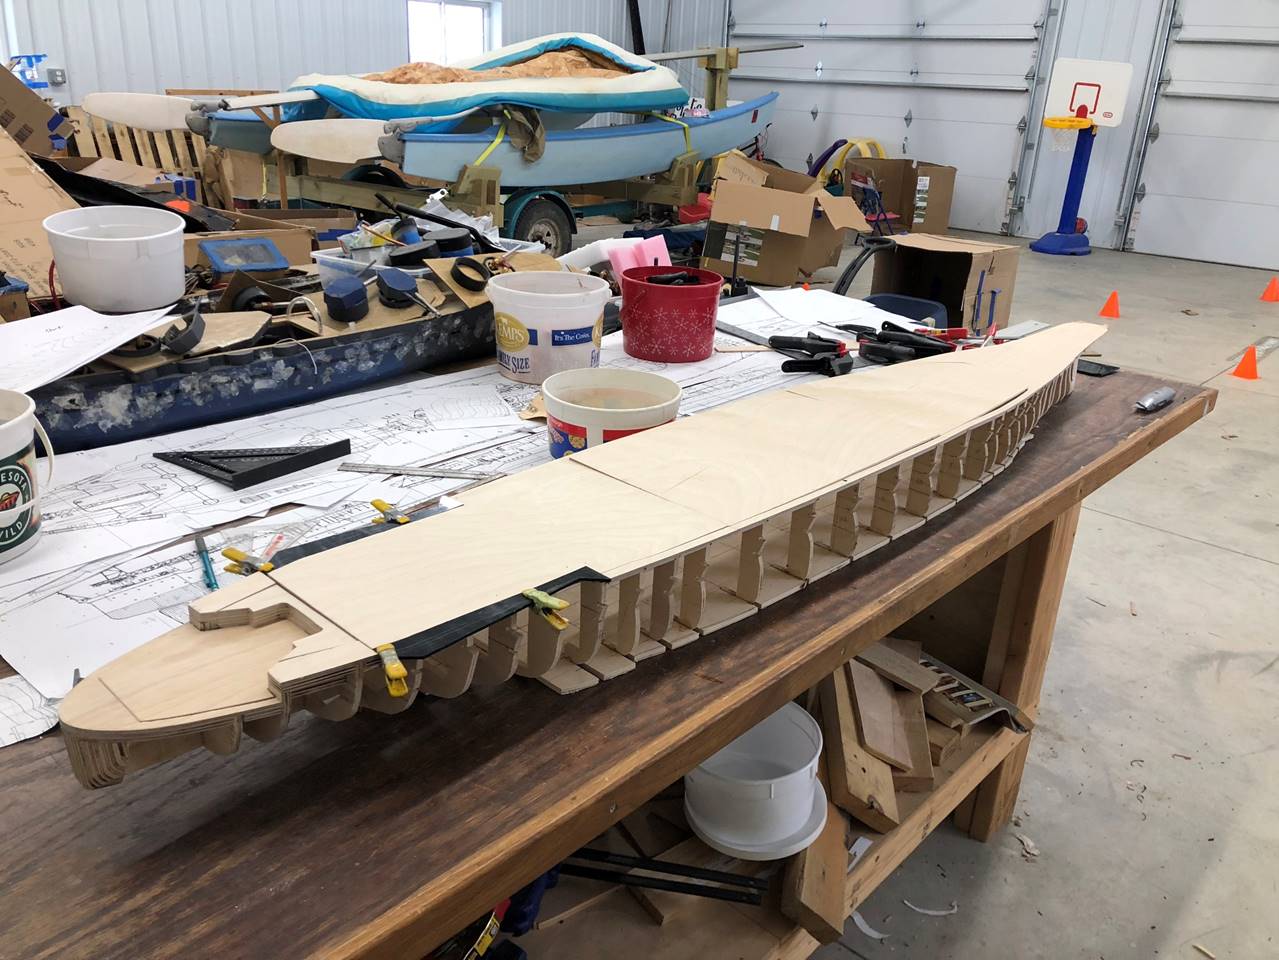
Balsa glued in and sanded smooth. The 1/4 inch subdeck is also sanded to follow the contour of the
ribs. This angle looks awesome. The far bow and stern are done with multiple
pieces of ¼ inch plywood rather than balsa as these areas are prone to getting
shot to shreds and need the structural integrity that balsa doesn’t offer.

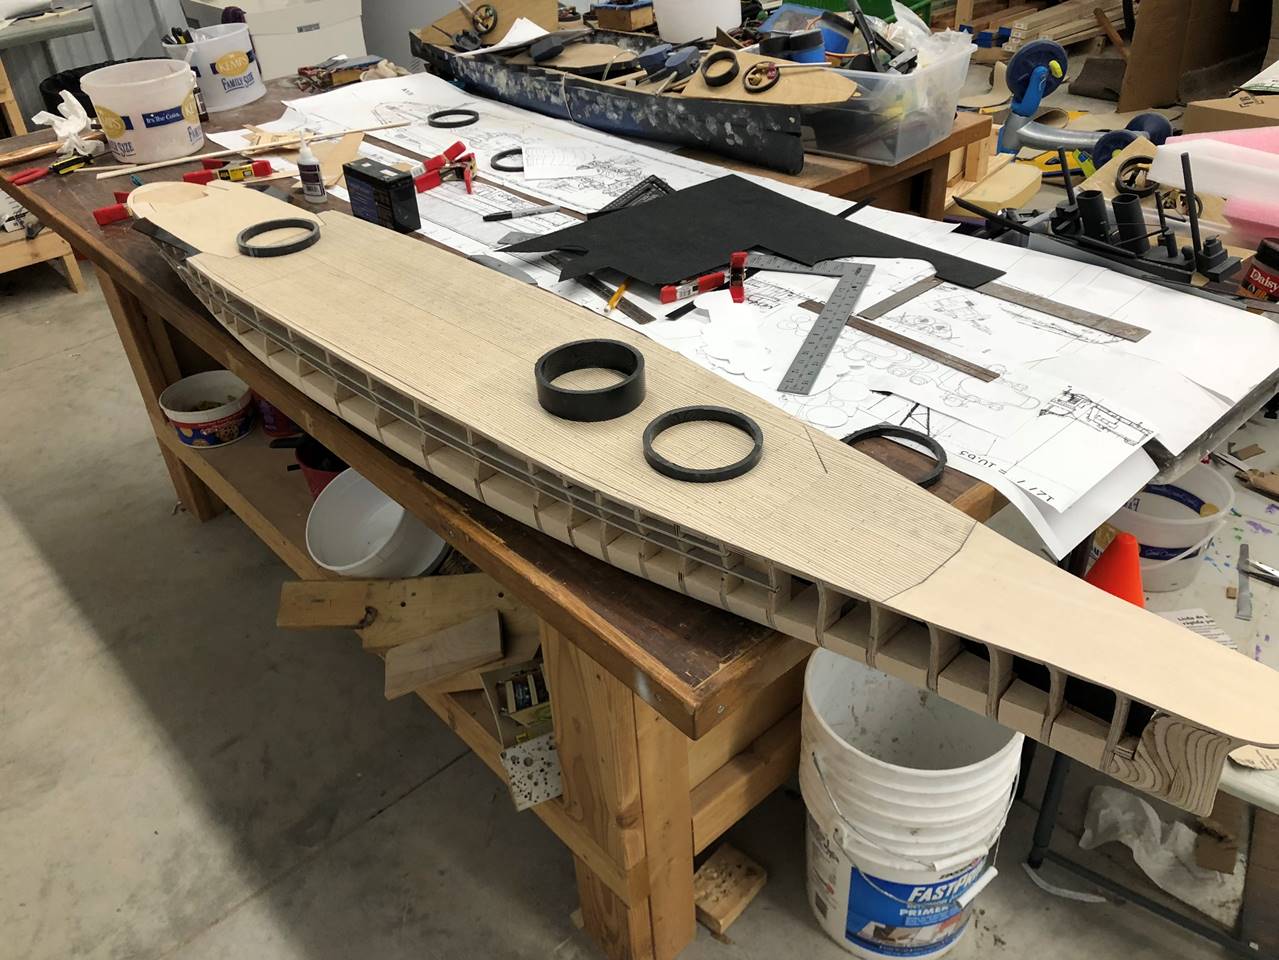
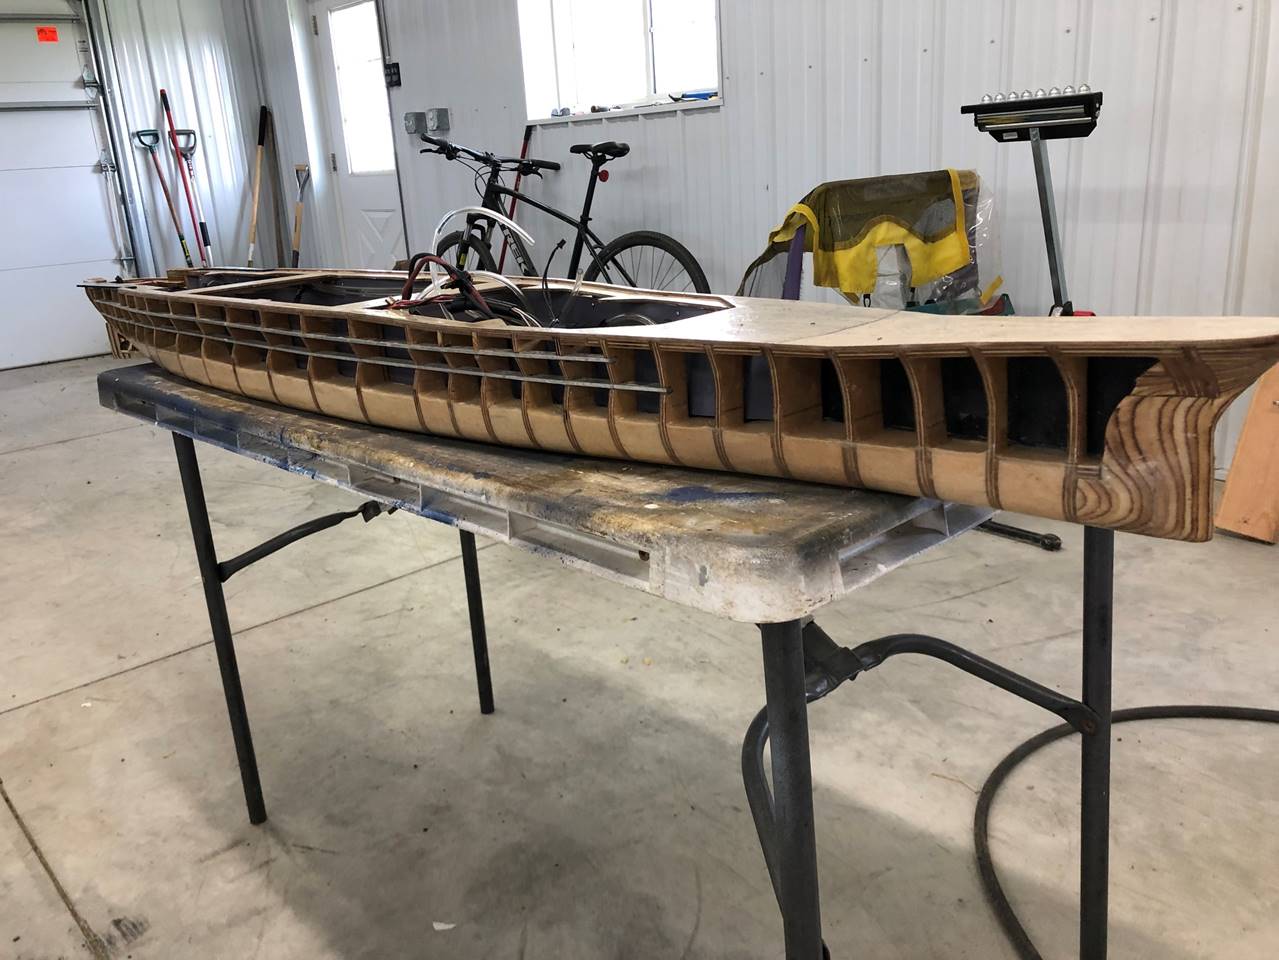
Similar angle but from the side. You can appreciate
the “swoop” in the main deck that occurs near the bow turrets.
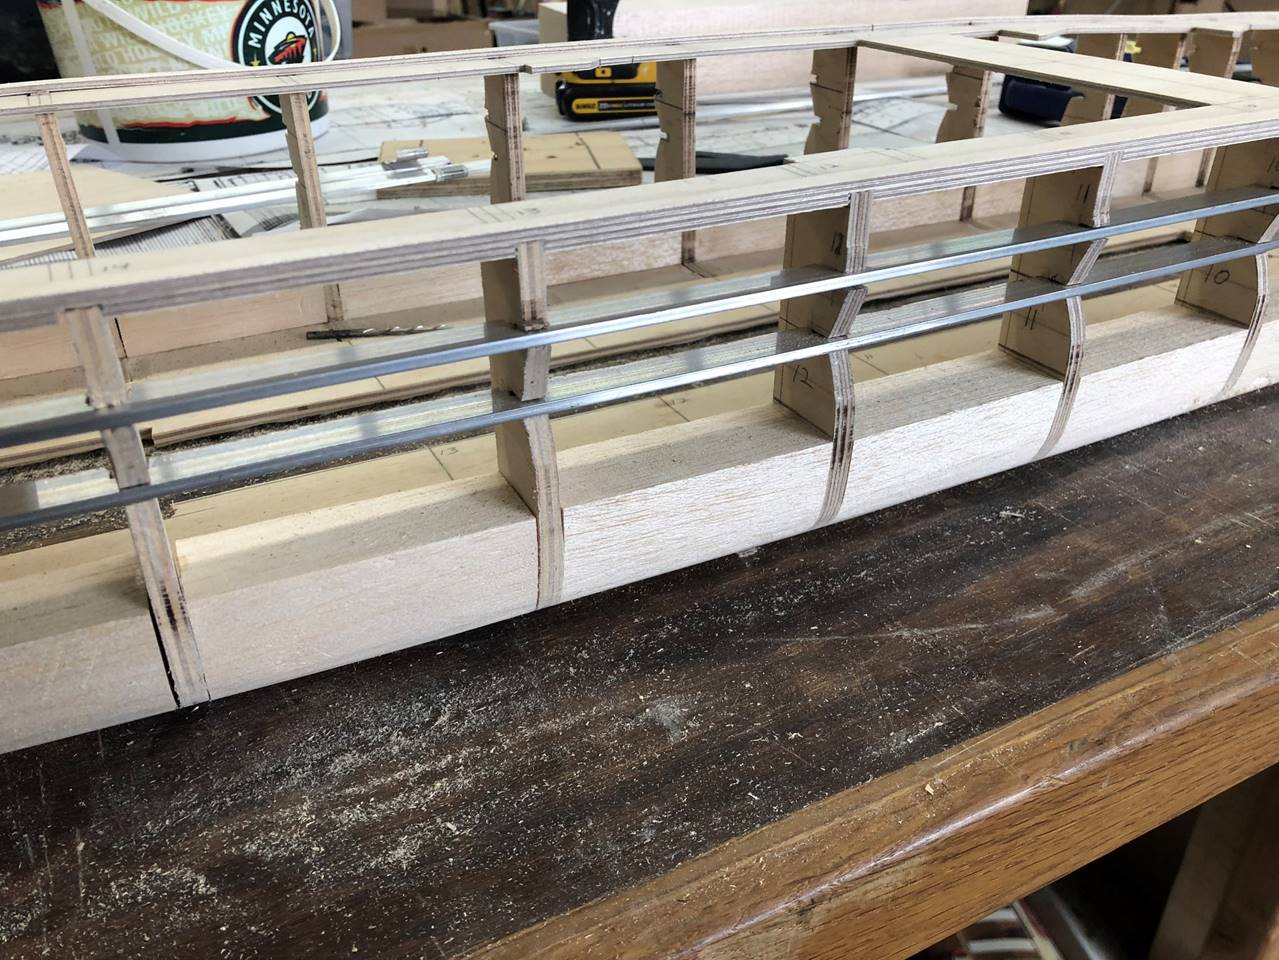
The stringers are made from 1/8 inch
thick aluminum. It is very strong against bb fire but very workable
especially when notched to fit into the ribs, but does take some patients when
bending to get it in place.
The barbettes are amazingly huge. I actually had a
hard time handling and cutting the huge ABS pipe evenly.
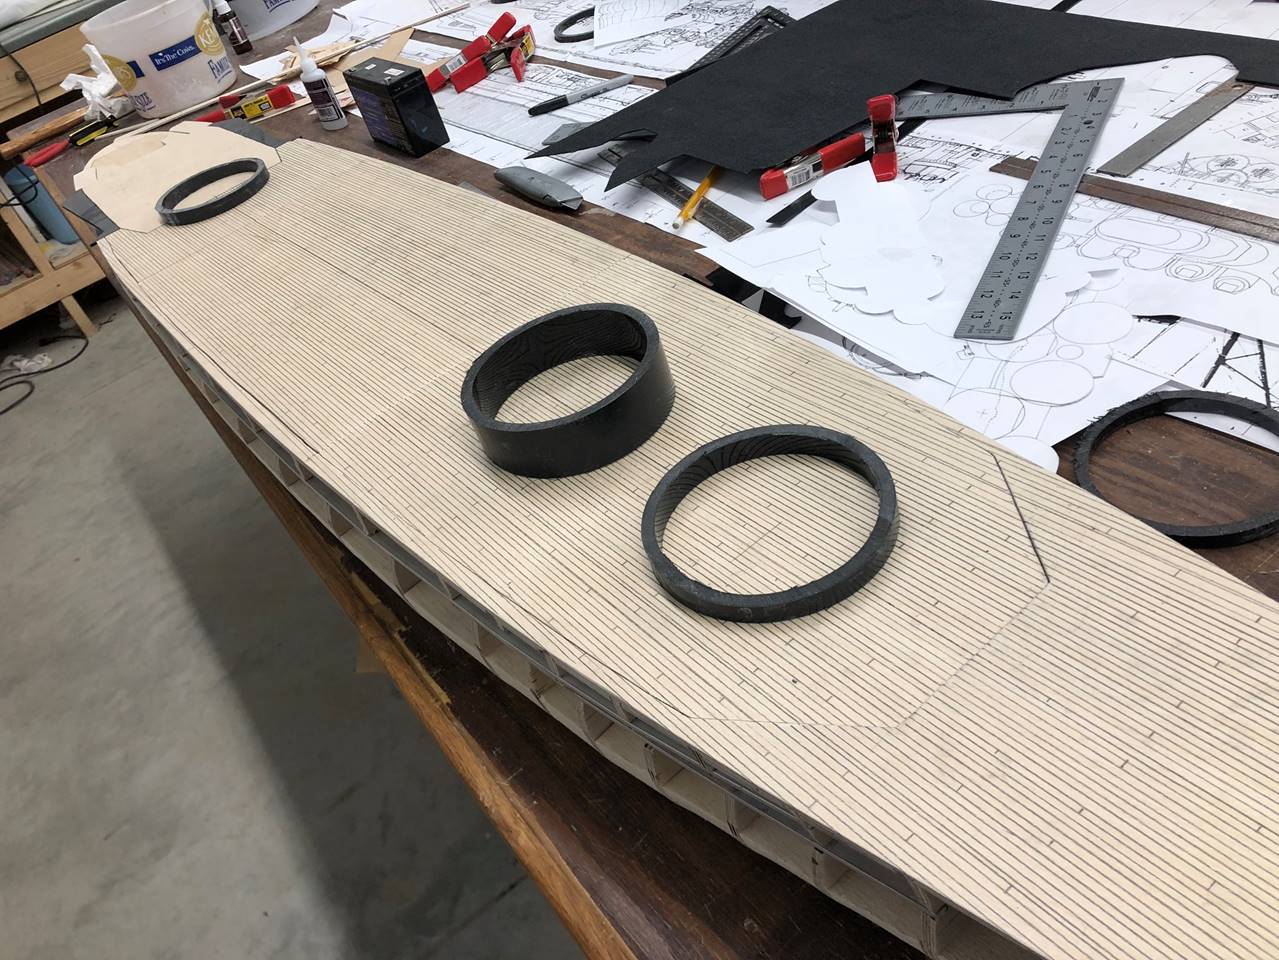
Close up of the deck planking. I love this effect. So
pretty but fairly unrealistic, the boards would scale to 3 feet wide.
Overlayed the entire thing with 5oz cloth and west
systems epoxy. I did 2 layers of fiberglass and sand/smooth re-finish with
epoxy 4 total times (2 with the fiberglass and 2 as finishing). Before the
epoxy/fiberglass layer the midline bottom of the ship was cut out for a water
channel, then I routed out a lip and inset a very thin piece of ply wood that
was sanded smooth with the bottom of the hull.

Shafts going in. 2 inch
props. Drag shafts not installed yet.
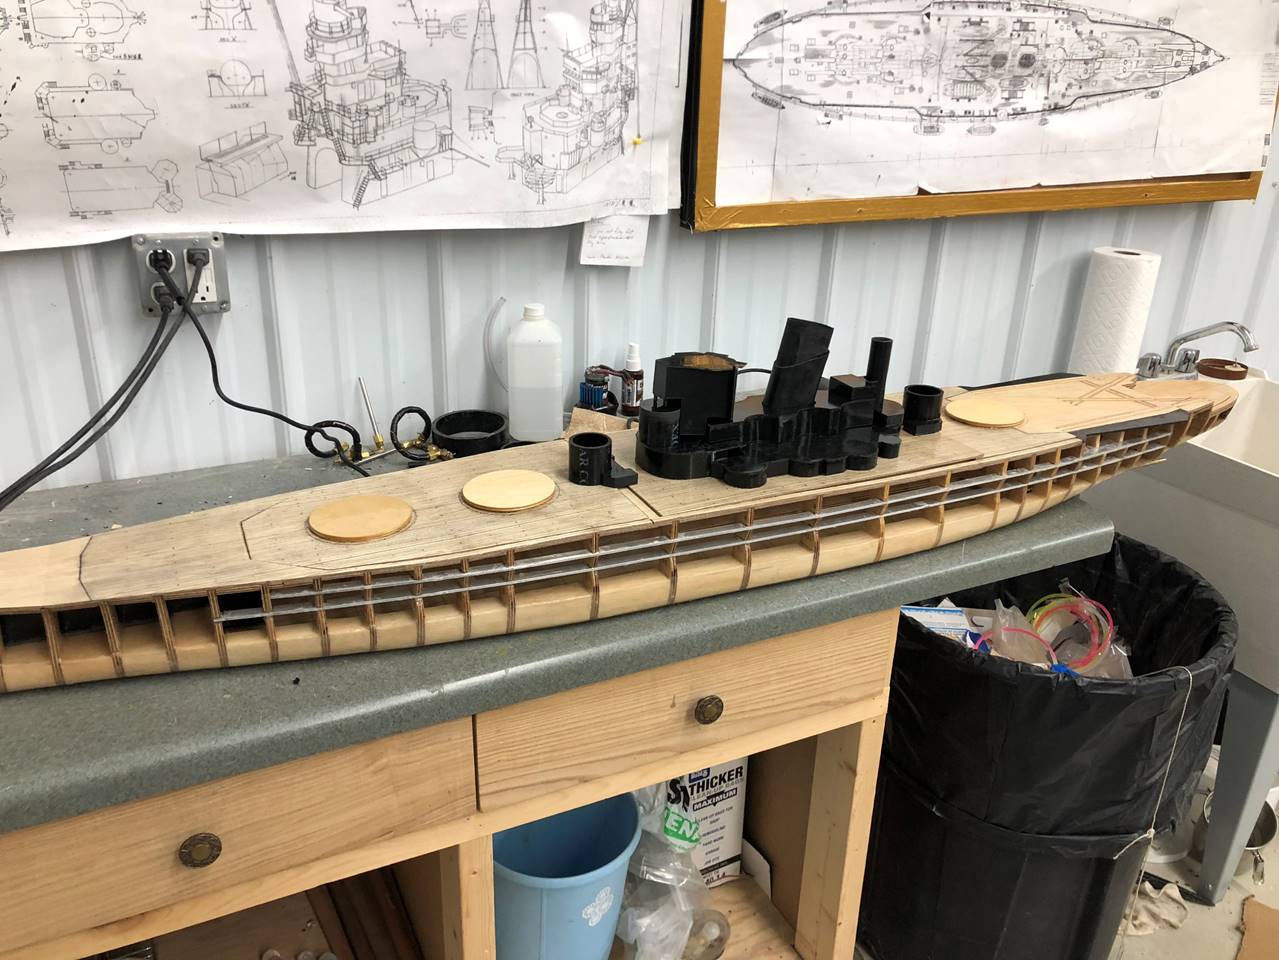
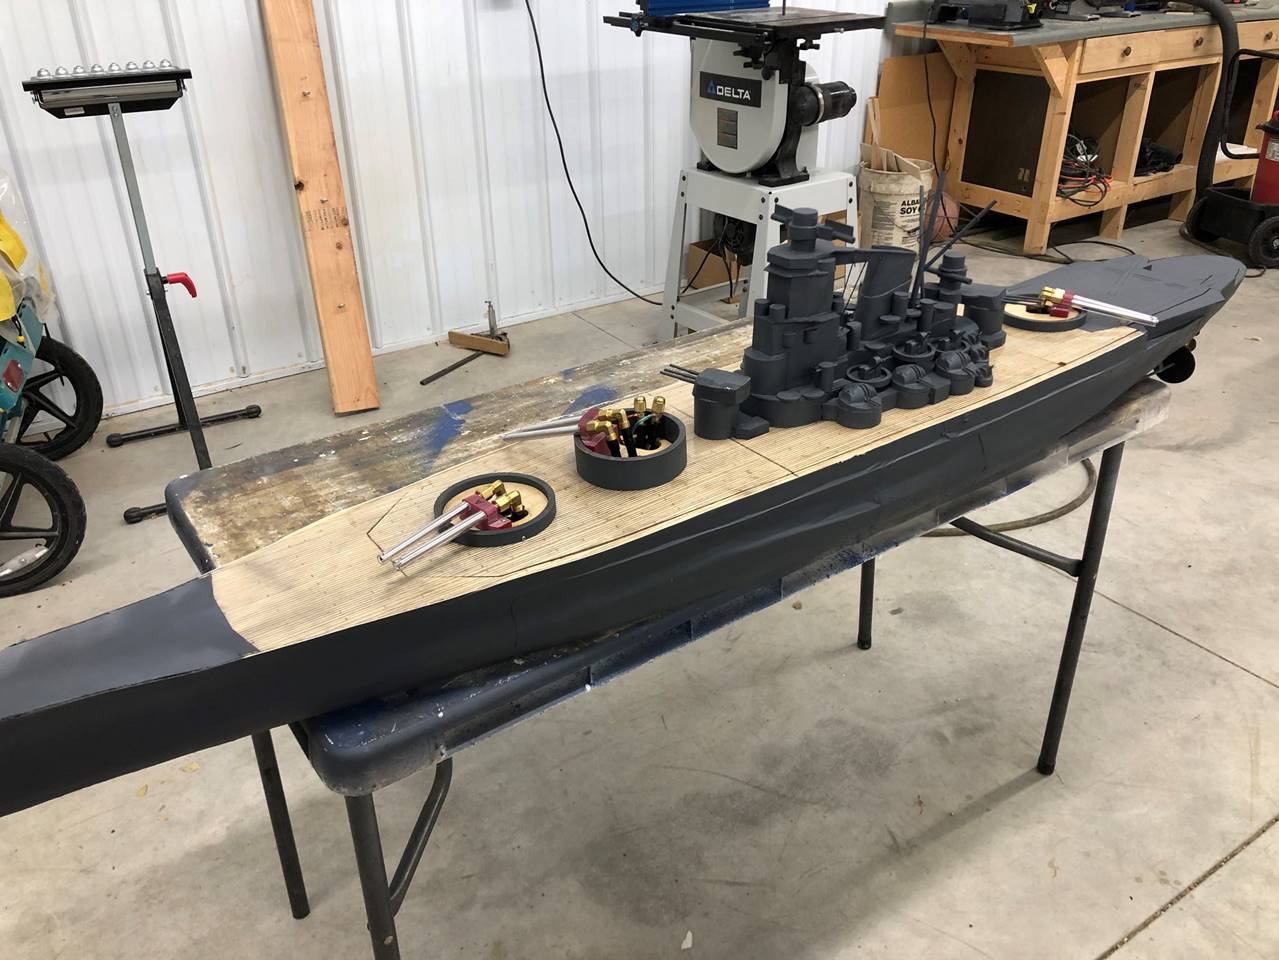
Epoxied everything to its final state, superstructure
is a work in progress in this picture. I like using wood circular inner
barbette rings that are glued to the deck to hold the outer layer of ABS
plastic pipe in place.
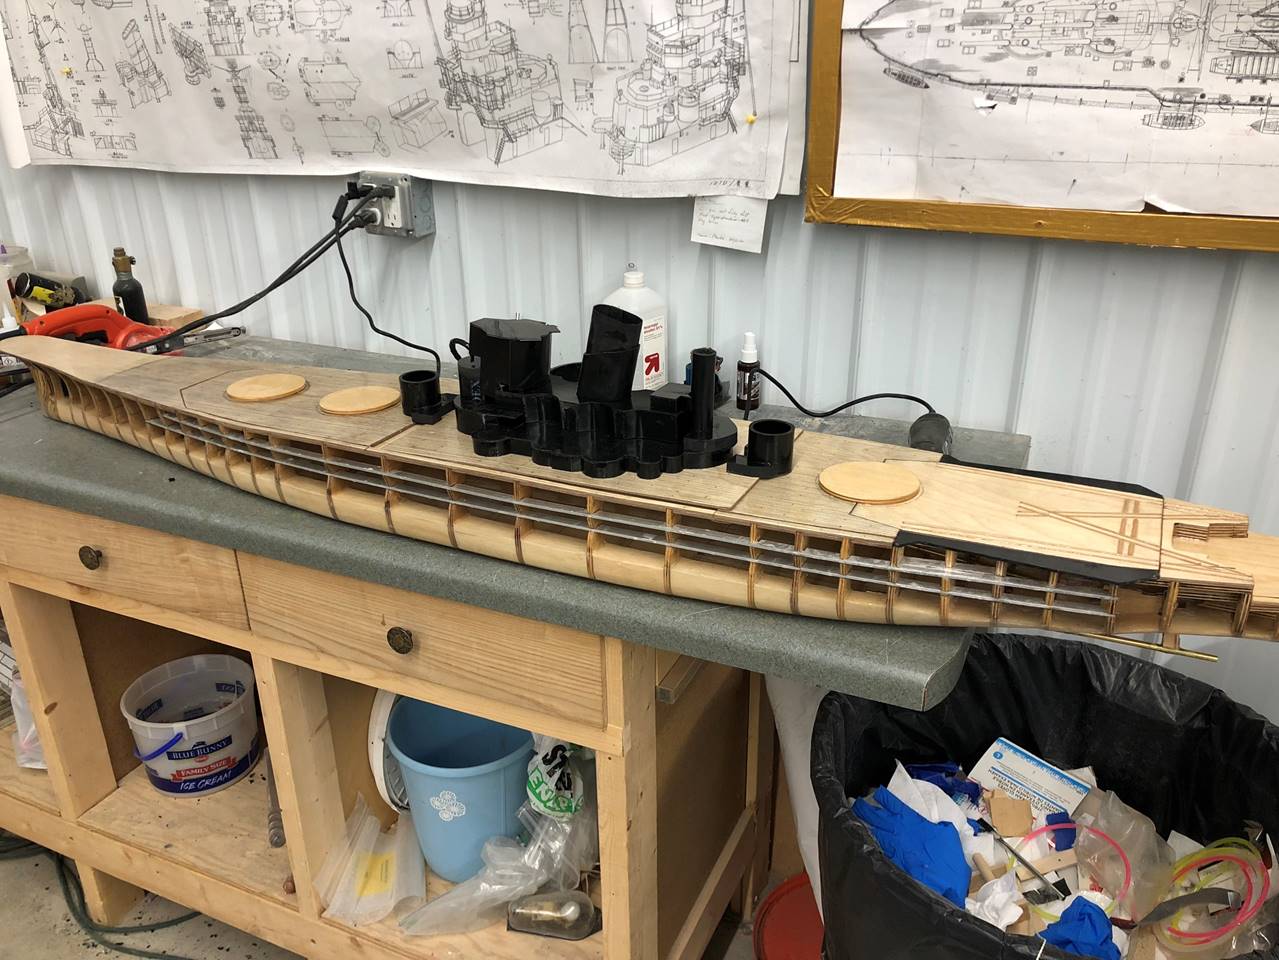
I took strips of 1/32 ply wood and laid out the
aircraft rails, should give it a little texture.
Superstructure continues to come together. The two
secondary turrets are in place.
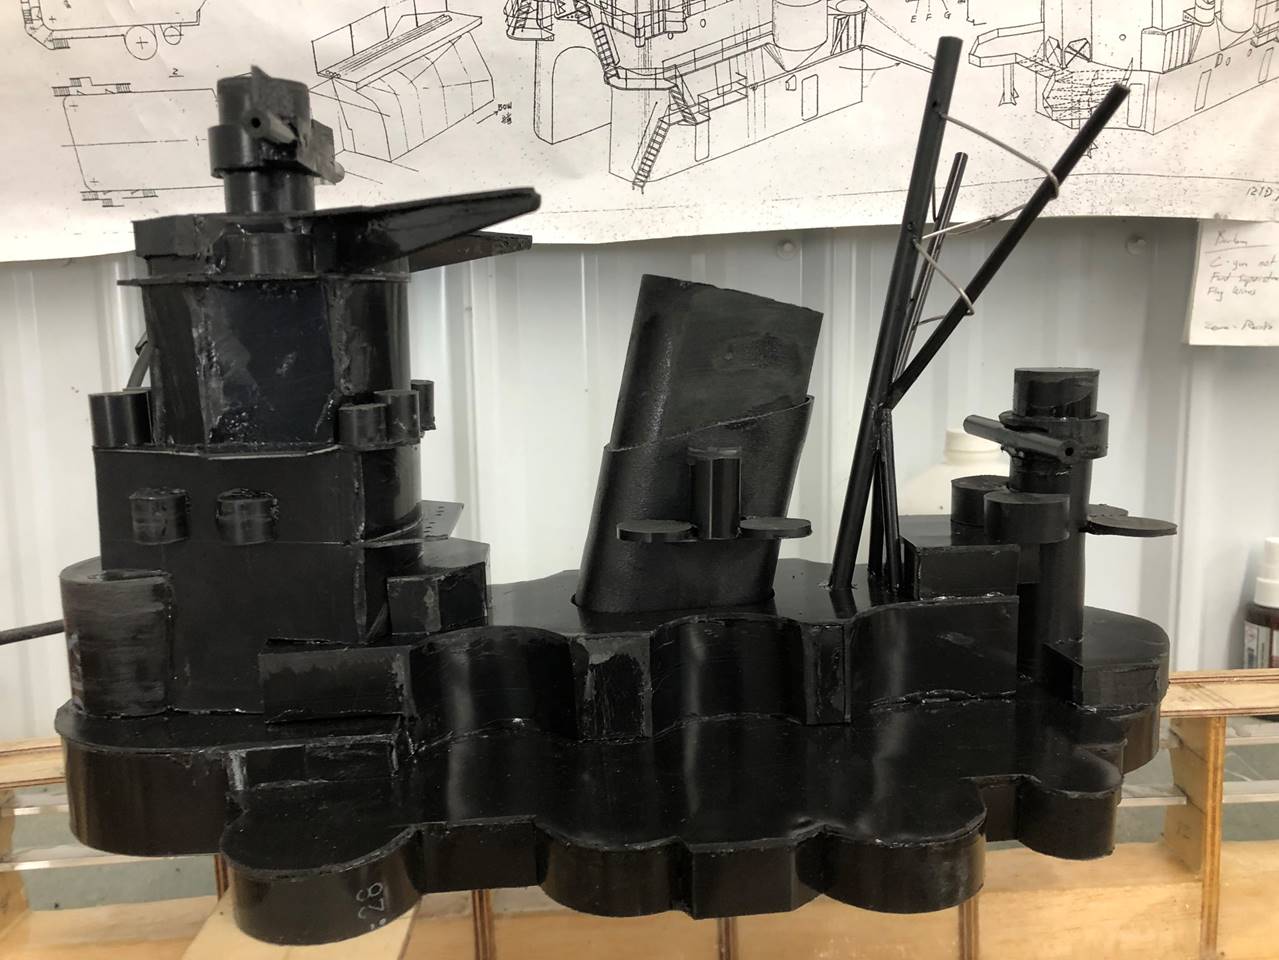
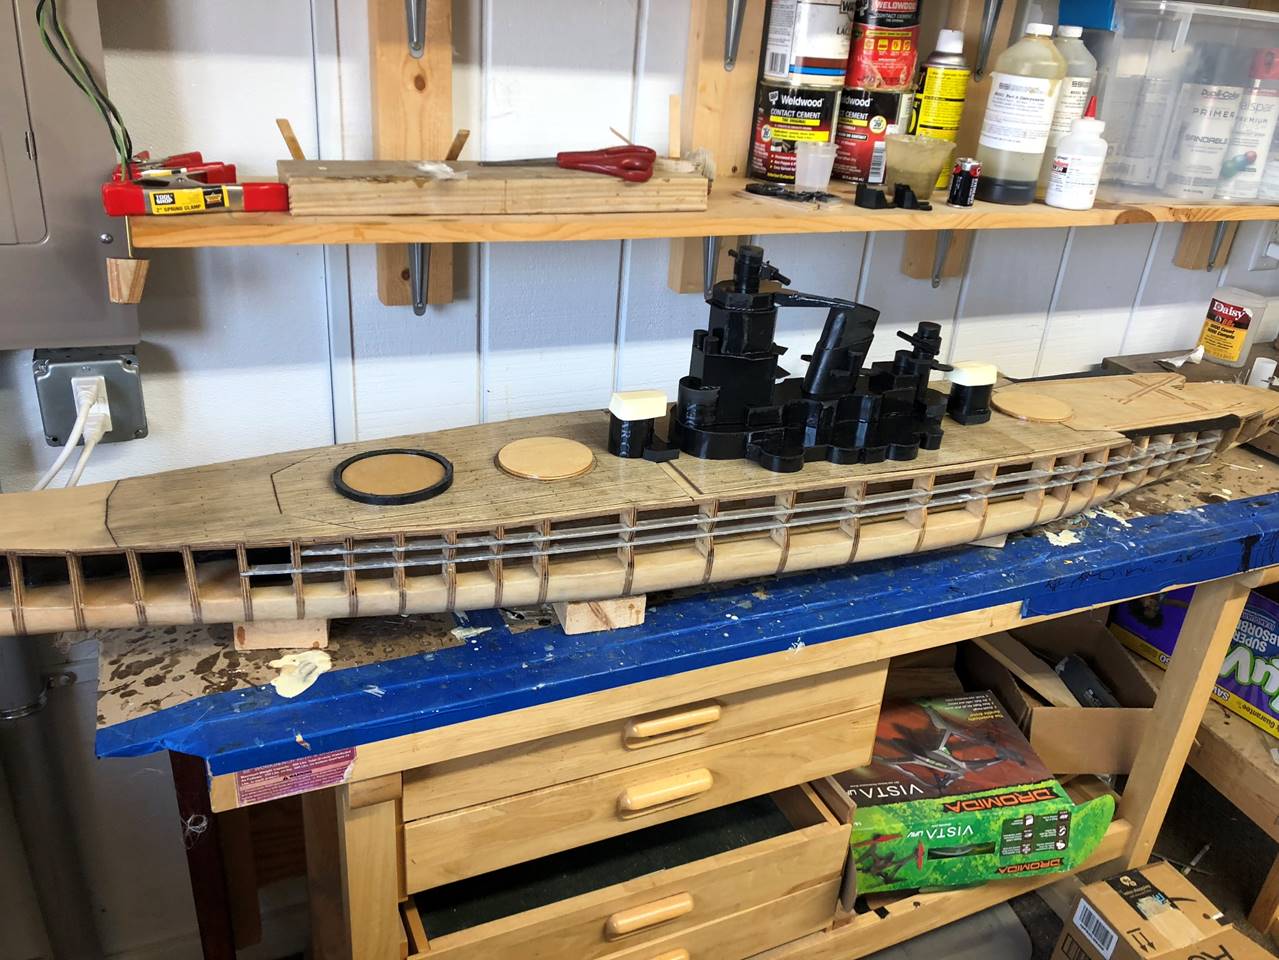
Closer look at the ABS superstructure. I could add
tiny bits endlessly. The secondaries are yet to be added.
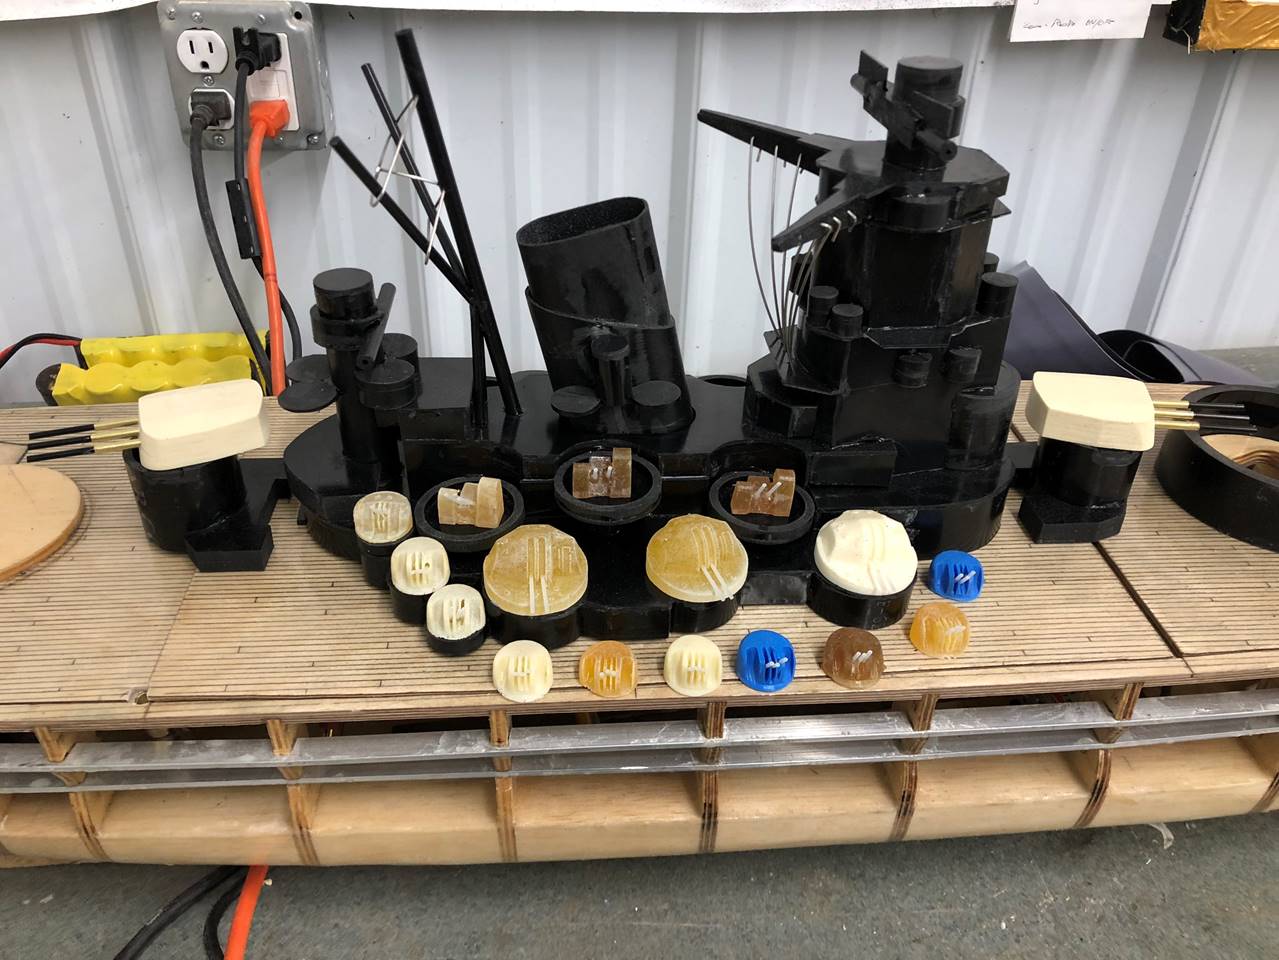
More mid size secondary
turrets added.
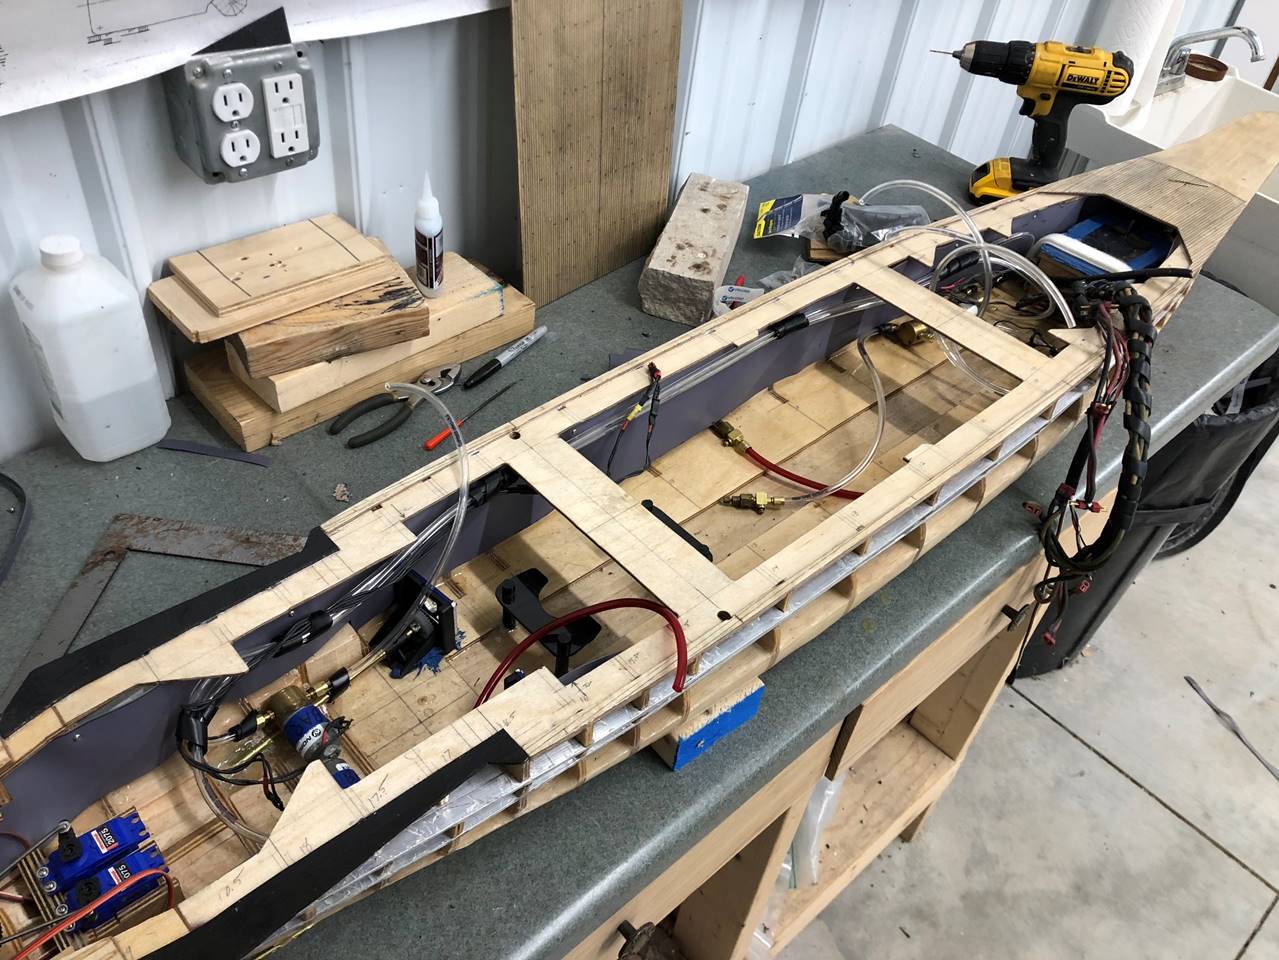
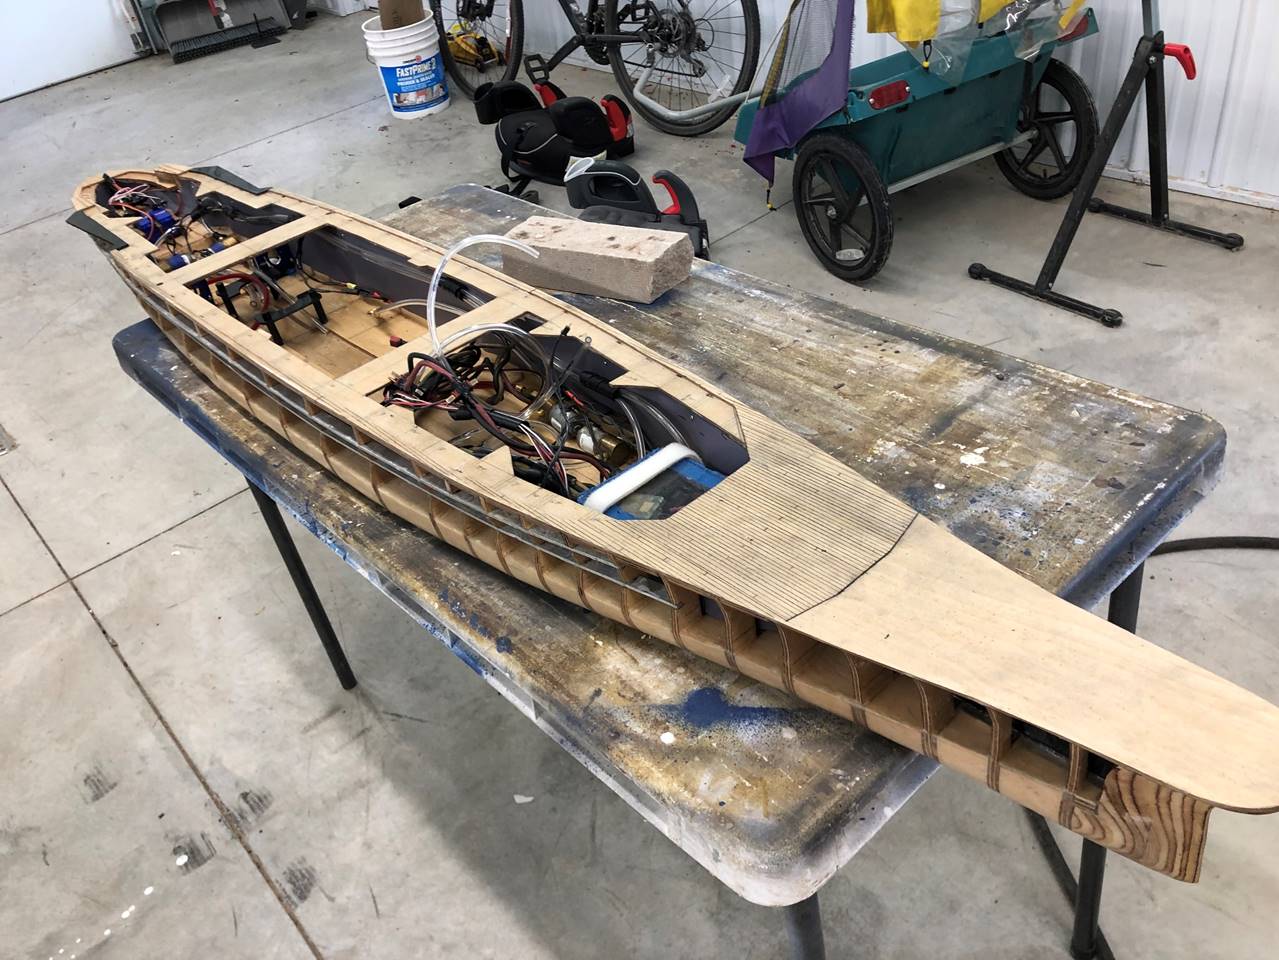
Internals layout starting to take shape. Radio box way
in the bow with a mess of wires from there, this is borrowed from the Barham. 4
solenoids in the bow for those 4 guns. Then the batteries and bottles will sit
in the middle section. Black pump mounts are under the other cross brace over
the top of the central water channel. Motor mounts are to the sides of the
stern most pump mount, the guns/solenoids will be right under the stern turret.
The rudder torque requirements are anticipated to be massive,
I will use 2 waterproof servos to push one gear. Internal armor is added.
The bow portion, a keen eye will see that there are 2
separate air systems divided into 3 guns each (one goes to each of the
left/right guns in each turret).
It is much bigger than the table.
Another profile shot. The internal armor is shower pan
liner.
Sides on and painted. The bow guns are loaded via the
B turret. The other guns are loaded with the center superstructure piece
removed. All magazines are straight.
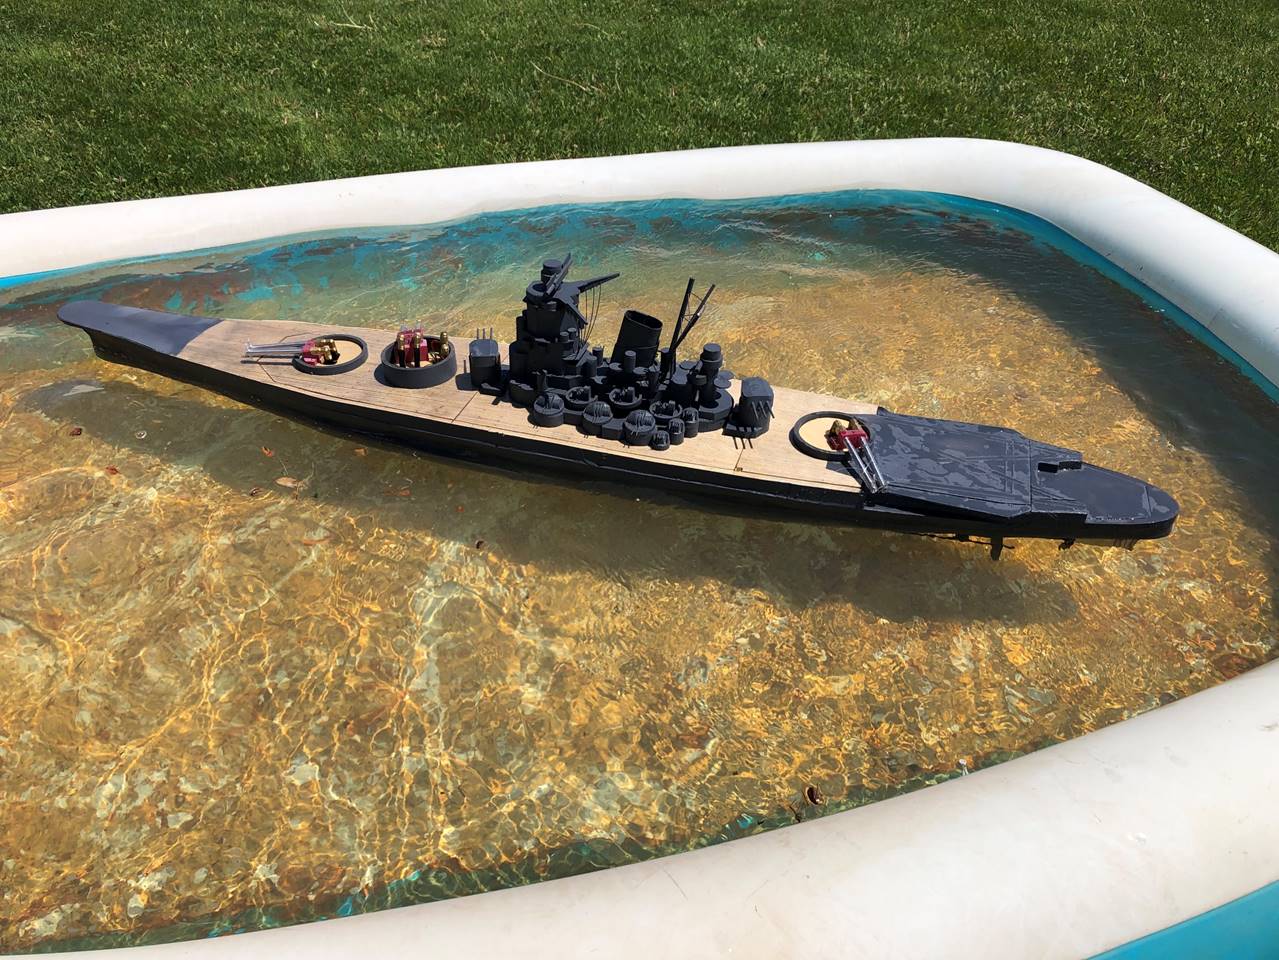
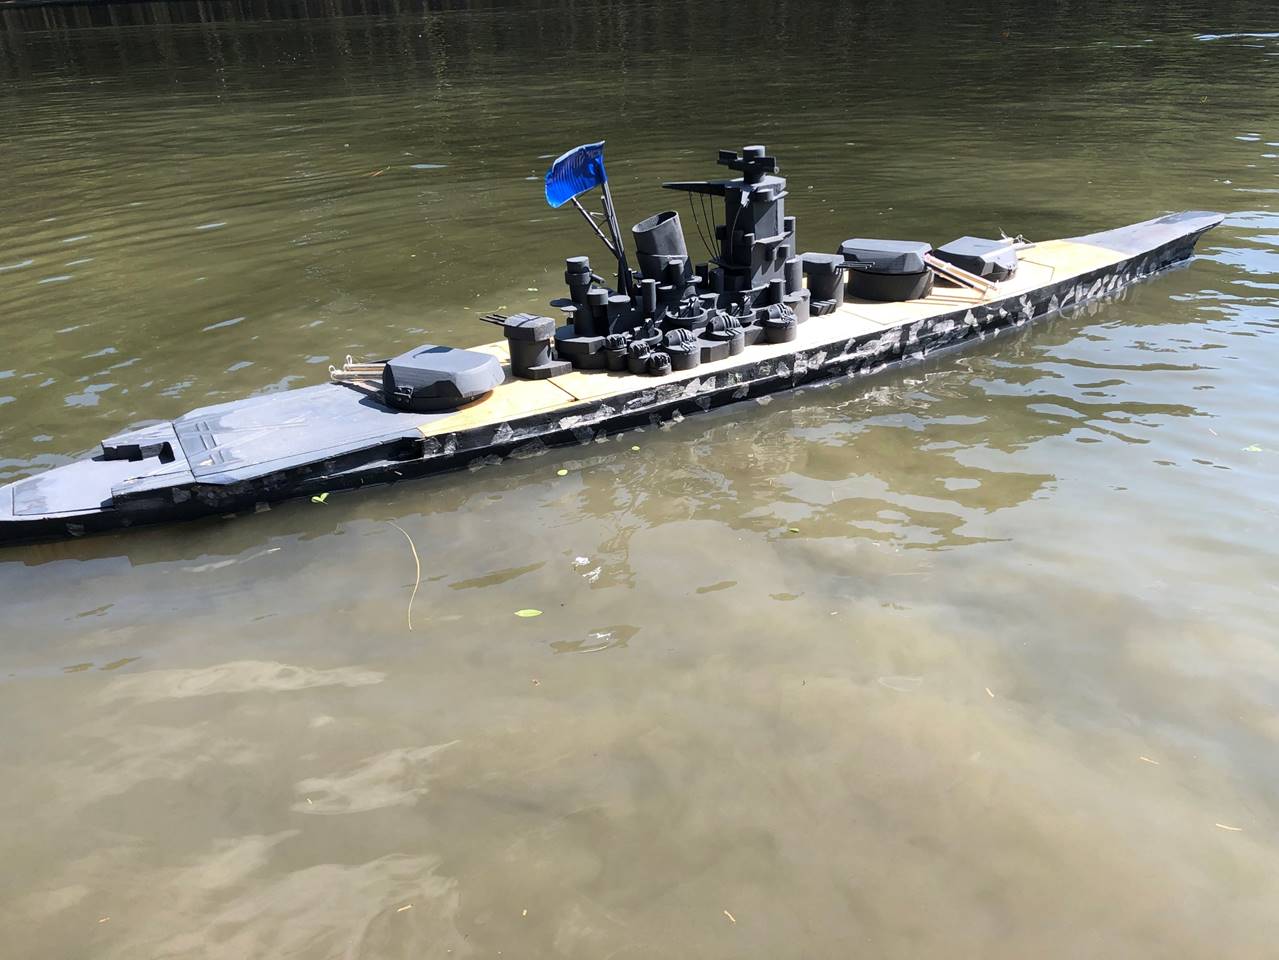
Float tested after sheeting and painting. I didn’t
have the main turrets yet. This is about 1 week before the first battle over
Memorial Weened in 2021. At her first battle in MN she
made it 2 battles but really only performed well for 1 of them. The solenoids
were not able to reliably fire with the standard 6v main battery so I had to
add a 9.6v separate battery after the battle to fire the solenoids which worked
well. Overall I was very pleased with how nimble it is
for such a massive ship. The damage control was also excellent, I took 190
above, 8on, and 74 below and didn’t really feel like it was anywhere near the
edge.
Picture from Nats 2021. The
guns were not quite high functioning at this point but the mobility and damage
taking ability was very high. I won the Most Feared Axis award and was the
highest damage with a sink/Swiss Cheese Award (214 above, 39 on, 67
below) and highest damage without a
sink/Alien Award (181 above, 37 on, 43 below).
Pictures of internals
Several months after creating this article I finally
got around in December of 2022 to add pictures of the internals. The ship runs
on 60 amp-hours with six separate 6volt NiMH batteries. I use two 7 oz bottles
with separate regulators which each feed one of the guns in each turret. The
massive rudder is turned with 2 servos that work together.
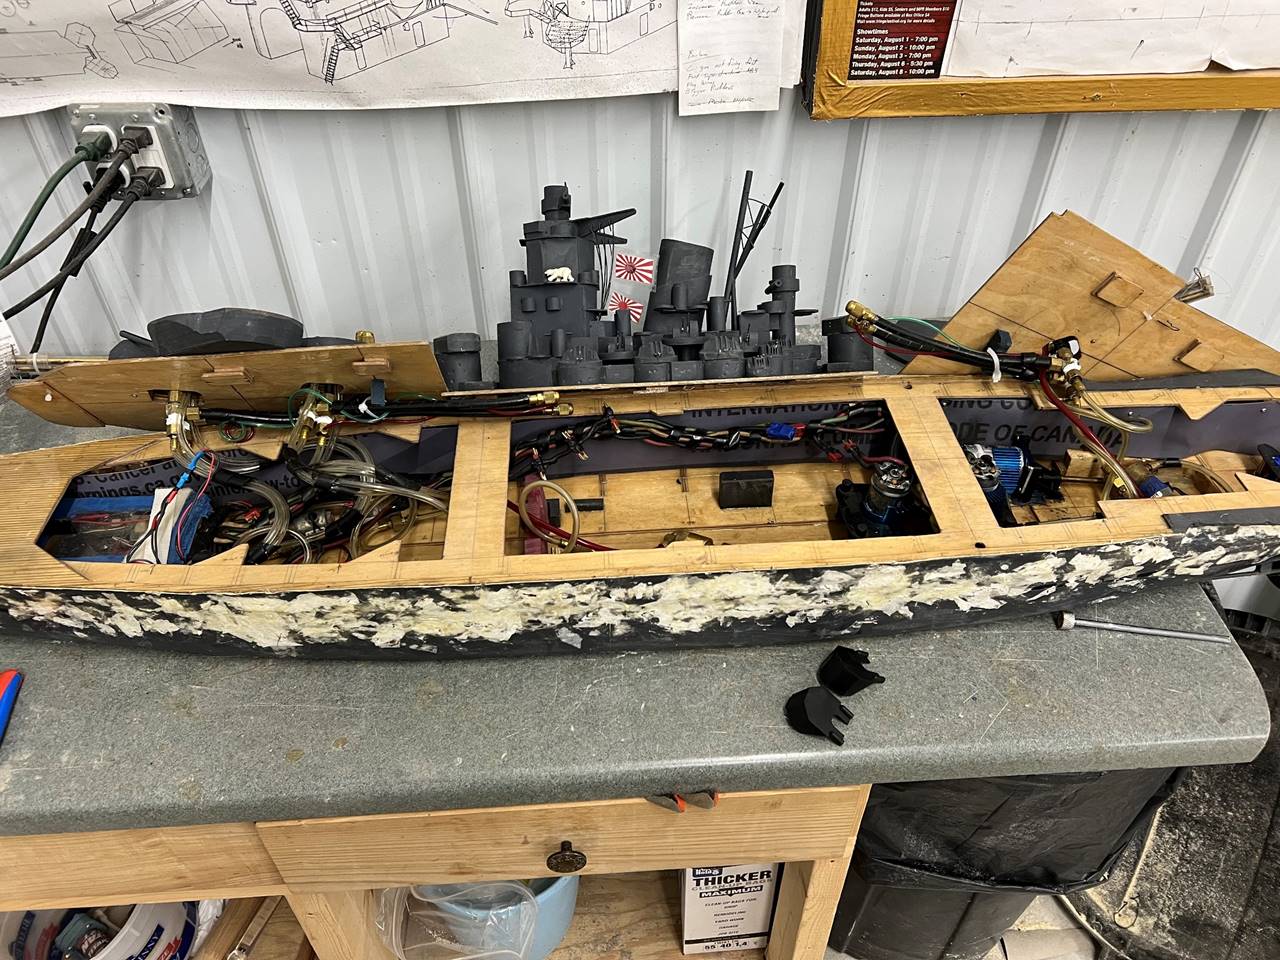
At first glance the massive ship has all kinds of room
inside. With the full load it is a little tighter in the middle but far bow and
stern are actually relatively spacious. The bow portion on the left under the
two turrets holds the radio box and four solenoids. The middle section is
removed to reload gas and batteries. The stern section houses the pumps,
motors, two stern gun solenoids, and rudder gear. The decks have slides/latches
that lock it in place for battle.
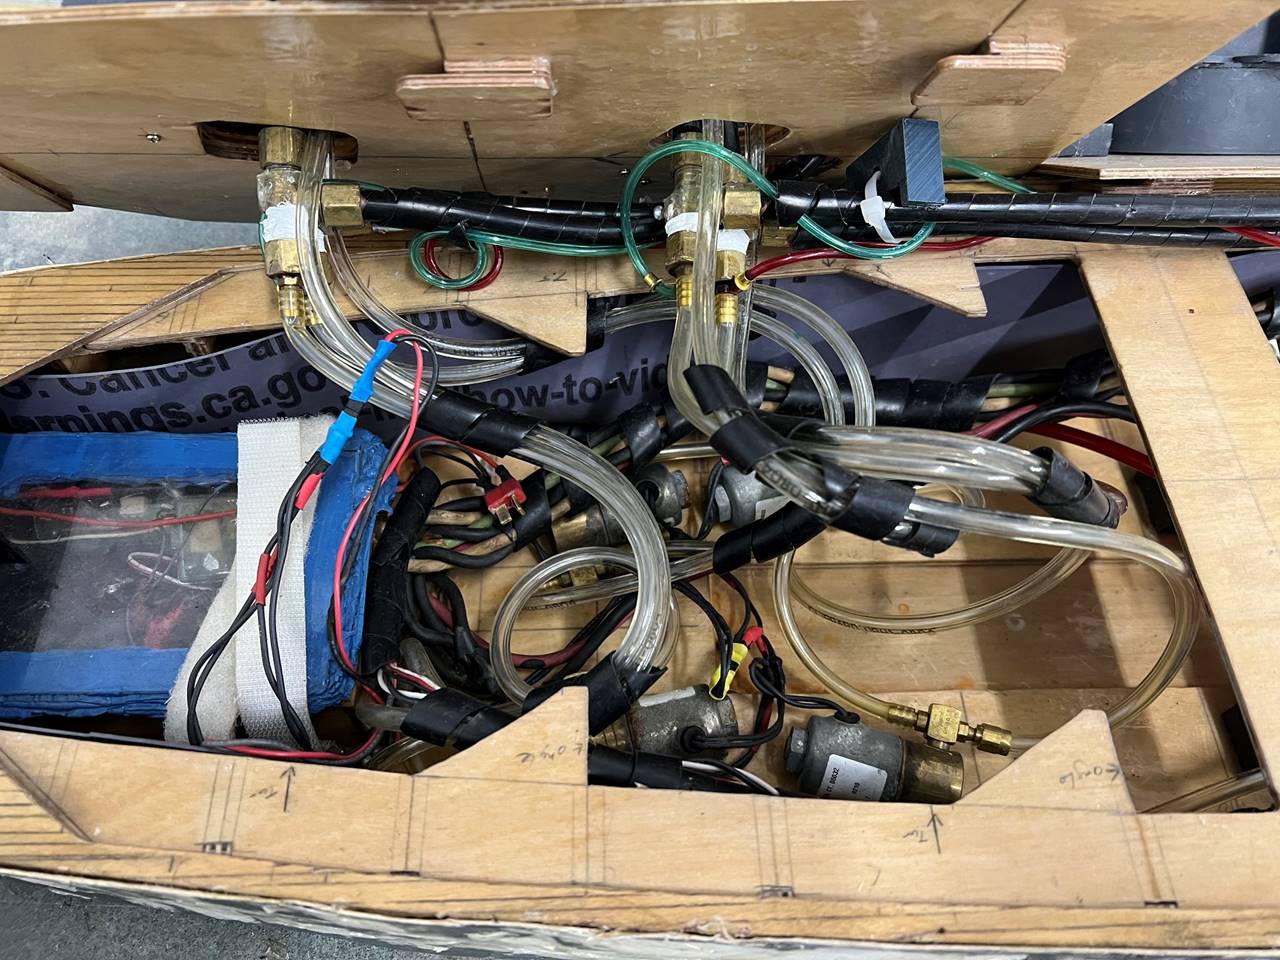
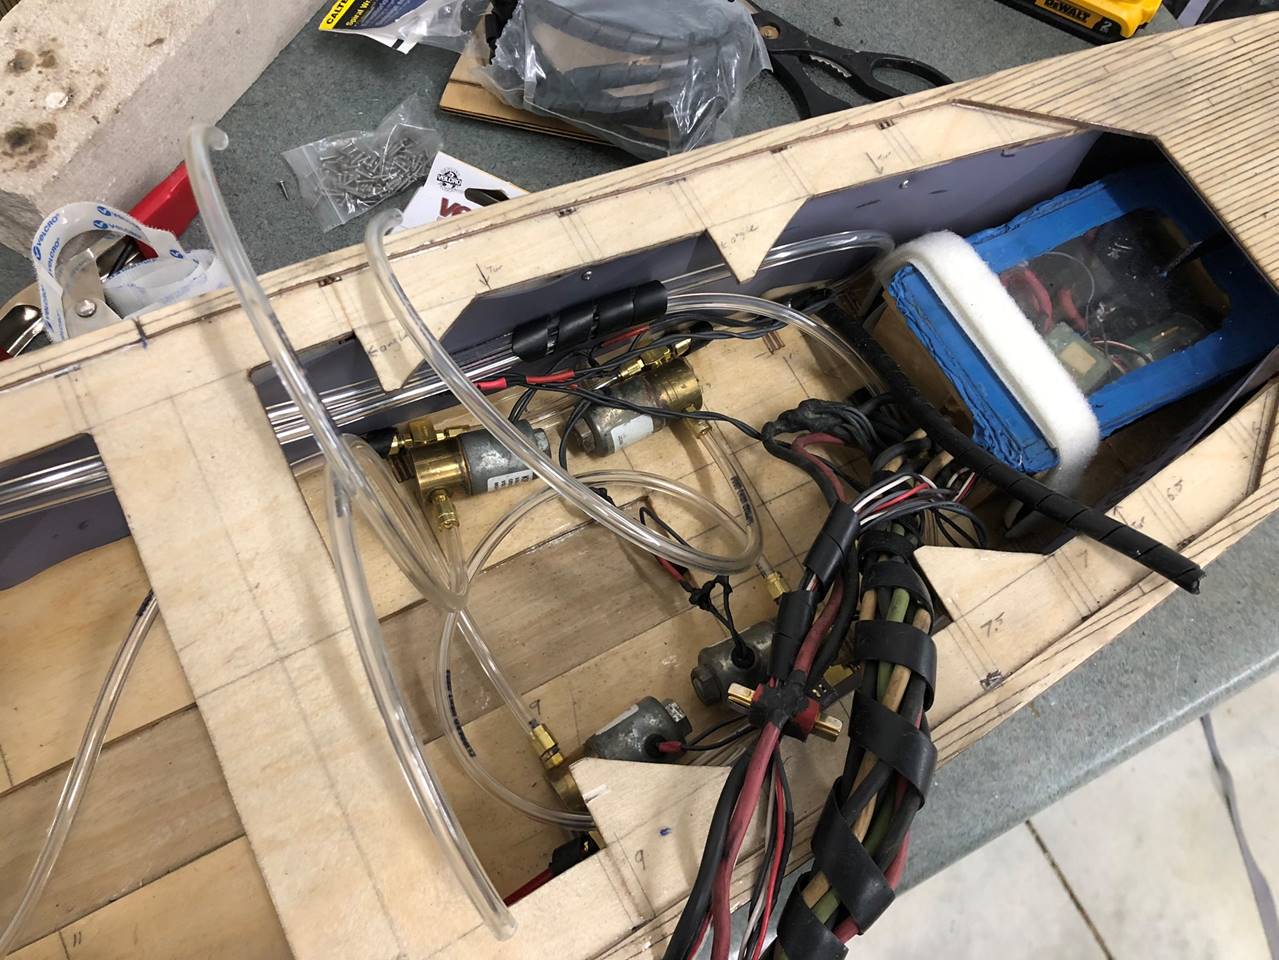
The bow section closer. Each solenoid fires one gun
via two hoses, one to the bottom of the gun and one to the back feed. I run a
9.6v solenoid firing battery separate from the 6v main power. It is a rat’s nest
of hose. That was actually pinching a bit when I put the deck on, which required
me to shorten the up feeds so the air inflow would not be obstructed by a hose
kink which was causing spurting.
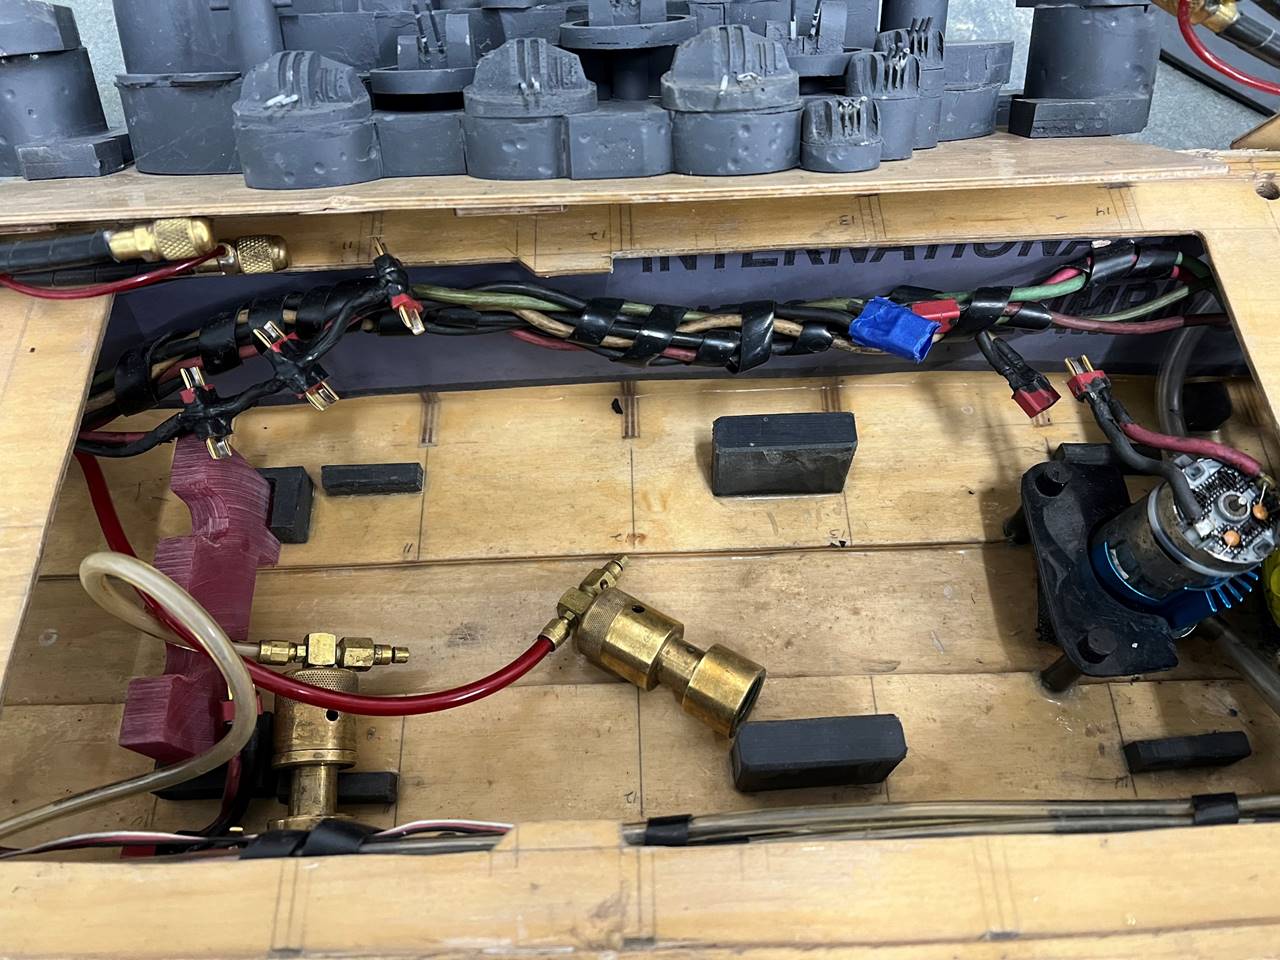
Middle section where the batteries sit upright along
the outsides, black plastic blocks hold them in place. The red plastic holds the
two bottles at the regulator. The bow most pump is visible.
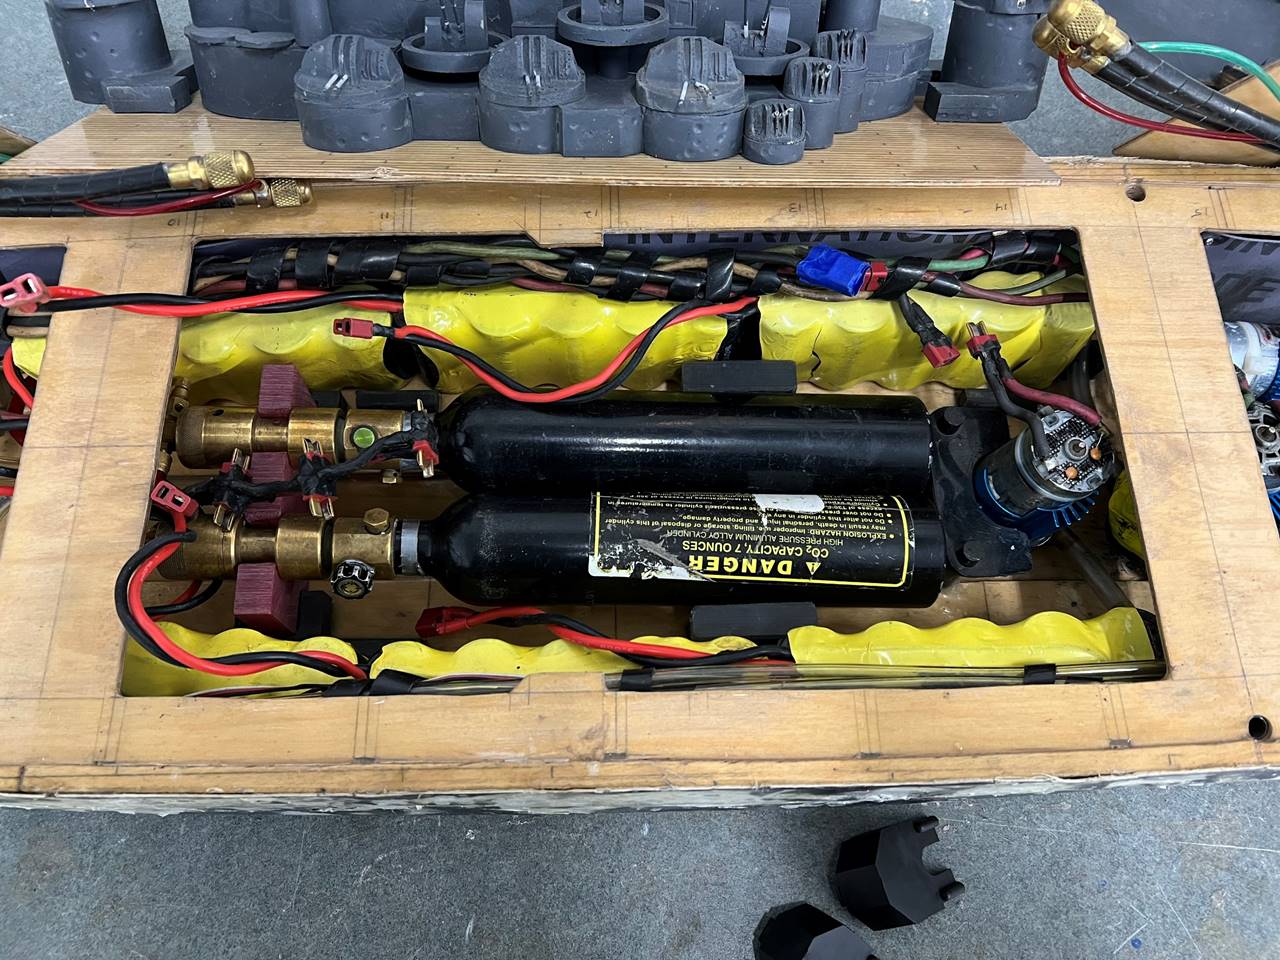
Same angle fully loaded. You can see the pump outlets.
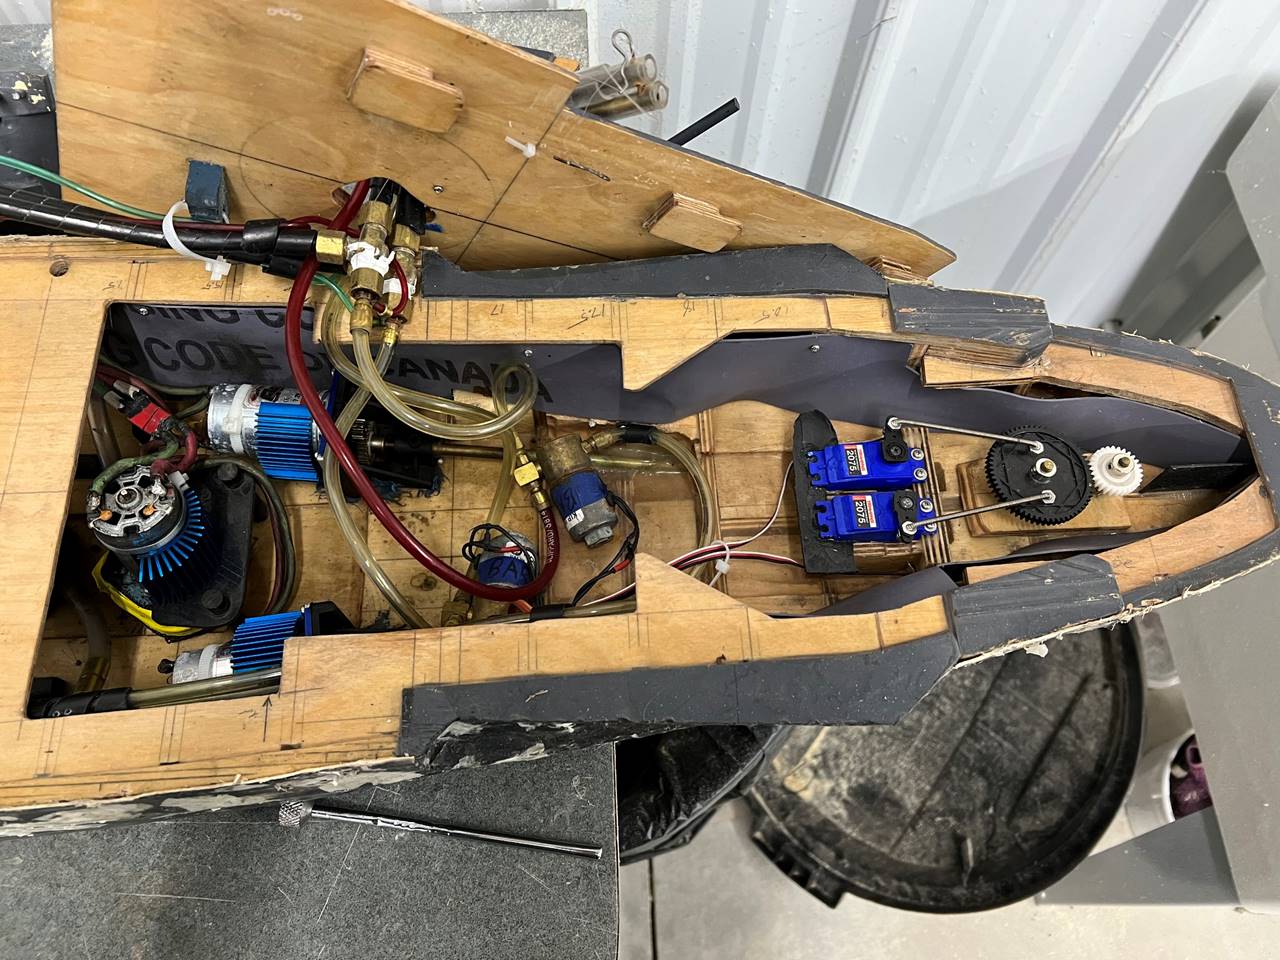
Stern section is spacious. The stern most pump, motors,
solenoids and rudder servos/gears are seen.